Optimizing and Customizing Phishing Campaigns using Caddy

Introduction
Over the past year, I’ve begun to regularly utilize a number of techniques designed to increase the overall sophistication of my phishing campaigns. What I ended up realizing was that while these techniques did, in fact, increase the volatility of my campaigns, they also added a significant amount of configuration, management, and system administration time to each one of my engagements. As a penetration tester, our engagements are already bound by time, and in addition to defensive controls, we’re in some capacity also combating the clock.
With this perspective in mind, I set out to diminish the time it took for me to produce my ideal phishing configuration. I initially investigated a few of the larger web-based frameworks designed to manage and reuse campaigns but found that for me they all fell short of the customization I wanted on the webserver side.
Eventually, a wild @slobtresix0 ended up introducing me to a webserver written in Go that provided me with all the customization I was looking for and the syntax I didn’t even know I wanted.
Enter Caddy.
Written by author @mholt6, Caddy is an open source HTTP/2-enabled web server written in Go. Caddy is a cross-platform, self-contained binary built atop Go’s standard library. This allows Caddy to function without any additional external resources or dependencies.

In my evaluation of Caddy, I was looking for the ability to quickly and easily:
- Configure and force the use of HTTPS
- Support wildcard certificates
- Allow for redirection/filtering by visitor attributes (IP, geolocation, user agents)
- Accommodate virtual hosting
- Leverage and reuse a common configuration
And of course, ultimately to reduce the time necessary to build and rebuild these configurations on an engagement to engagement basis.
Installation
To get started with Caddy there are two components that you’ll need:
- GoLang
- Caddy
There’s already a plethora of good (and substantially more complete) GoLang installation information at golang.org but I’ll do a quick TLDR; as it’s still something I see people get hung up on.
Despite GoLang being multi-platform, for simplicity’s sake lets assume for the remainder of this investigation that we’re working with on a Linux 2.6.23 or later machine.
- Visit the GoLang download archive and retrieve the binary release matching your target OS in this case: go1.10.1.linux-amd64.tar.gz
- Copy the download location of this file and wget it onto your target
- From here, extract the file using:
tar -C /usr/local -xzf go$VERSION.$OS-$ARCH.tar.gz
- Add the newly created GoLang bin to your PATH variable
- Manually add the line "export PATH=$PATH:/usr/local/go/bin" to /etc/profile for a system-wide go installation
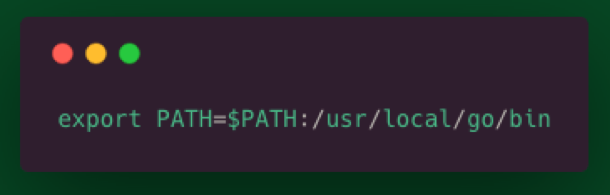
- A newly spawned shell should contain the updated $PATH variable

Now that Go is properly installed, let’s use it to fetch and build the caddy project source.
- Install Caddy via “go get”
- Go get github.com/mholt/caddy/caddy
- Go get github.com/caddyserver/builds
- Build Caddy
- Cd /root/go/src/github.com/mholt/caddy/caddy
- Go run build.go
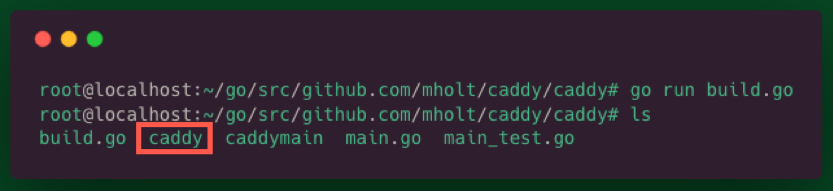
- Ensure the resulting caddy binary is added to your PATH
- Mv caddy /usr/local/go/bin
- This will enable the ability to reference the binary from your current working directory via the “caddy” command
- Cd to the web directory you would like to serve (here /var/www/html) and try it out with “caddy”
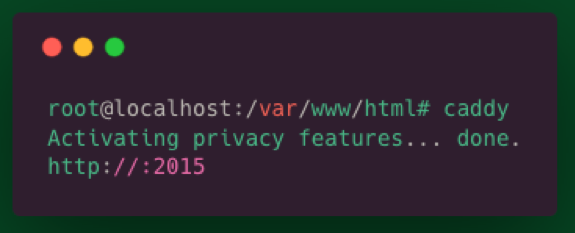

Hey neat! But so far I could do all this with a single line of Python… and why is my webserver running on port 2015??

The Caddyfile (not CaddyFile or caddyfile)
The Caddyfile is a text file designed to configure your Caddy web server. Its syntax is drop-dead simple to understand and, in my experience, you won’t have spend too much time here (I'm looking at you Apache). With Caddy, typical deployments don’t have to contain much additional configuration because of what is given to you for free!
If your Caddyfile lives in the same directory you’d like to serve, simply type “caddy” as we did previously, otherwise specify a path to your configuration file using “caddy -conf ../path/to/Caddyfile”
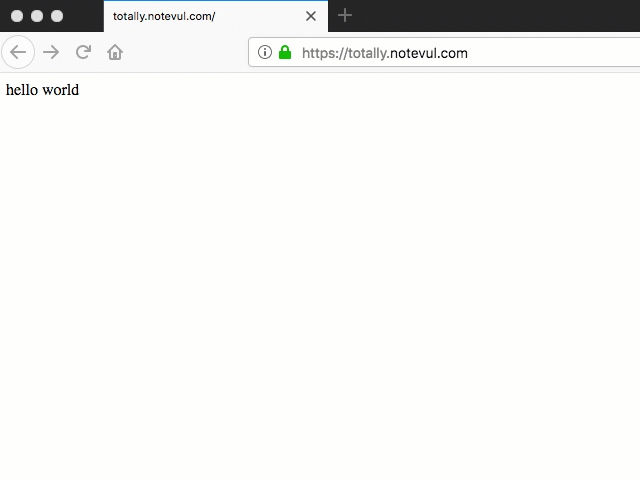
Hey wait! We’re about to serve some files to the internet, we should ensure we disable directory browsing before we do. Actually, by default file listings are disabled and a request to a directory path will result in a 404.. neat!
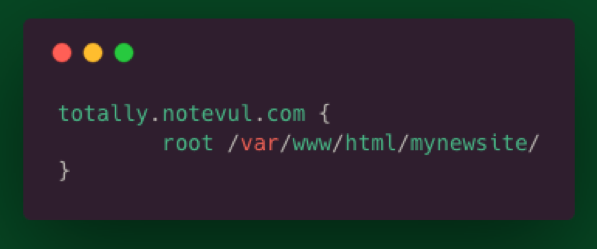
A Caddyfile will minimally need to include the address of the site you would like to serve as the first line. In this example, I’m additionally specifying a web root utilizing the “root” directive. Directives are keywords that Caddy queues from to perform specific optional configurations.
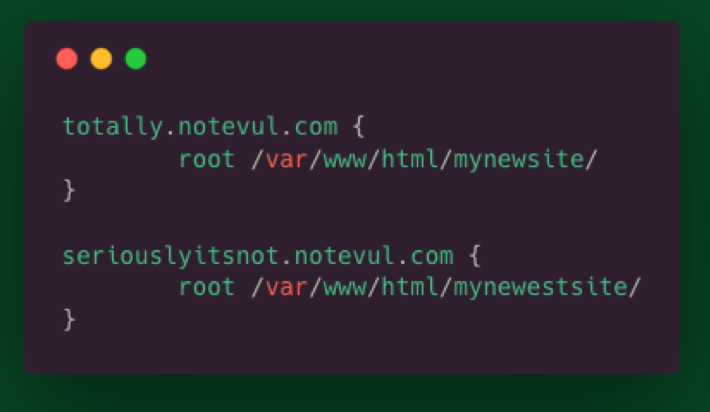
Dealing with multiple sites? Simply define them and their associated directives within a set of “{}”s beneath a site label. Caddy uses Server Name Indication (SNI) allowing you to host multiple sites on a single port.
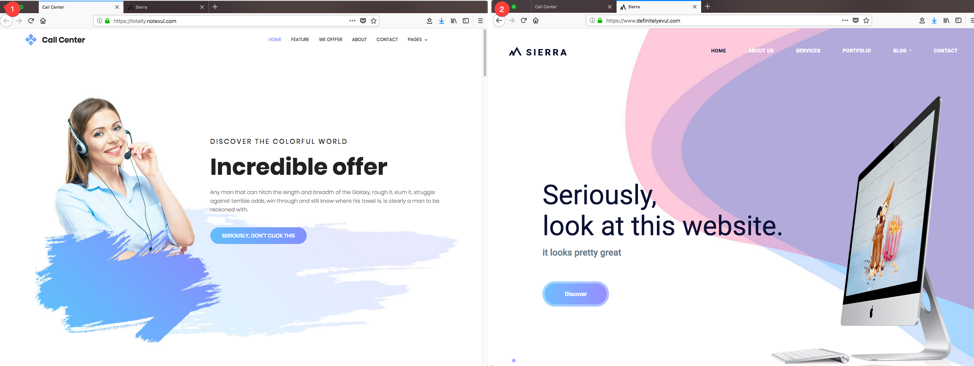
You may notice that in both of these examples, the sites are stood up with valid HTTPS certificates. That’s because by default Caddy works with Let’s Encrypt to provide what they call “Automatic HTTPS.”
By default, caddy will:
- Redirect HTTP to HTTPS unless overridden in the Caddyfile
- Manage certificate renewal requiring no action by the operator
- Implement OCSP stapling
- Periodically rotates all TLS session ticket keys
Ok, so straight out of the box we achieved a near-ideal HTTPS configuration and support for virtual hosts. Lets investigate another standard HTTP directive to better understand directive syntax and see how they can further influence our configuration.
Http.Redir
As its prefix suggests the “http.redir” directive send the client an HTTP redirect if the URL they’re requesting matches a specified URL or pattern. In this example, we’ll use this directive in combination with augmenting conditional statements to redirect select traffic.
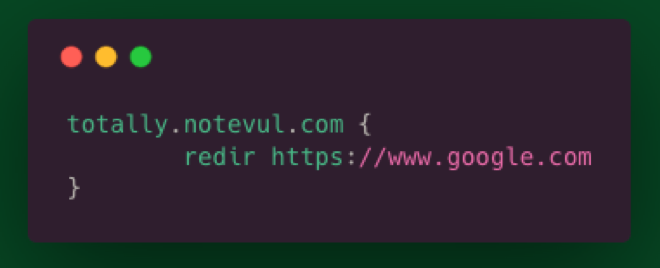
To denote a simple redirect of all traffic to another site, define the “redir” directive within the definition of the target site.
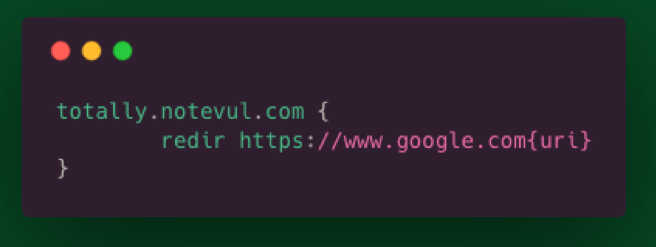
If you would like to redirect the client while preserving their incoming URI simply append its “placeholder”. Placeholders allow you to specify a value within your Caddyfile that will be handled differently for each incoming request.
For a better idea of what’s possible with these placeholders, review the more complete list available within the Caddy Docs
Redirect client by their incoming IP address.

That’s all there is to it. Hopefully this is giving some insight into just how easy it is to work with the Caddyfile syntax.
Finally, lets examine one of my favorite aspects of the Caddy web server, plugins. Caddy utilizes plugins to build on and enhance the default functionality provided. In this example, we’ll review how to configure a wildcard certificate provided by Let’s Encrypt. Wildcard certificates specifically require the use of the ACME DNS challenge. This particular challenge uniquely requires additional configuration on our end and the installation of a plugin associated with our DNS provider.
To enable the DNS challenge, we’ll need to:
- Augment our source to import the associated DNS plugin
- Tell Caddy which provider to use
- Provide Caddy the information required to solve the presented challenge
Plugins associated with DNS providers can be found beneath caddyserver GitHub within the dnsproviders repository.
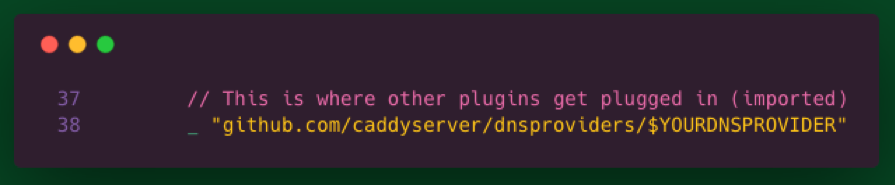
since we’re working with the source code, to import our desired plugin we’ll need to add the DNS provider plugin location to the grouped import statement within the relevant run.go file /root/go/src/github.com/mholt/caddy/caddy/caddymain/run.go
After our plugin import has been added to our run.go file, rebuild the caddy binary just as we did before with the “go run build.go” command.
Move the resulting binary to the /usr/local/go/bin/ directory and overwriting our previously compiled version.
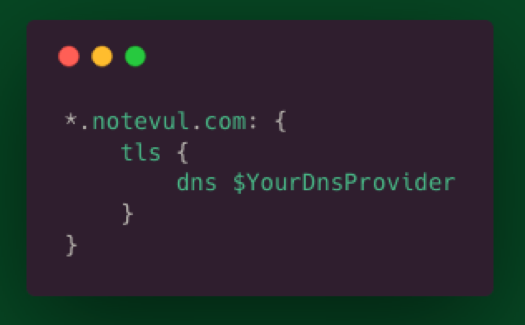
Next, we’ll need to revisit our Caddyfile and specify that we’ll be using a wildcard certificate. To do this we’ll need to redefine the site name using a “*” in place of a registered A record. Within the newly created wildcard site definition we’ll need to additionally define the TLS directive and supply its associated DNS keyword with your DNS provider name.
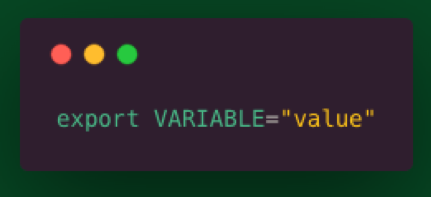
Lastly, we’ll set environment variables to provide Caddy the information required to solve the presented challenge. What values are required varies between DNS providers but generally includes your account name and an associated OAUTH token. For our purposes it’s sufficient to set these values transiently as you would any other environment variable via the export command.
The caddy server docs additionally maintain a complete list of DNS provider names and their required environment variables.
If you’ve just generated accounts or their associated keys required to perform this challenge, now is a great time to grab some coffee as these changes typically take a few minutes to apply and propagate.
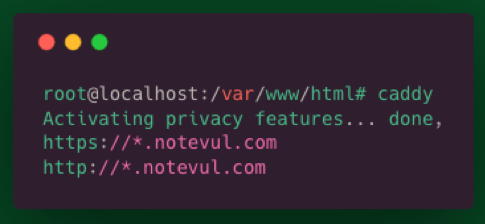
Note: If you’re receiving an error here regarding an issue solving the challenge, ensure you have set a www.domain.com record set.
Success!
Initially in our evaluation of Caddy we set out to:
- Configure and force the use of HTTPS
- Support wildcard certificates
- Allow for redirection/filtering by visitor attributes (IP, geolocation, user agents)
- Accommodate virtual hosting
- Leverage and reuse a common configuration
Not only does Caddy deliver on these requirements but ultimately, they’re delivered in a way that vastly decreases the amount of time I spend on my webserver freeing up cycles for use elsewhere during testing.
With Caddy this truly is only the tip of the iceberg. This is just a singular limited perspective on a project that provides many. I encourage anyone interested to read Matt’s considerably better written documentation.
And if you needed any additional incentive to check out Caddy, here’s an obligatory SwiftOnSecurity TLDR:
