JavaScript Essentials for Beginning Pentesters

JavaScript is heavily used in almost all modern web applications. Knowing how to format a .js file, set breakpoints, and alter a script's logic on the fly can be very helpful when working with web applications.
To start, let’s navigate to a website and view the application’s resources. For our example, we are using the angular.io website. To do this, we can navigate to the site’s homepage and press F12, or right-click on the homepage and choose the inspect option.
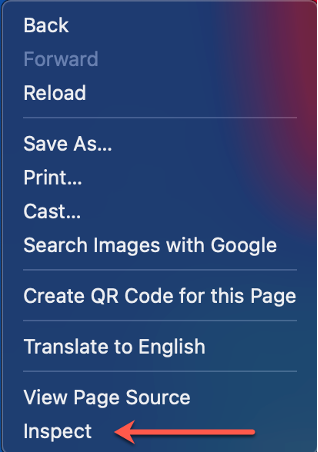
This opens the developer tools, and from there, we can select the Sources tab if we are in a Chromium-based browser such as Google Chrome or Brave. In Firefox, we can use the Debugger tab.
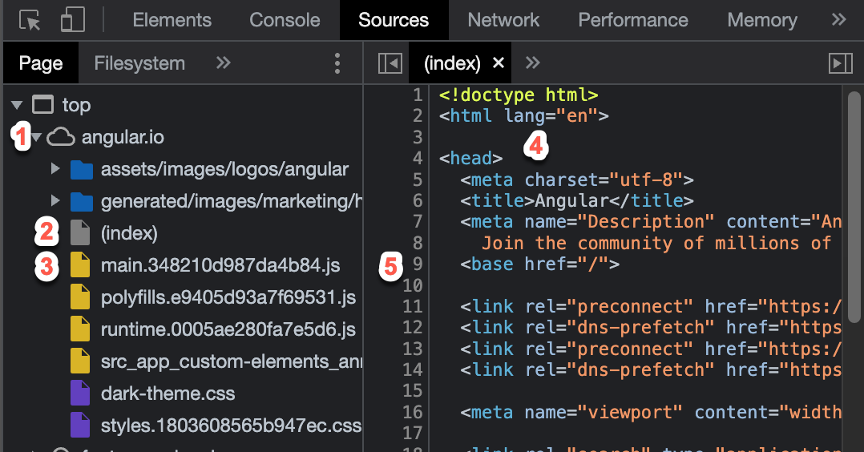
- Lists the resources by domain.
- Shows the HTML of the current page, including scripts. In this case, we are on the homepage of the application, which is called 'index'.
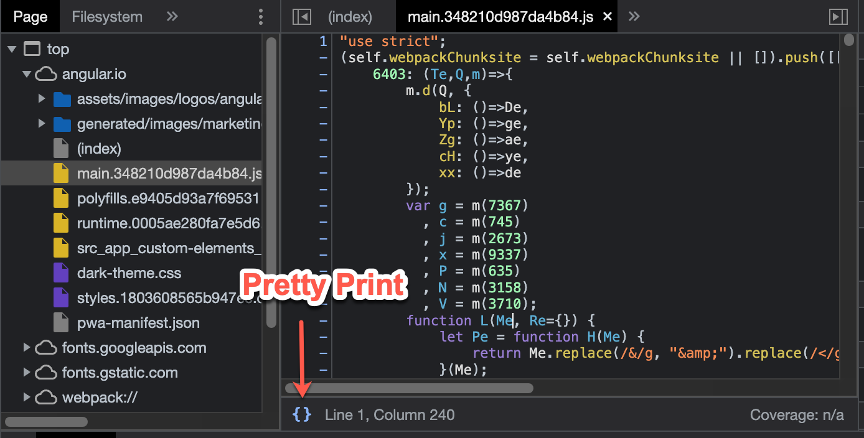
- This would show the contents of the selected JavaScript file. In this case, the file is named main.348210d987da4b84.js, which we will just reference as main.js.
- Contents of the currently selected item from the document tree; in this case, we have the index page selected.
- Shows line numbers of the current file, which can be used to set breakpoints anywhere in a JavaScript file or in-between any script tags in an HTML file.
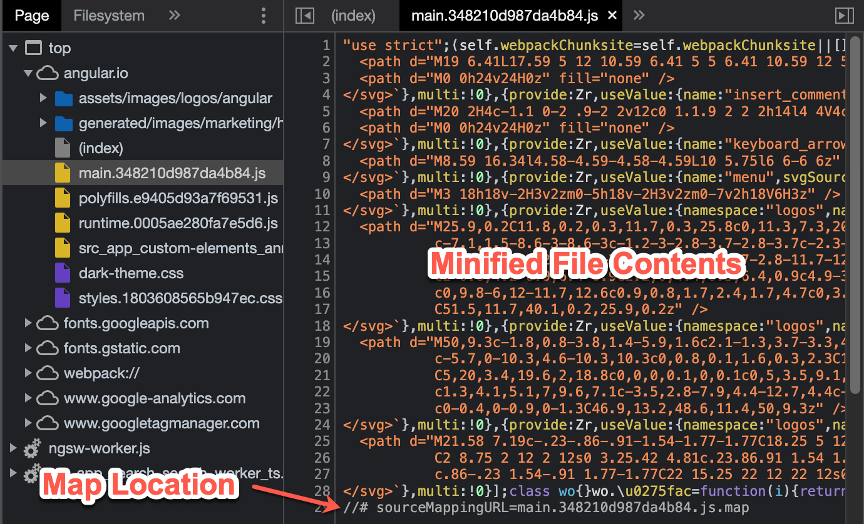
We select the main.js file from the document tree to view the contents of the file. In this case, it’s not really in a readable format. It is common for production applications to minify resource files to help speed up the application. This process usually combines several files into one and changes a file's variable and function names. Minified files also do not include comments. To help make the file easily readable during debugging, a map file is also generated during the minifying process. These files are not always publicly accessible, as they are only necessary in development environments. Typically, if a map file is accessible, the location of the map is added as a comment at the bottom of the minified file it is mapped to.
If a script file doesn’t contain a map's location, you can also find map files by appending .map to the original JavaScript file, e.g., site.com/js/main.js.map.
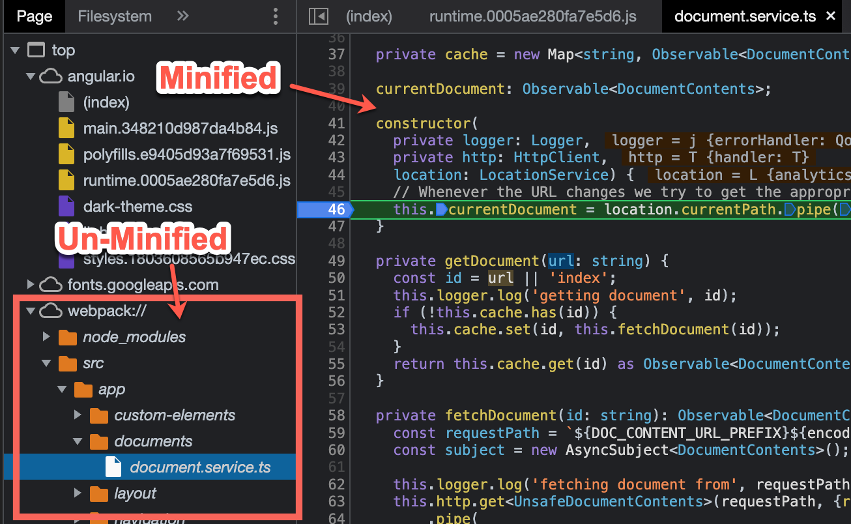
If Chrome can use a source map to unminify a resource, then additional files and directories will show up in the document tree, usually under the Webpack section. We will also have the ability to set breakpoints in an unminified file when debugging—more on that a little later.
It is common for applications to not include source maps, though, so we need other ways to view and format scripts. An easy way to format a script file is to use the built-in pretty print option in the browser.
Note that all browsers are not made equal, and Chromium browsers seem to be faster at formatting and displaying large JavaScript files than some of the other browsers.
Pretty print helps format the document to make it easier to read but doesn’t deobfuscate any of the code. Variable names and function names that were changed during minification will still be changed in the pretty print view.
Depending on why you are looking at a file, you may find it hard to read parts of the document in the development tools window, or you may want to change function names to make code more easily readable. Formatting an offline document can further help you understand the logic in a file. To do this, we can right-click a script in the document tree and select 'Open in new tab'.
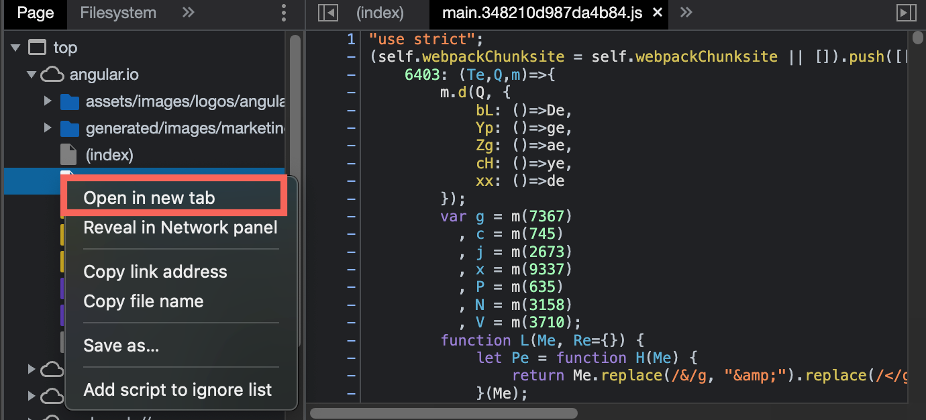
This can allow us to copy the whole script to an offline editor, such as Visual Studio Code (VS Code) or Sublime, where we can format the script or perform advanced searches for specific text.
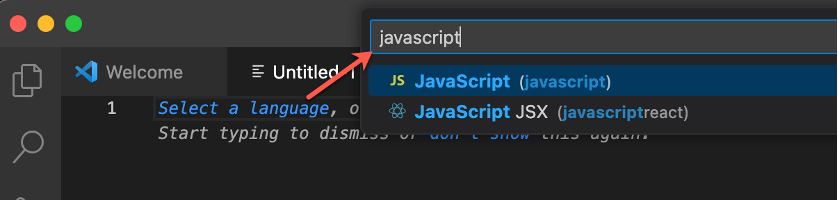
In VS Code, we can create a new document, set the language to JavaScript, and paste the code from the browser that we want to format. Then, we can right-click the document, select 'Format Document With…', and use a JavaScript formatter like Beautify to format our script.
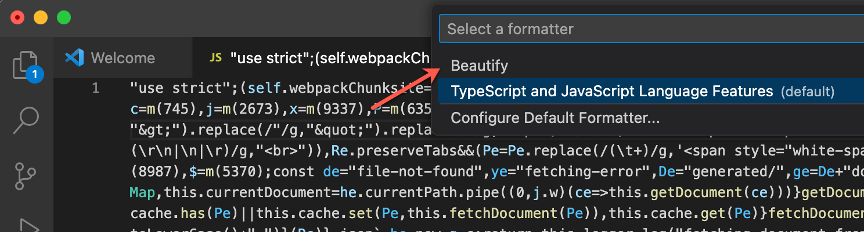
If you do not have any JavaScript formatters installed in VS Code, you can add them from the extension marketplace.

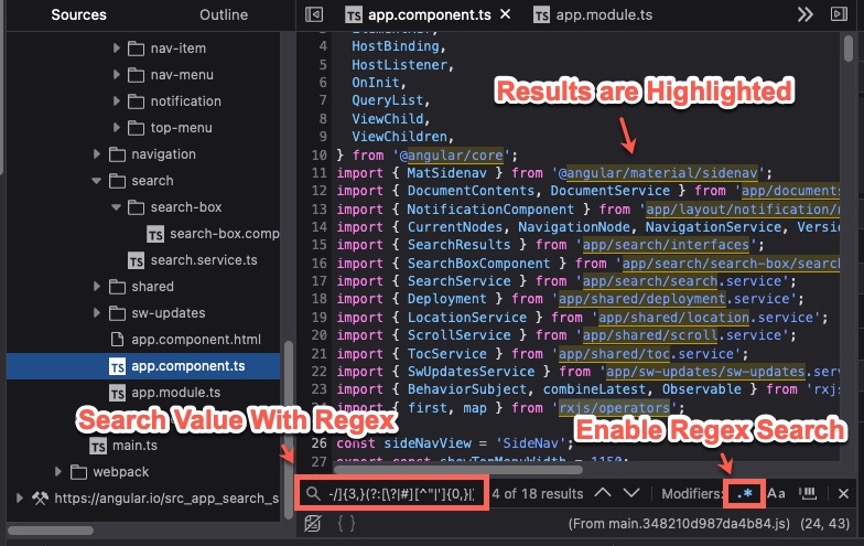
Now that we have an easier-to-read file, we can search the file for useful information such as API endpoints or file paths.

Regex:
([a-zA-Z0-9_\-/]{1,}/[a-zA-Z0-9_\-/]{3,}(?:[\?|#][^"|']{0,}|))
Searching for text like 'password' or 'secret' may not yield many results if variable names have been changed. Hard-coded text such as the password itself may remain unchanged and could be contained between double or single quotes. Doing a simple regex search for just strings can return valuable information about an application.
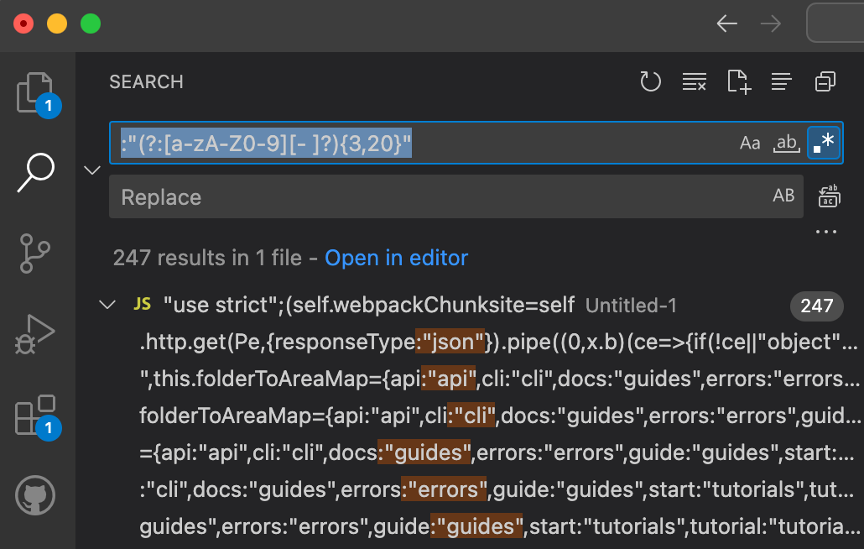
Regex:
:"(?:[a-zA-Z0-9][- ]?){3,20}"
Changing double quotes to single quotes in the above regex, or preceding with an equals sign instead of a colon, can return other string values as well. This can, of course, be done in the browser as well by clicking anywhere in the file contents view of the developer tools, entering regex in the the search bar by pressing Ctrl+F or Command+F, and adding your search term.
Once we have identified any areas of interest within the script, we may want to see what values are being set for a specific parameter or variable. To do that, we can set breakpoints in the browser.
Going back to the main.js script in the developer tools, we notice that after we applied pretty print formatting, our line numbers are no longer on every line of the script file. Instead, they have been replaced with a bunch of dashes. If we click one of these dashes, we can set a breakpoint.
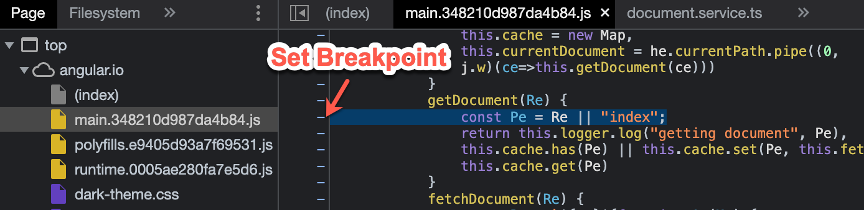
When we set a breakpoint, we are actually setting a breakpoint in the unminified file. The file will automatically show in the developer tools, and the corresponding line will be highlighted to show a breakpoint has been added. This happens because the row we are setting a breakpoint on is part of a minified file, and so the browser uses the map file we talked about earlier to expand the document back to its original structure.
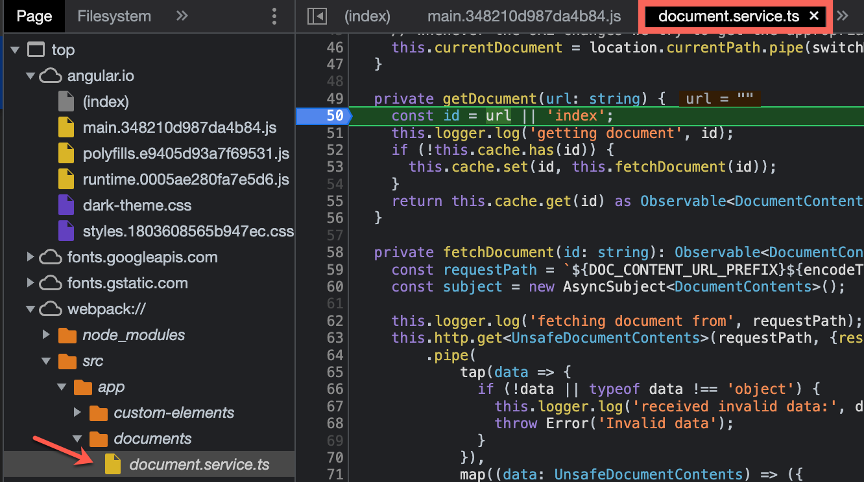
If we want to see the location of the current file in the document tree, we can right-click on the file contents of the unminified file and select 'Reveal in sidebar'.
We can see in the minified version that the 'url' variable was renamed to 'Re', but the string text 'index' remained the same.
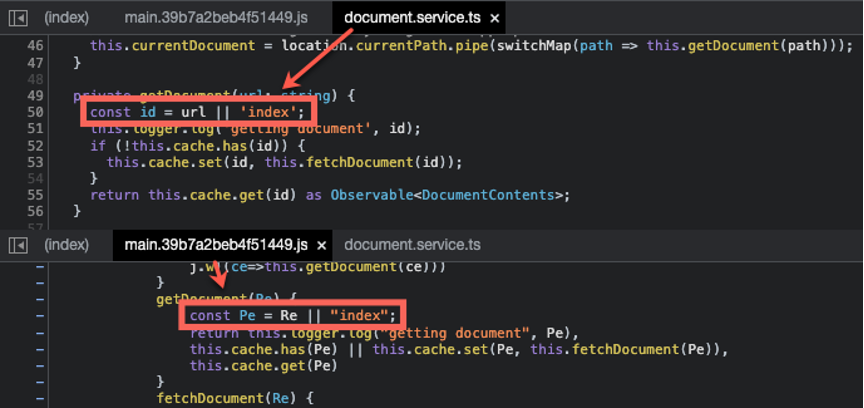
As long as no additional obfuscation was added to the original files, string values should remain unchanged. Now we have a breakpoint set on one of the unminified files (document.services.ts), as shown with a blue marker.
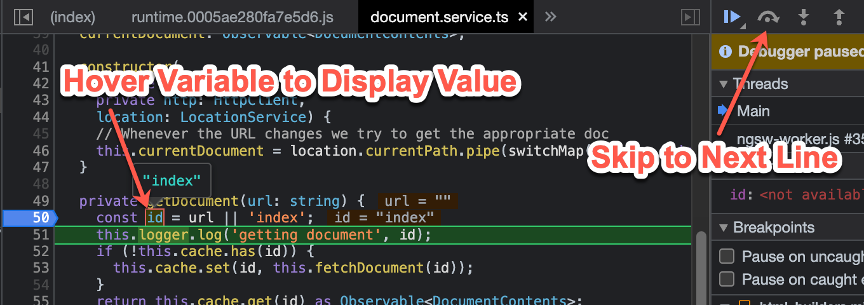
Now that our breakpoint is set, we can refresh the page, and as long as our breakpoint is in a function that is called on page load, the browser will pause on our breakpoint. In our example, if we wanted to view the value of the 'id' variable, we could allow the browser to skip to the line right after our breakpoint and then hover over the 'id' to view its current value—in this case, id has the value of 'index'.
This can be useful in cases where a script has complex logic that can be hard to follow in an offline viewer. You can instead run the script with a breakpoint at the end of a function to obtain a variable's value after all the logic is executed.
Note that if the JavaScript file you are viewing was not minified, then any breakpoints set would be set in the unminified file, because there would be no map file to open and add breakpoints to.
Let’s say that the logic above was restricting access to additional page contents. Something we can do with the help of a proxy is to change what values are being set in our browser. For this, we will use Burp Suite, and specifically, we will use the Match and Replace functionality in the proxy options. This feature should be available on both the Professional and Community versions of Burp.

With Find and Replace, we can change the response body of any page that passes through our proxy.
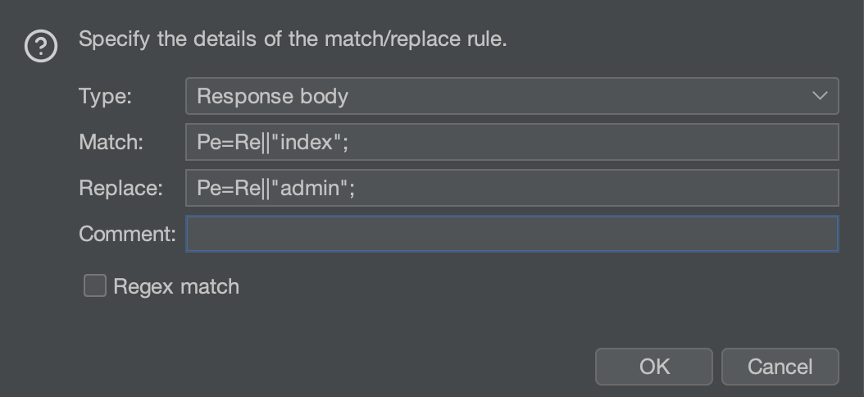
Let’s say we want to set the 'index' string in the main.js file to something else, like 'admin'. For this, we don’t have to use regex, but you can if you would like—we just need to be sure we get the spacing correct. When we are viewing an unminified file, the text shown is not the text that is returned in application responses. The response will contain the minified file contents without formatting. So, we need to find what the value of the text we want to change would be in the application response.
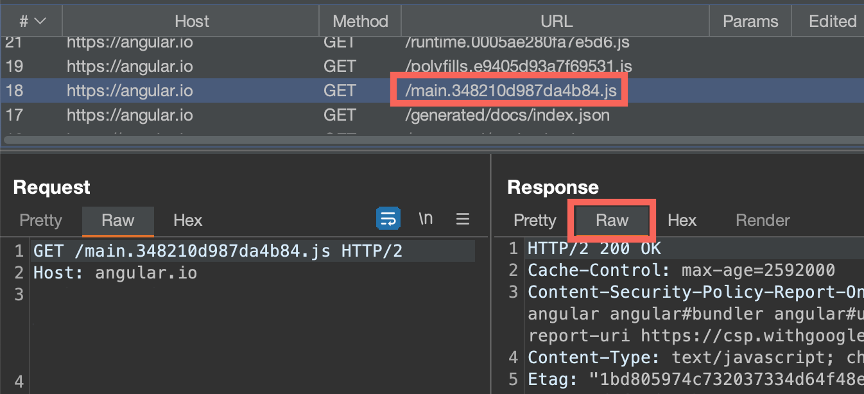
To start, let’s go to our proxy history in Burp and find the script file we want to edit. Note that if the file does not appear in your history, then it is most likely cached, and you will need to clear your cache and reload the page. If you still have the developer tools open in a Chromium browser, you can right-click on the refresh button and select 'Empty Cache and Hard Reload'. Once you find your script file in Burp Suite, make sure the response type is set to Raw.
Now, let’s find our 'index' string in the script response by using the Find functionality.
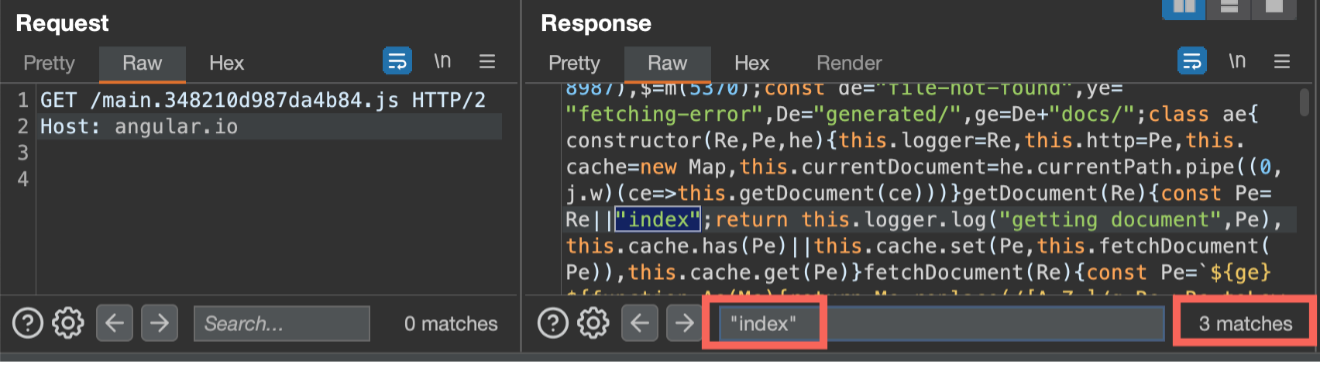
Notice that we have three (3) matches. If we only find and replace the word 'index', we will change every instance of the string 'index' in every page response that is proxied by Burp, not just the script we are trying to alter. Looking at all three (3) matches, we see that the first match looks like the code we set a breakpoint on earlier. The 'url' variable has been changed to 'Re', like we observed. Now that we know what needs to be replaced, we can add a Find and Replace rule to change 'index' to 'admin'.

Now that our Replace is set up, we can close any open scripts in Chrome’s developer tools and refresh the application (clear the cache if needed). When we view the contents of main.js, we see that the script has been changed.

Depending on the functionality of the application, this could allow page sections to be viewed that were previously not shown to the user. This could also be used to allow specific file extensions during file uploads, which allows any file types to be uploaded and bypasses any client-side restrictions. Thats why it’s important to check any client-side logic on the server side of an application as well.
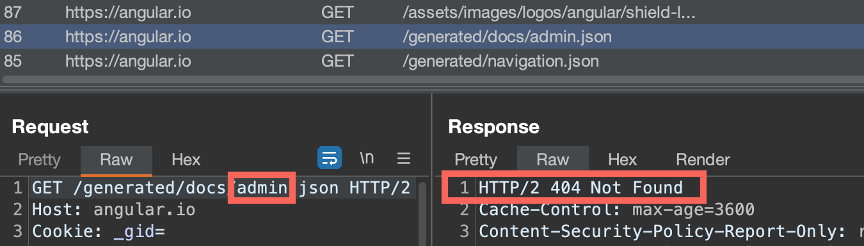
In our case, the application tried to pull in a resource that included our changed text.
In some cases, you will find that script files pulled into the application are very large and cause the application to lag when proxied.
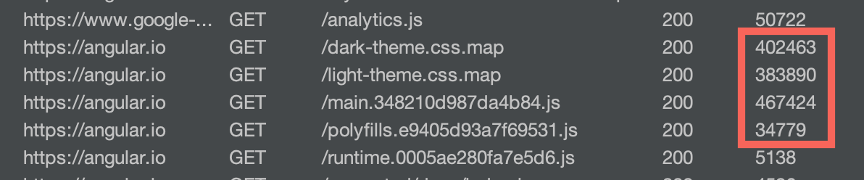
To help this, you can set the scope of your Burp project under the Target - Scope tab and check the 'Use advanced scope control' option. Then, set your target domain, and exclude from scope any large files that can slow down the application when proxied.
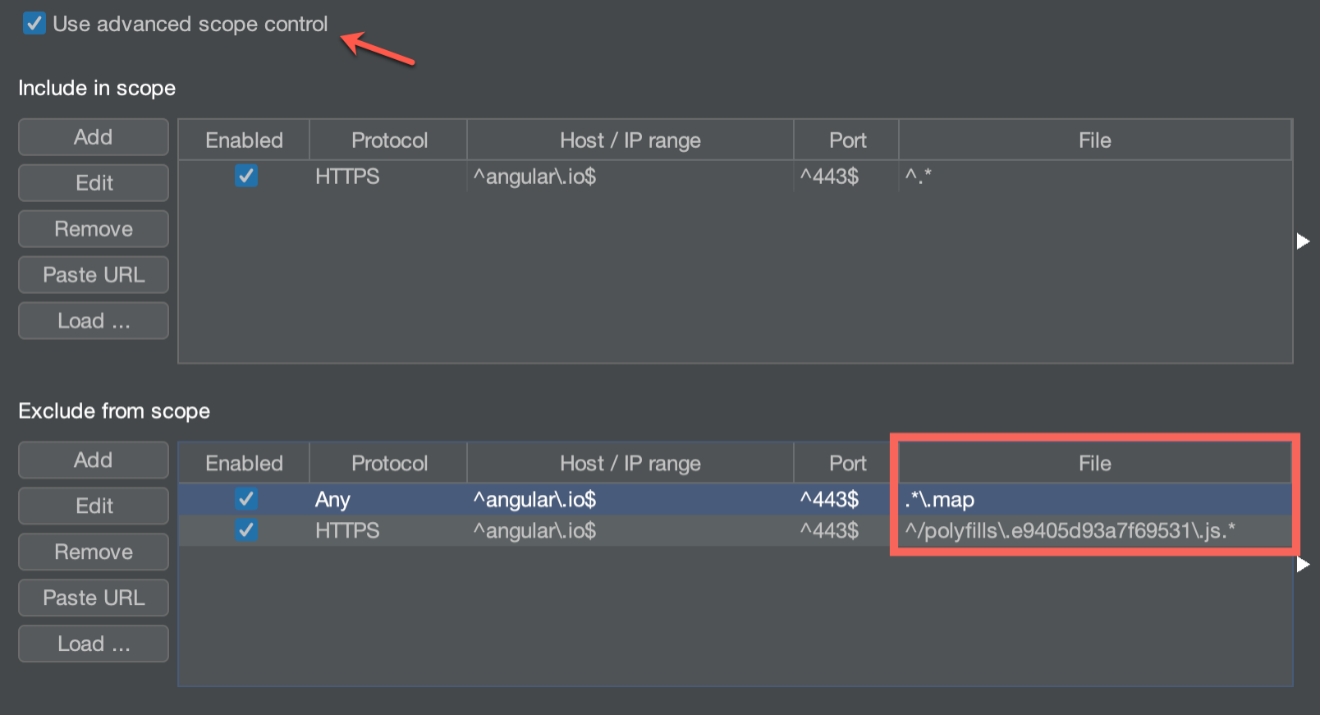
To exclude file types, you can use a regex like this:
.*\.map
This would set any .map files out of scope. Additionally, you can right-click a file in the proxy history and select 'Remove from scope'. In some cases, applications pull from external domains, so you may need to allow all domains in your scope.
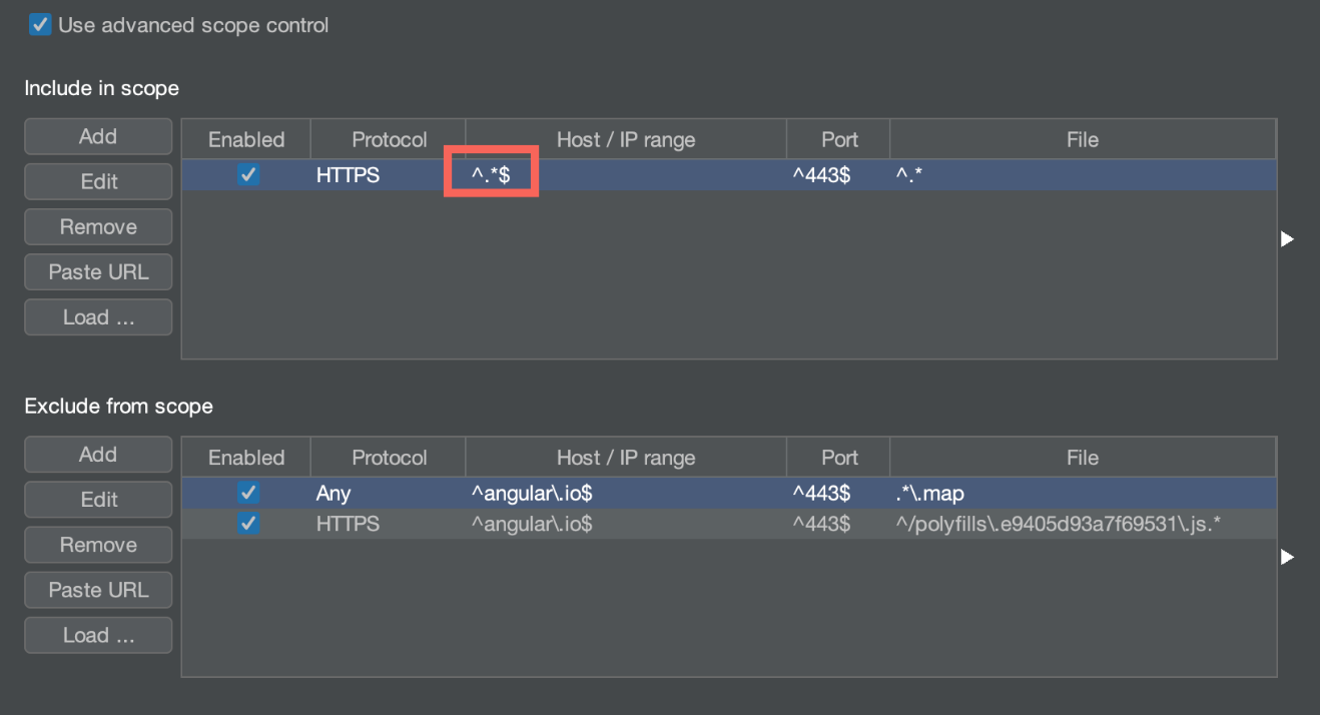
Regex:
^.*$
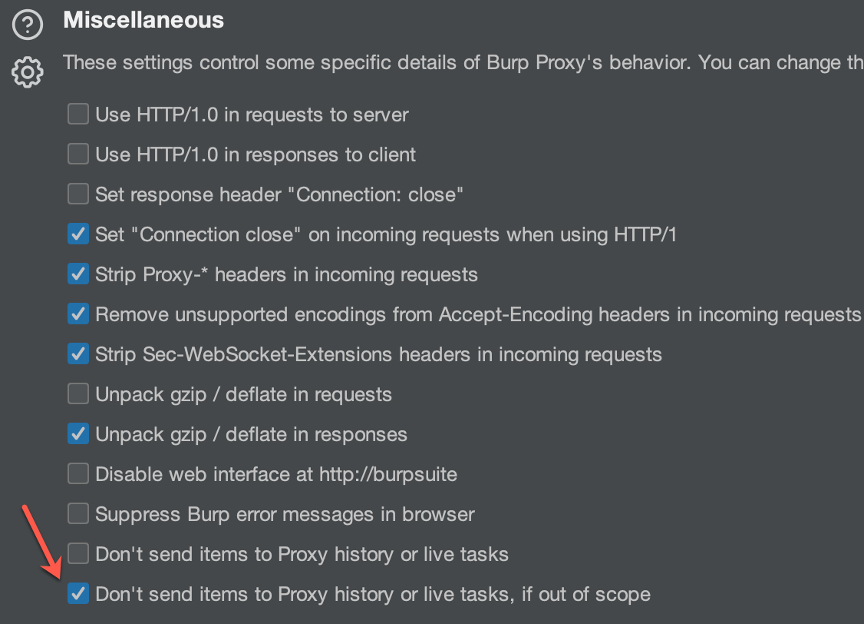
Once you exclude files from your scope, you can refresh your application, and your out-of-scope request will no longer be sent to the proxy history or live tasks.

Note that for this to work, Burp needs to have the option turned on that prevents out-of-scope requests from being added to the history, which it does by default when you set a scope for the first time. If you need to toggle the option, it’s in the proxy options under Miscellaneous.
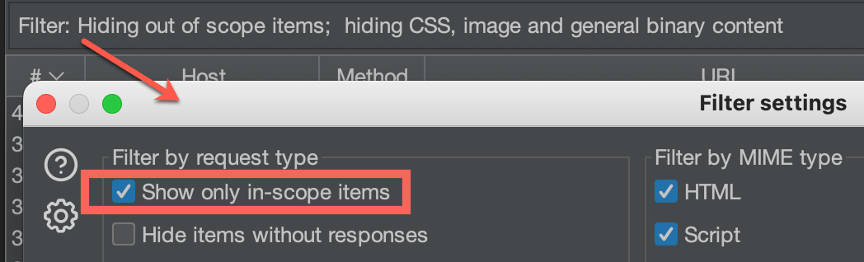
Additionally, you may need to set your proxy options to only allow in-scope requests.
Now, you should be able to view, format, search, debug, change, and exclude script files in your proxy the next time you look at a web application.