Red Teaming With Cobalt Strike – Not So Obvious Features

Since beginning work as a red teamer almost two years ago, I've had to learn a lot of new information and tooling. I had never worked with Cobalt Strike before and there were features not obvious to me until I had used it for a while and gained some experience with it. This post will go over some of my experiences and will hopefully help others on their way to becoming better Cobalt Strike operators. If you are an experienced operator, this will probably be nothing new, it may even be humorous at times when you see how I did things. That said, there's no shame in learning something new. I've learned a lot from working with Cobalt Strike and wanted to share my experiences here.
GUI Tips
After working with the Cobalt Strike Graphical User Interface (GUI) for a while, I noticed that every now and then I missed the CTRL+V function and hit CTRL+B instead. I then realized that the GUI would suddenly change, with the remedy being closing and reopening the Cobalt Strike Client application. After doing this a couple of times, I did a little research and found an incredible post on the Cobalt Strike homepage going over some GUI information. I also found more details about GUI in the manual itself.
Here are some GUI functions that I use frequently:
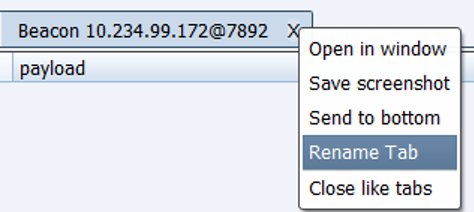
- Right click on X on tabs to rename:
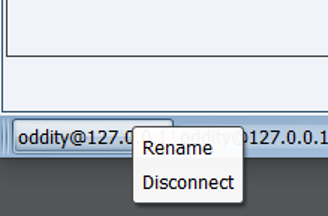
- Right click on TeamServers in the bottom of the GUI to name them accordingly:
- Using CTRL+B will send the tab to the bottom of the page and is perfect for splitting/displaying multiple tabs at the same time. I tend to prefer having multiple tabs open instead of splitting. Use CTRL+E if you press CTRL+B by accident.
- Use CTRL+F inside the interact prompt to search.
- Use up and Down arrows to navigate previously entered commands inside an interact prompt.
- Using the CTRL+Left arrow or CTRL+Right arrow will navigate the tabs.
Web Log
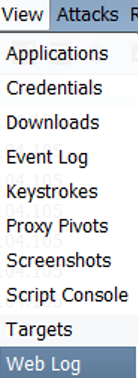
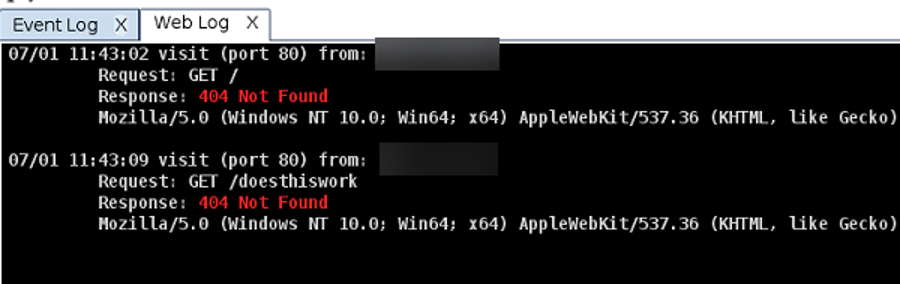
One thing that made troubleshooting easier for me, when I needed to track down an issue, was when I found that Cobalt Strike has a web log in the GUI. Often, redirectors are used, and in some cases, you will find yourself troubleshooting connections from the redirector to the Cobalt Strike TeamServer or from another host. In those troubleshooting scenarios, the web log is perfect. It shows you when connections are made and gives you an idea of whether the traffic hits or not. The web log is found under View > Web Log:
Sync Files
Having worked with Windows most of my career, I knew that getting files out of a NIX box would require the use of SCP or some other file transferring protocol. Ultimately, I spent substantial time on my first few engagements moving files that were downloaded from hosts on the TeamServer to my own operator computer. I started by using SCP to download everything in the downloads folder on the Cobalt Strike server. It felt like a nightmare trying to navigate all those strange folders to find files. After enough frustration, I asked my co-workers for feedback and they instructed me to use the “Sync Files” option. (Not going to explain how it made me feel when I discovered that…) This option can be found in the View > Downloads menu option, using the “Sync Files” button.
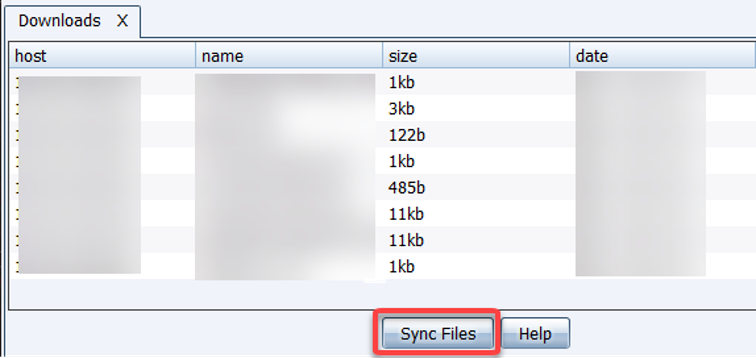
For this to work, select the files you want to sync and click the "Sync Files" button. The prompt will then ask you for a folder to download the files onto and voila, files are downloaded.
Stageless vs Stager
Two terms that confused me a lot on my first engagements were Stageless and Stager.
A stager is a smaller file that only has one purpose, which is to get the payload from your Cobalt Strike server so the host can be fully compromised. This allows the stager to pull down the actual Cobalt Strike payload. When you're dealing with hard limits on how much data you can load into memory, a feature like this can be quite useful. The issue with stagers, as mentioned in the manual under section 4.4 – Payload Staging, is that when they are enabled, anyone can actually connect to your Cobalt Strike server and pull down the configuration. A good example on some reversing of Cobalt Strike can be found here.
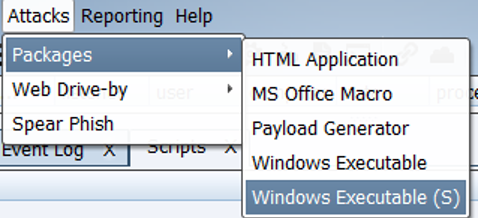
Stageless payloads are full Cobalt Strike payloads that have security built-in and do not need to pull down anything else. Stageless payloads are the recommended payload to use. All Stageless payloads are marked with (S) in the menus.
Also, a recommendation if you are not using stager payloads, you should change the profile for your TeamServer and add the host_stage = false. That disables the staging function on the TeamServer.
Profiles
I remember the word profile was thrown around a lot when I started using Cobalt Strike, and I could not understand what the fuss was about. Simply put, the profile is actually a ruleset on how Cobalt Strike should behave. You will probably see the words Malleable C2 profile, which is the correct terminology according to the manual. With a Malleable C2 profile, you can adjust how the traffic between the host and the server interacts, how processes should be spawned, and more. It uses its own language for defining these options and the complete documentation can be found in the manual in Chapter 11 – Malleable Command and Control.
I will not cover everything with regard to profiles, but I learned a lot by looking at existing profiles that I found here as well as reading this amazing blog post by Jeff Dimmock.
Even if I'm not covering all aspects of profile writing, there are some things I want to highlight that are not necessarily obvious, or at least not obvious to me.
Spawn With Parameters
In the post-ex section of the profile configuration, you can specify the spawnto_x86 and spawnto_x64 options. When looking at examples, you'll find different binaries specified. None of the examples that I've found show the use of parameters. In one of my previous posts I showed how to find common parameters for system binaries in Windows. Let's say we want to use those parameters when spawning a new post-ex task to hide better. To accomplish this, you would just need to specify the parameters in the spawnto options. Let’s say we want to fake gpupdate.exe /Target:User /Sync /Force. It would ultimately look like this:
<strong>post-ex {
  set spawnto_x86 "%windir%\\syswow64\\gpupdate.exe /Target:User /Sync /Force";
  set spawnto_x64 "%windir%\\sysnative\\gpupdate.exe /Target:User /Sync /Force ";
}</strong>
Finding Pipename
Under the profile, you can specify pipename and pipename_stager. These are used when leveraging Server Message Block (SMB) beacons. To figure out the named pipes that are living on a Windows box, you can simply use the following PowerShell command:
<strong>[System.IO.Directory]::GetFiles("\\.\\pipe\\")</strong>Or, In Windows 10, you use the following command:
<strong>dir \\.\pipe\\</strong>

Multiple URLs
Here's something interesting that doesn't appear to be well documented anywhere I've seen. In your profile you can specify multiple URLs for:
http-get > uri
http-post > uri
Let’s say you want to have two different URLs for the http-get and two for http-post, you would simply specify the URI like this:
<strong>http-get {
    set uri "/www/images/cache/file_ /wordpress/content/index_";</strong>
<strong>http-post {
set uri "/feed/data/api/interface.php /apiv2/weather/stats/forecast.php";</strong>
Notice that there is a space between the different URLs.
So, how does it work when you've specified multiple URLs? When I first discovered this, I thought that it would randomly switch between all the URLs during communication, but that is not the case. When you spawn a beacon, it picks one of them at random and continues to use it. This means that if we use the URLs above, one client could pick /www/images/api/interface.php for the get and /apiv2/weather/stats/forecast.php for the posts, and a second client could pick something else. It would have been really cool if it rotated automatically, but that is not the case. If you generate a stageless payload, that payload will always use the same two URLs - one for get and one for post. However, if you spawn a new beacon on an existing client where you have an existing beacon, it picks new URLs from the profile list at random.
Changes Not Working
One thing I could not understand when I began working with Cobalt Strike was that changes to the profile may not work as expected. Let’s say I changed the sleep setting to something lower, saved the profile, restarted the TeamServer, and executed the beacon on a client using existing payloads. In that case, the changes would not get picked up. After some digging and learning a little more about how the stageless payload is generated, I realized that I actually had to regenerate the stageless payload for it to pick up the new settings. This is probably obvious for most of you, but I did not understand this at first, especially since the stager payloads picked up the changes. But when you think about it, it makes sense since the stager payload pulls down a payload with the settings in it.
What Spawns a Process?
On early engagements, I often ended up getting caught by Endpoint Detection and Response (EDR) systems, since I wildly spawned new processes. What I did not understand at the time was that some of the things you do within Cobalt Strike actually spawn new processes. I often found myself wanting to take a screenshot to have a look at the desktop, which was a big mistake. It wasn't until after I found this blog post from 2017 that I realized what I was doing wrong. You can clearly see some of the actions that use native Win32 APIs that are safe to run, but there are also some post-exploitation jobs that spawn new processes and inject the capabilities into those processes. In the updated documentation, these are referred to as "Fork & Run" commands. The commands that spawn new processes and inject capabilities are very often in my experience picked up by EDR solutions pretty easily. It is also important to take a good look at your profile, since you can manipulate how the processes are spawned, which can help a lot in terms of avoiding the EDR on process spawning.
Things have changed a lot with the latest 4.1 release of Cobalt Strike, since we now have the new Inline Execute option using Beacon Object Files (BOFs). I have not had a lot of time to play around with the BOFs, but I will most certainly make time for them going forward. I would also recommend having a look at this updated documentation, as well as TrustedSec’s blog post on a developer's introduction to beacon objects.

I Regret the Commands I Queued Up
If you are working on engagements where you have a little higher than normal sleep (30 minutes +), you may end up in a situation where you have issued a command or commands that you regret and would actually prefer not execute after all. The first time I ended up in this situation, I could not figure out how to cancel the commands. After some testing, I saw that it was right in front of me the entire time. This was a big facepalm moment for me.

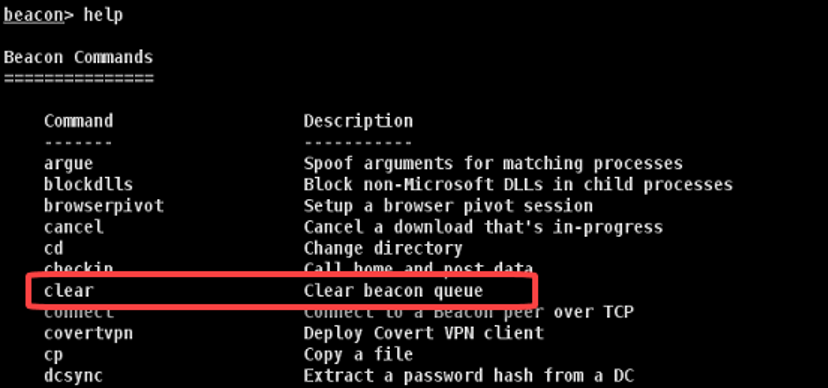
If you type "help" in the interact window, you can see that there is a command called "clear" that will clear the beacon queue. This command can be useful to remember.
PowerShell
I won't say much on this topic, but you can use powershell-import to get the PowerShell code ready for usage with other Cobalt Strike commands, which is something I didn't know at first. After you have imported the ps1 file, you can use either Powerpick or PowerShell. Powerpick runs the code in an unmanaged PowerShell environment and can execute without being dependent on powershell.exe. This can be useful in a whitelisting scenario.
OPSEC
Thanks to Jason Lang, another thing I learned that may be worth considering when using Cobalt Strike is to restrict access to the port 50050. You do not want to show the world that you are using Cobalt Strike, so how you tackle that problem? Well, a good approach is to use IPTables to not allow port 50050 from the Internet and to only allow it locally. When allowing it locally, we can use a Secure Shell (SSH) tunnel to get access to Cobalt Strike instead.
What you want is a drop rule for 0.0.0.0/0 on TCP 50050 and an allow rule for 127.0.0.1 before that drop rule. You can use the following commands to add those two rules:
/sbin/iptables -I INPUT 1 -p tcp -s 0.0.0.0/0 --dport 50050 -j DROP
/sbin/iptables -I INPUT 1 -p tcp -s 127.0.0.1 --dport 50050 -j ACCEPT
After you have those rules in place, you should verify by attempting to connect directly to the Cobalt Strike team server. To create a tunnel, simply use the following SSH command:
ssh [email protected] -L 50050:127.0.0.1:50050 (replace "user" with the correct user and x.x.x.x with the IP address to your Cobalt Strike server).
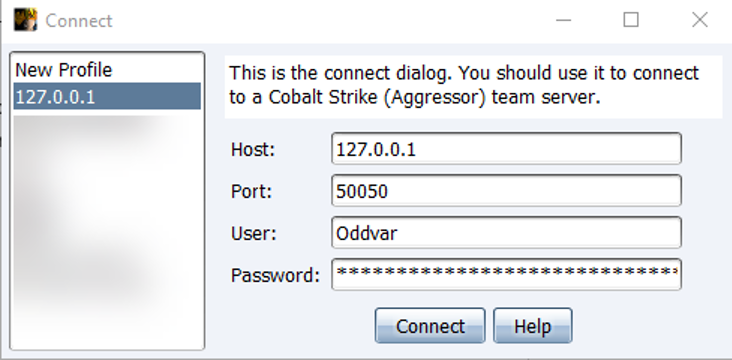
What happens now is that your localhost is listening on port 50050 and forwarding that to your Cobalt Strike server. So, now you can simply type 127.0.0.1 as the address in the Cobalt Strike connect GUI.
Outro
I’m sure there is a lot more that I’ve learned in my time Red Teaming, and I’m sure I’ll have more information and experiences to share in upcoming posts. Hopefully, you found some useful information in this post, or, if nothing else, found some humor in my learning experience!