SELinux and Auditd

In this blog post, I will discuss SELinux and Auditd, how to use them, how to determine what the default policies are doing, and how to add new ones. For those who do not know what SELinux is, it stands for Security-Enhanced Linux. More details about SELinux can be found in the resources section at the end of this post. Auditd is the audit daemon and rules can be written with SELinux in mind.
A warning to the readers: this will not be in-depth, just a quick introduction and starting point. More in-depth resources are linked at the end of the blog post.
The systems used for testing in this blog post are default installs of CentOS 7 and 8, which can be downloaded here: https://www.centos.org/download/ For CentOS 7, it is necessary to click on the “Older Versions” link. The main reason for this is that SELinux is already set to enforcing with a targeted profile and Auditd is already installed, it just does not have any rules added to it. The following steps and instructions can be done on those systems and should be able to be duplicated there.
Additionally, note that I am using a default install, so what is enabled or disabled will be different on servers that are encountered during pen tests and red team tests, and can vary from completely disabled SELinux policies to highly restrictive policies where most commands and actions are logged.
SELinux
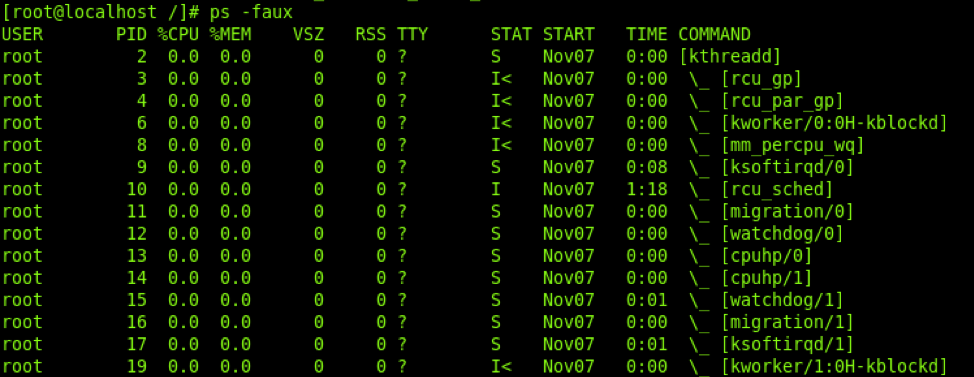
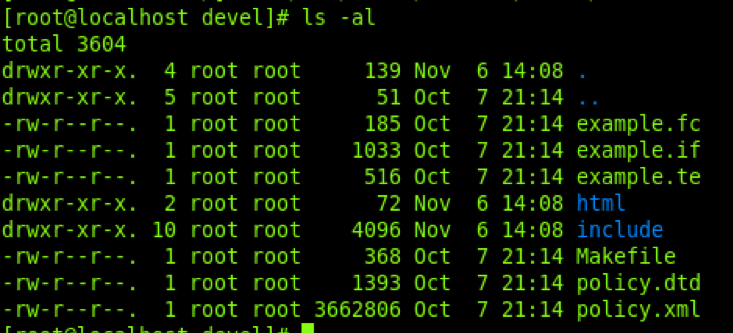
Within SELinux, some commands will expose extra details—a couple of examples of this are the ‘ps’ and ‘ls’ commands. By providing extra flags like “ps -fauxZ” instead of “ps -faux,” you end up getting additional details. The same applies to the ls command “ls -al /path/” and ls -alZ /path/,” as these examples below show.
LS Command


PS Command


As you can see from the screenshots above, by adding the “Z” flag to those commands, they then show the associated context with the process or file. These contexts will be associated with the permissions that process has and the file contexts will show what context owns that file. This will come in handy when trying to start processes as specific contexts later on.
Getting Started
These are some basic commands to start using SELinux, including commands that are useful to show the status, enable/disable settings, or set booleans.
- sestatus: Shows the status of SELinux
- setenforce permissive: Disables SELinux temporarily
- setenforce enforcing: Re-enables SELinux
- getsebool -a: Lists all SELinux booleans
- getsebool httpd_can_network_connect: Gets a specific boolean
- setsebool -P httpd_can_network_connect 1: Sets a specific boolean
- ps -fauxZ: Tells ps command to show process contexts
- ls -alZ: Tells the ls command to show file contexts
The get/setsebool commands enable or disable the permissions of process contexts. A few of the SELinux permissions we are going to pay attention to is execmem, execheap, and execstack. For more permissions and descriptions for what they do, check out resource #6.
Pulling Apart Rules
Now onto the fun part!
Warning: we will be digging into the weeds a bit. For this section, you will want to install the “selinux-policy-devel” package for your system. To install, just run “yum install selinux-policy-devel” on CentOS7 or “dnf install selinux-policy-devel” on CentOS 8. Once installed, you can cd to /usr/share/selinux/devel/. Inside of that folder, you will have an “include” folder, which contains all the policy files and the xml file to manage them.

For this section, the scenario will be looking for processes that allow execmem or execheap. This will make it possible to allocate memory in the process and make it executable. These permissions enable function hooking, injection, and other techniques. Ideally for this we would want to see a line in the policy that looks something like this example taken from system/userdomain.if but have the execmem and execheap permissions included.

The line with “:process { PERMISSIONS }” shows what permissions are allowed in that context. This example also shows the tunable policy of “deny_ptrace”. While looking at this, we have a pretty good idea of what permissions are set for that context. This policy does not have what we are looking for so we will not dig into it much because it is fairly large. However, if we take a look at the deny_ptrace section, we will see something different. The way these rules work is by checking if the boolean “deny_ptrace” is set. If it is set, it does the first action which in our case is empty, else it does the second action “allow $1_usertype $1_usertype:process ptrace;” which adds the ptrace permission to the context. These SELinux booleans are what we will be covering in the next section.
In this section, we are just searching through policies until finding a context to run under that has the permissions you need to inject into it and if ptrace is enabled, so you can actually inject. This is also why it is extremely important to know what your tooling does and what it requires to operate properly.
Check Booleans
SELinux booleans are configurable options that toggle additional rules inside of various SELinux policies. In the previous section, we talked about deny_ptrace and how that can disable ptrace permissions on the system. To check if it is enabled on the system, you would run “getsebool -a” to list all booleans or run “getsebool deny_ptrace” to specifically get that flag.

The default configuration we are on has this set to ‘off’. To enable it, run “setsebool -P deny_ptrace 1”.

Once set, this should prevent most applications from using ptrace on that system. This is a recommended setting for production servers that should not have much debugging happening on them anyway. A few of the booleans to keep an eye out for, and the scenarios for which they will be useful, are listed below.
- deny_execmem:
- This will block execmem from both the unconfined and userdomain policy.
- httpd_can_network_connect: “Allow HTTPD scripts and modules to connect to the network”
- httpd_can_network_relay: “Allow httpd to act as a relay”
- Both of these can be used to enable nginx/apache2 to be used as a redirector for redteam infrastructure.
AuditD
Now that we got through the SELinux policies, we will go through Auditd. Without additional Auditd rules, the SELinux policies will log if changes are made to them, or if one of the processes tries to do something it is not supposed to. Examples include if a process under the httd_t context tries to establish network connections, or if ssh tries to map execmem or execheap permissions. Auditd builds off this and allows an administrator to log any time a syscall is called or files are modified or read, essentially providing full access to logging. In the resources section, I have a few public Auditd policies listed that you can look at for more complete examples of what can be done. For now, we will go through some example rules from resource #8 and what they do.
- -w /etc/passwd -p wa -k etcpasswd
This rule watches the /etc/passwd file for any modifications, so any new users will show up with the “etcpasswd” label in /var/log/audit/audit.log.
- -a exit,always -F arch=b64 -f euid=0 -S execve -k rootcmd
This rule watches for any execve syscall run by a user with an euid=0 (aka root) and is labeled as rootcmd. This is essentially logging all root commands run on the system even if HISTFILE was unset.
One of the things you will want to keep in mind while building your Auditd rules is that the first rule that matches whatever event in the Auditd config file is the one that is logged, which means that if you have a generic rule that catches a lot of different techniques, and later down you have more specific ones, the first one will always be the one logged. That being said, I would recommend having more specific rules over less specific rules.
Review
In this blog post, we went through the basics of SELinux, Auditd, and how to understand the rules and policies that are in place. This blog post is just a basic introduction, so I also compiled a list of resources below as references in case anyone wants to dig a little deeper into SELinux or Auditd. If you are looking for recommendations, I would recommend starting with either Digital Ocean’s introduction to SELinux, the CentOS wiki’s documentation, or the Redhat pdf. For Auditd, I would check out resource #8—it is a pretty massive ruleset and will generate plenty of log data for analysis.
Resources
- https://selinuxproject.org/page/Main_Page
- https://github.com/SELinuxProject/refpolicy/wiki
- https://wiki.centos.org/HowTos/SELinux
- https://wiki.centos.org/TipsAndTricks/SelinuxBooleans
- https://www.digitalocean.com/community/tutorial_series/an-introduction-to-selinux-on-centos-7
- https://selinuxproject.org/page/ObjectClassesPerms
- https://access.redhat.com/documentation/en-us/red_hat_enterprise_linux/8/pdf/using_selinux/Red_Hat_Enterprise_Linux-8-Using_SELinux-en-US.pdf
- https://github.com/Neo23x0/auditd/blob/master/audit.rules
- https://github.com/bfuzzy/auditd-attack/blob/master/auditd-attack.rules
- https://github.com/bfuzzy1/auditd-attack
- https://github.com/linux-audit/audit-userspace/tree/master/rules