Set Up an Android Hacking Lab for $0

With the ever-increasing demand for mobile technology, it seems like there is an app to do just about anything you can think of, right on your cell phone. From banking to mobile gaming and even controlling the RGB lights installed in your home office, everything is interconnected now. With the rise of this functionality also comes the responsibility of ensuring that these apps are safe to use. When it comes to learning about mobile security, setting up a lab is a great first step. The intent of this writeup is to provide the building blocks to getting a lab set up and starting the process of learning how to assess a mobile application.
Prerequisites:
- Python3 - https://www.python.org/downloads/
- Android Studio - https://developer.android.com/studio
- Android Platform-Tools - https://developer.android.com/studio/releases/platform-tools
- ADB Drivers (for Windows users) - https://developer.oculus.com/downloads/package/oculus-go-adb-drivers/
- DVBA - https://github.com/rewanthtammana/Damn-Vulnerable-Bank/raw/master/dvba.apk
- Frida-server 15.2.2- https://github.com/frida/frida/releases
- Frida client –
pip3 install frida==15.2.2 - Frida-tools –
pip3 install frida-tools - Objection –
pip3 install objection
1 Emulator Setup
An Android emulator is the core of this setup. Since Android is an open-source technology, it costs nothing to set up. Within Android Studio, it is possible to set up multiple devices with a variety of operating systems that can be used for testing purposes.
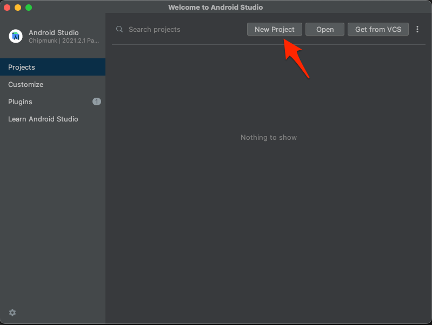
To get started, launch Android Studio and select New Project.
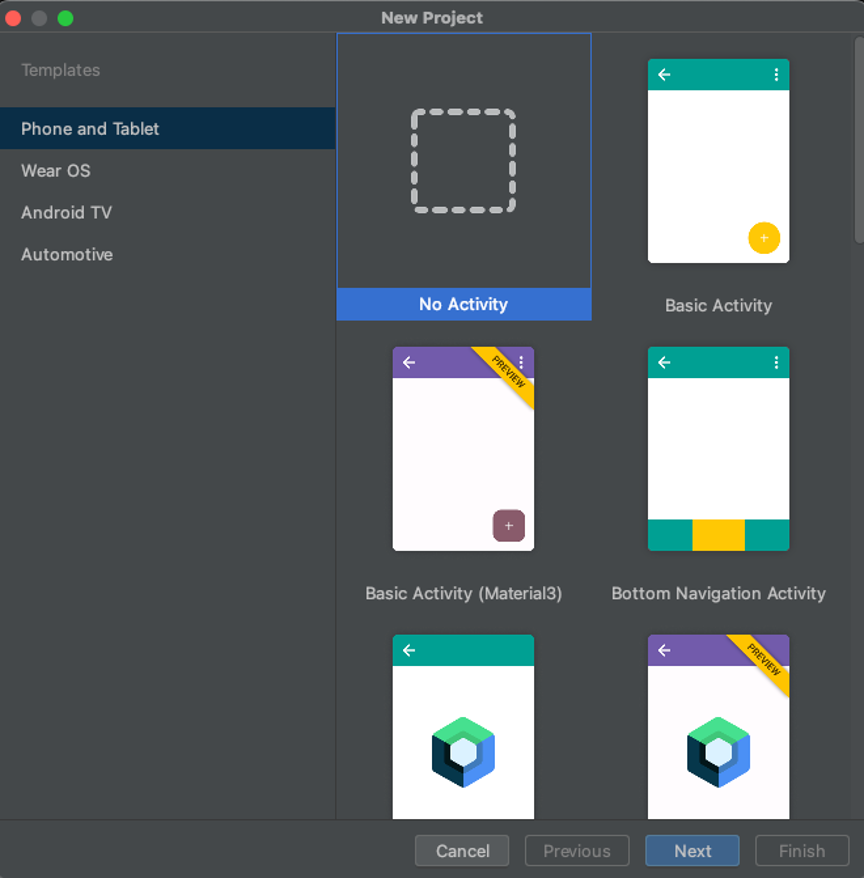
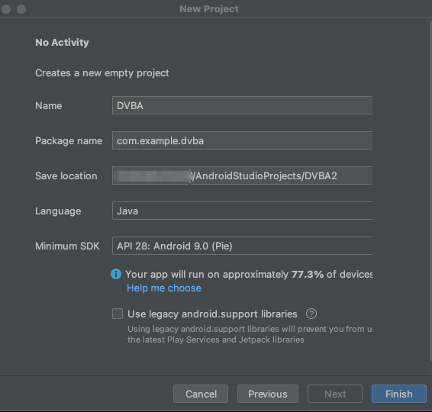
Choose No Activity and click next—this is just to get a project started to run an emulator,and any code generated will not actually be used. On the next page, give the project a name and click Finish.
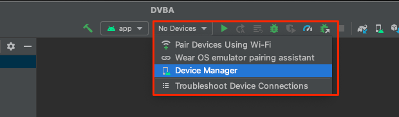
Once the project is created, in the top center of Android Studio, there should be a dropdown menu that says No Devices. Within this menu, open the Device Manager and select Create device.
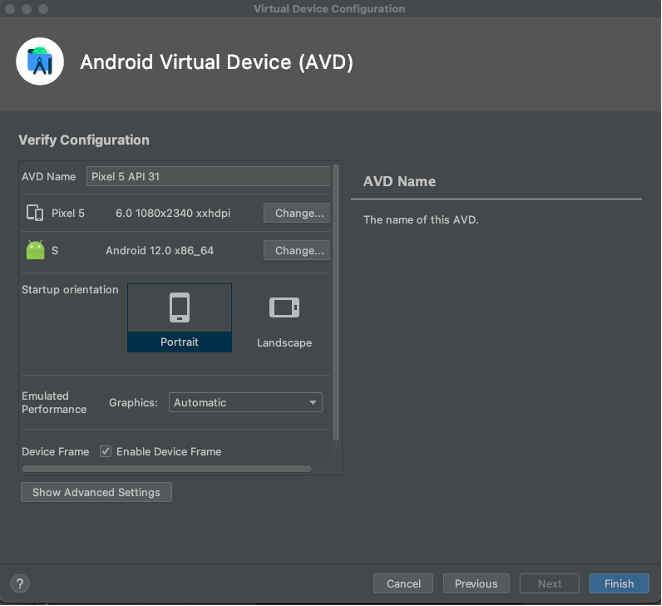
The options used for this device are:
- Category – Phone
- Pixel 5
Click Next
- System Image ‘S’ (this may need to be downloaded)
Click Next
- Choose a name for the virtual device
- Make sure that the startup orientation is “Portrait”
Click Finish
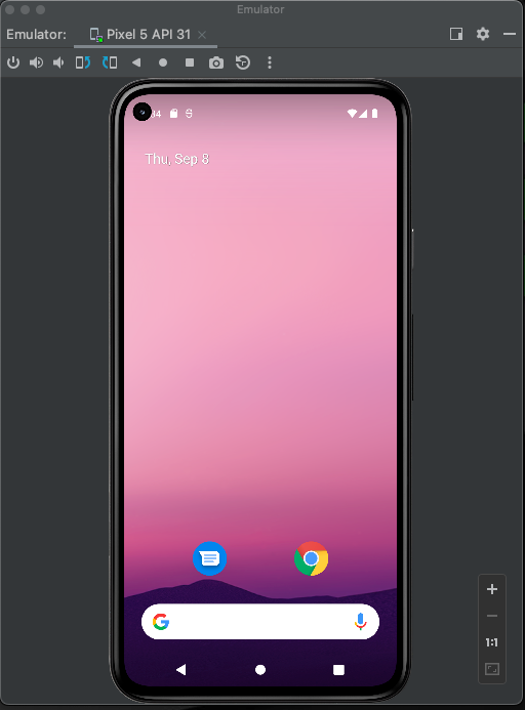
Back in Device Manager, a new device with the name Pixel 5 API 31 should be there. Click Play to start the emulator. The emulator will start as a window at the bottom of the Device Manager. Click and drag the Emulator header to have the device in its own window.
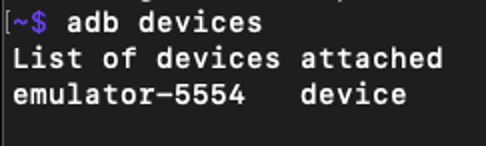
One nice benefit of using an AVD is that super user permissions should be enabled by default. This allows for full access to the operating system without having to explicitly root the device. Connectivity can quickly be verified by using Android Debug Bridge (ADB), which is part of the Platform-Tools. In a terminal, run adb devices to see a list of devices that are accessible.
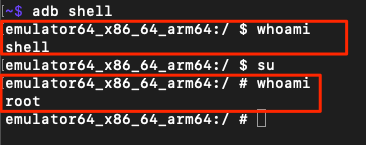
Super user access can be verified by dropping into a shell and running whoami. Similar to a traditional Linux system, su can be used to elevate privileges.
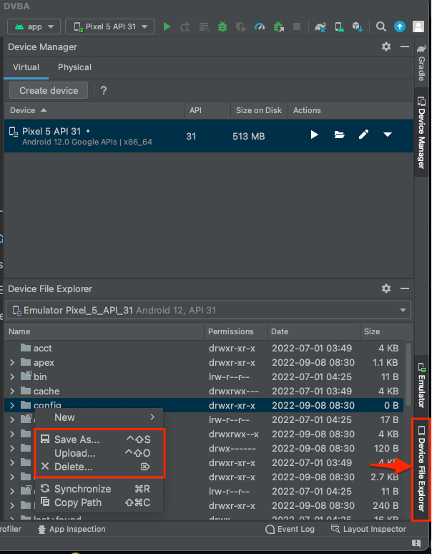
Another useful feature of Android Studio is the Device File Manager. This allows direct access to the files and folders of the AVD and can be useful when needing to quickly move files to or from the device during testing.
2 Sideloading an APK
As a consultant, there are generally two (2) ways an application is provided for testing: a client provides the APK, or the app is downloaded from the Google Play Store.
When the APK is provided, ADB can be used to install the app. The command adb install dvba.apk can be used to sideload the app onto the device.

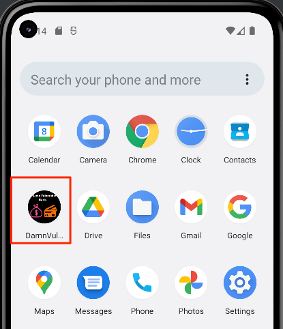
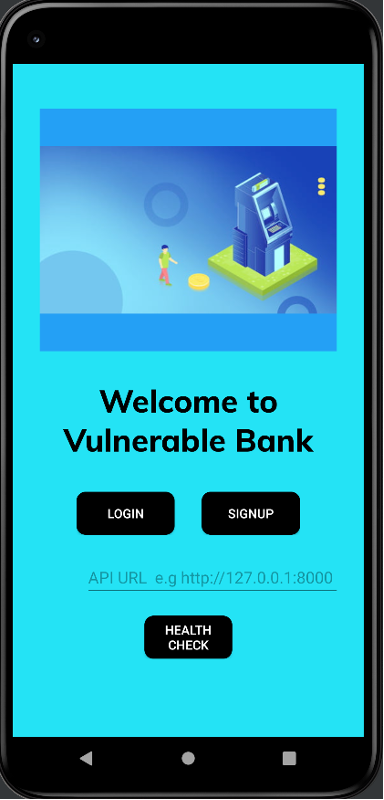
Once the app is installed, clicking on it should load the login page. It is worth noting that apps with adequate root detection in place may close out and not allow access to the functionality; this would require a root detection bypass.
3 Extracting an APK
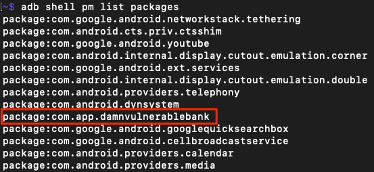
For situations where the application is downloaded from the Google Play store, it can be beneficial to pull the APK off of the device so that it can be extracted for static code analysis. Within the host terminal, the command adb shell pm list packages can be used to list all installed packages on the device. The list provided can sometimes be quite lengthy, and ideally, the package name is consistent with the name of the app being tested.
Grep can be paired with the list function to narrow down the possible package names.

With the package name, the path function can be used to list the location of the APK on the device. From the host terminal, ADB’s pull functionality can be used to download that file to the local system.
$ adb shell pm path com.app.damnvulnerablebank
$ adb pull /data/app/~~pWHFJ-giZ4urm-3QK2Ngrg==/com.app.damnvulnerablebank-NwQH9ayh-ggqM1Ee9mEN1Q==/base.apk ./Desktop

4 Frida Setup
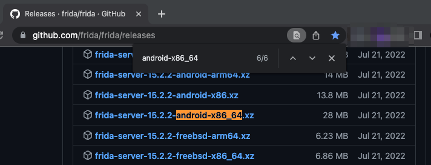
Frida is one of the tools that will enable runtime analysis and manipulation of the application. The first step is to get the Frida-server running on the AVD. Be sure to grab the correct file based on the AVD’s architecture. From the host terminal, adb shell getprop ro.product.cpu.abi will show the device’s architecture.

The device that was set up is x86_64. Going to the Frida’s release repository on Github, the file that needs to be downloaded will be named similarly to ‘frida-server-x.x.x.x-android-x86_64.xz'. At the time of writing of this article, the current version is 15.2.2.
Once downloaded, the archive can be extracted, uploaded, and run on the AVD. Walking through each step of the process, start by using ADB from the host terminal to push the Frida-server executable to the phone’s /data/local/tmp directory.
$ adb push Desktop/frida-server-15.2.2-android-x86_64 /data/local/tmp/frida-server
ADB shell can then be used to modify the file permissions of the Frida-server to allow it to run.
$ adb shell "chmod 755 /data/local/tmp/frida-server"
Finally, ADB shell can be used to elevate to root access, navigate to the tmp directory, and run the server.
$ adb shell
[emulator]$ su
[emulator]$ cd /data/local/tmp
[emulator]$ ./frida-server &

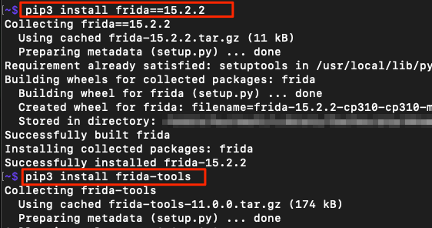
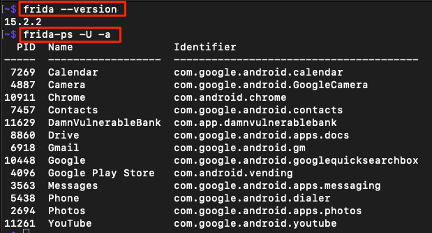
In a new terminal, the Frida client needs to be installed that matches the server version that was just run—in this case, version 15.2.2. It is worth noting that updates to Python libraries can break Frida functionality. Installing the Frida client within a Python virtual environment can reduce the chance of accidentally breaking things in the future. The client can be installed using pip3 install frida==15.2.2 and pip3 install frida-tools. Frida-tools is a set of command line tools that can be useful for interacting with the Android operating system, such as listing or killing system processes. Once the client has been successfully installed, view the running processes on the AVD using frida-ps -U -a. Note that the vulnerable banking app is listed within the running processes, including its process ID (PID), name, and identifier.
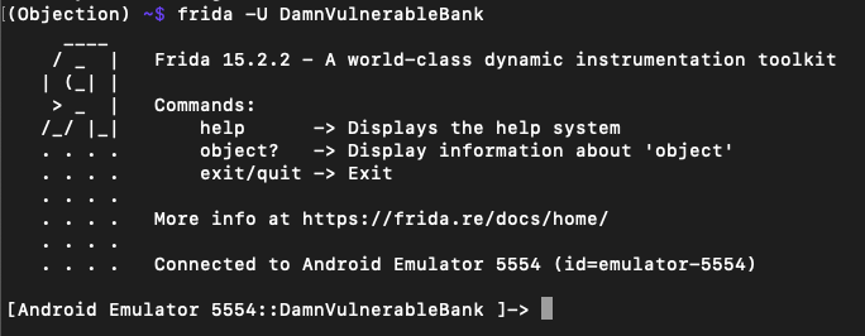
The next step is to verify that the vulnerable banking app can be hooked by Frida using the command frida -U DamnVulnerableBank. With the process officially hooked, Java functions can be run against the app to begin looking for vulnerabilities.
For those that may be a bit rusty with their Java skills, like myself, Objection can ease some of that burden. Objection is a tool that is built on top of Frida and has a lot of pre-built Frida scripts.
5 Objection Setup
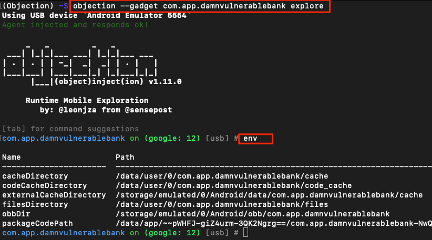
Objection can be installed using pip3 install objection. The vulnerable banking app can be hooked using objection --gadget com.app.damnvulnerablebank explore. A good place to start analyzing the app is running env to list some details about the environment. For this application, some path locations are provided, and it might be interesting to see what is stored when the application is in use.
At this point, a virtual Android device has been set up with root access. An application has successfully been sideloaded for testing, and the process can be hooked using Frida and Objection to start analyzing the application. The next steps are to take some time to start using the target application, identifying security checks that may be in place, and hacking the functionality. In the next post, we will take a look at how to use some of the most common tools in Objection to assess an Android application.