Tracing DNS Queries on Your Windows DNS Server

During a recent engagement, I successfully deployed a wildcard Domain Name System (DNS) record in conjunction with Responder. Within minutes, a misconfigured host made a query for a non-existent DNS record and was poisoned into connecting to our Responder instance. Unfortunately, the account was privileged enough that domain compromise was achieved. The techniques and tools used to achieve this attack can be found here, here, and here. Kevin’s blog post, in the first link, also spells out what a company can do to help protect against the attack. Essentially, the post recommends adding your own static wildcard and 'wpad' DNS record pointing to a host you control or loop back.
After working with the client, the necessary changes were successfully implemented. However, they did ask an excellent follow-up question - 'How can we identify what DNS record these hosts were looking for in the first place?' By pointing a wild card record to our Responder instance, we can see what hosts are poisoned, but ONLY if the host attempts a connection. In other words, if a host is configured to use a mapped drive but has a typo in the host name, we’d catch it. But what if there’s a process on the host to connect to a Redis server? Responder wouldn’t know what to do with that and would drop the traffic. Furthermore, there could be instances wherein a DNS query is made, but no follow-up connection is attempted.
Thankfully, starting with Windows Server 2012, Microsoft introduced a debugging/tracing feature into Windows DNS server service. This blog post will walk you through how to enable and track down hosts performing DNS queries for non-existent records.
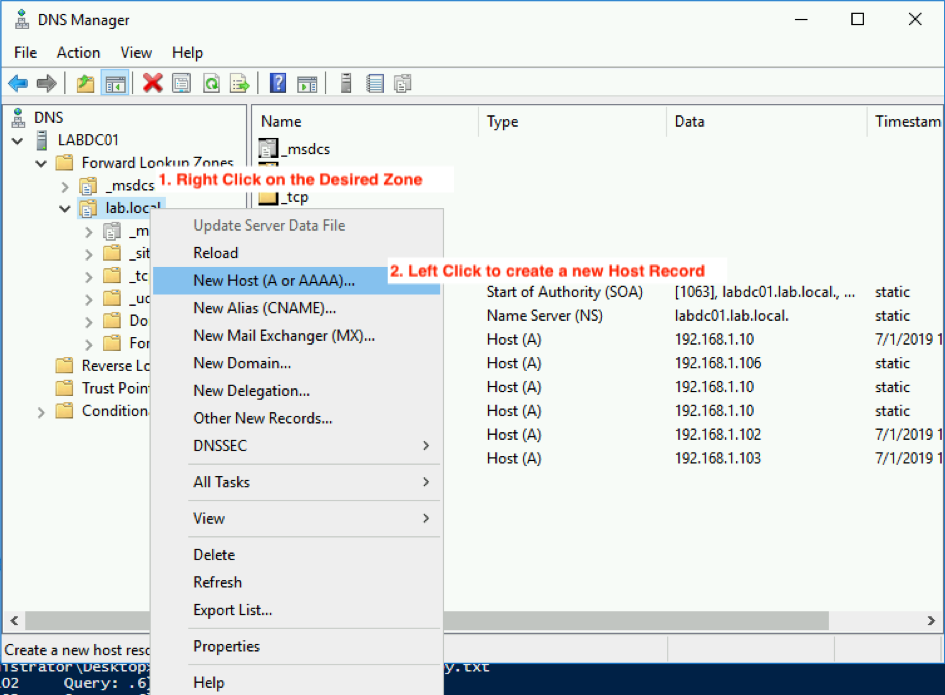
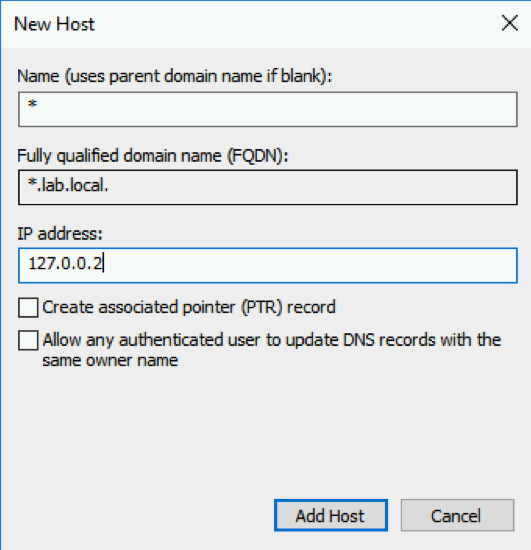
Step 1: Configure the Wildcard DNS Record
This should be done regardless, as it tends to mitigate the above wildcard and LLMNR/NBNS based poisonings. In our case, however, we’re going to set it to an IP that we'll remember. In our example, we’ll resolve any queries that hit the wildcard DNS record to point to 127.0.0.2. We could pick anything, but we don’t want any server or service to accidentally reach out to a legitimate IP.
Step 2: Enable Advanced Logging
Once the wildcard record has been created, we will enable Debug Logging. Please note, this will generate a large and verbose text file. Disk IO, Disk Space, and CPU load could be heavily impacted depending on your environment. I highly recommend testing in your dev/stage environment first.

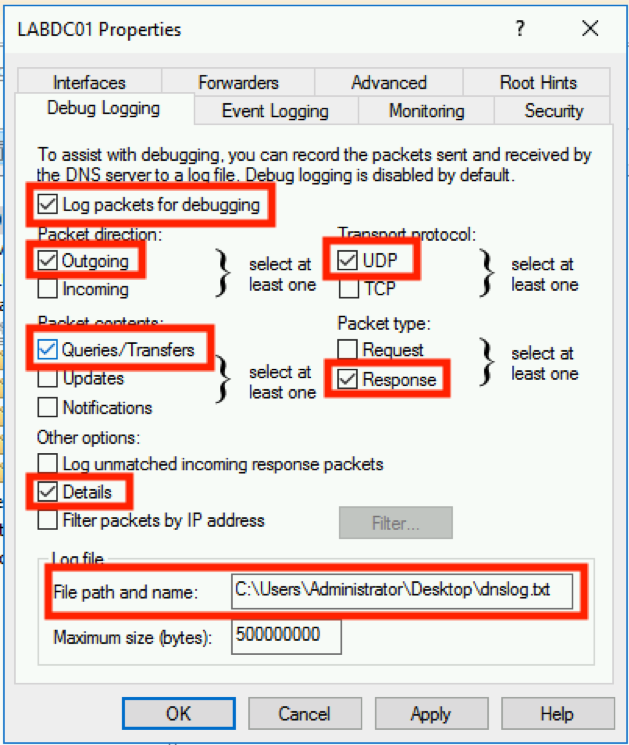
To reduce the load, I’ve selected only the boxes that need to be enabled. You can always expand the logging to include more functions, but for now, use the above. Another note, I’m saving this to the desktop because I’m in a lab. You might want to choose a better place if running in a production environment. If you’d like to rotate these logs out, see the following instructions on how to do so here.
Once all of the settings are correct, you can go ahead and click OK.
Next, I’ll go ahead and generate some DNS queries to simulate a host attempting to resolve a non-existent record.
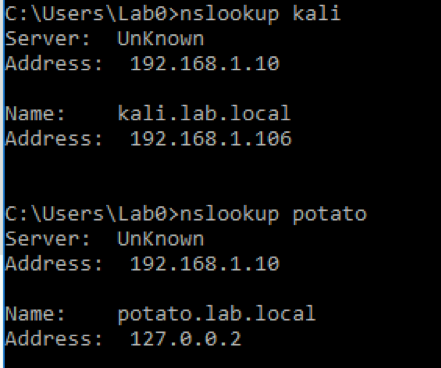
As you can see, the address for our second query resolves to our static value, 127.0.0.2.
Step 3: Reviewing the Log
In testing, I found that the DNS Server does not append to the log in real time. I believe this is due to caching with the DNS service. To force the log to write out immediately, you can stop/pause the DNS service itself, but be aware, this also stops the resolution service for any incoming DNS requests.
If we open the log, here is what we’ll see.
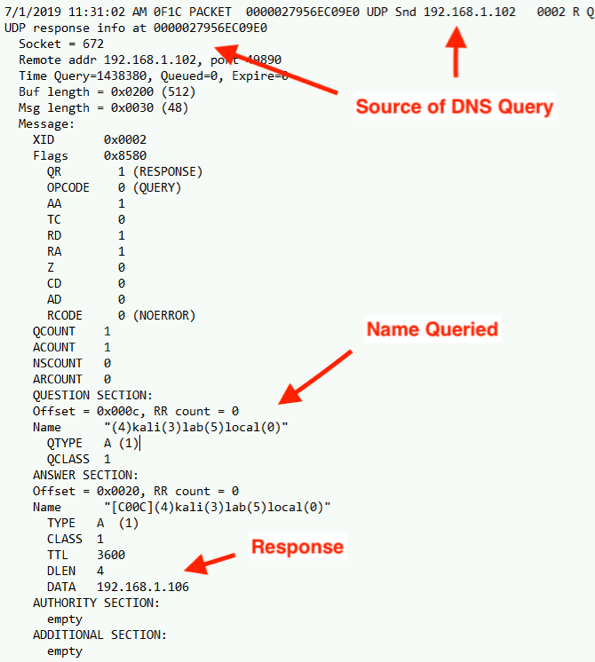
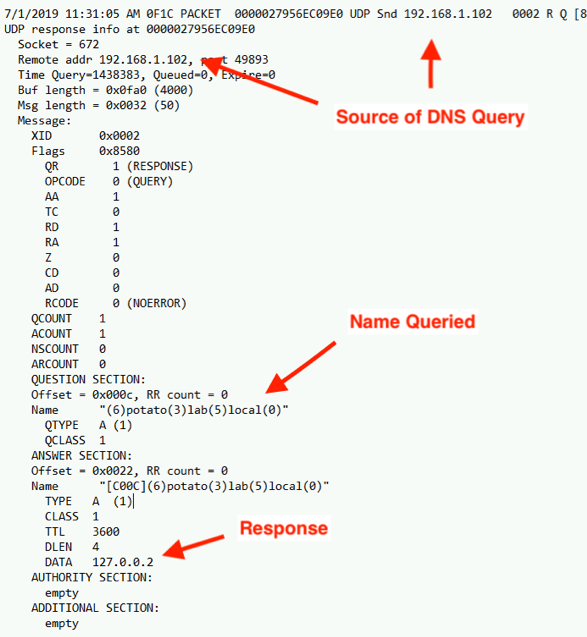
Because we enabled 'details' with our logging, we get the full content of the DNS response packet. While this information is great, it’s a bit of a pain to deal with. There are several free tools out there already to parse DNS logs (Windows DNS Log Analyzer, Microsoft Log Parser, DNSModule.psm1). However, from what I can tell, they only parse the high-level logs, not the detailed contents. If you find one that does both, please let me know!
Step 4: Parsing With PowerShell
To aid in the parsing of these logs, I created a very basic PowerShell script that you can feed the log through. Essentially, the script will scour through the log file and pull four values: source IP connection, port, name being resolved, and the IP address included in the response. The script then filters on any record where the address resolved was 127.0.0.2. Therefore, it is important to pick a unique IP for our wildcard. If we picked a common IP, we’d have a hard time distinguishing between legit queries and wildcard-based queries.
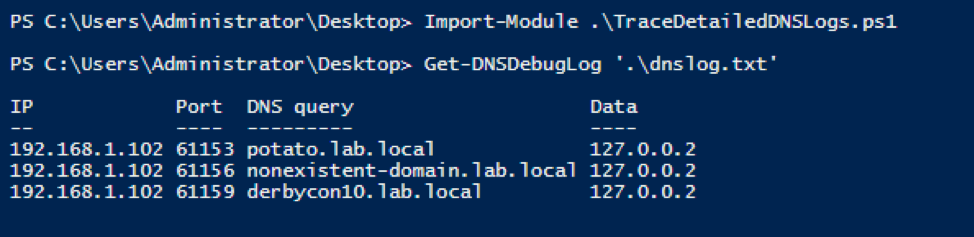
Code (TraceDetailedDNSLogs.ps1) can be found here.
That’s it! The next steps would be to grab a copy of Sysmon10 with DNS query logging to trace down what process initiated the DNS query and clean it up. Hopefully this post will help in tracking down hosts/users that are attempting to resolve addresses for DNS records that do not exist. One additional benefit to enabling DNS logging is that, if you uncheck the details option, the log file will continue single line entries of log debug data which then can be fed into a Security Information and Event Management (SIEM) system, like Splunk. This could be a great asset for monitoring and tracking DNS queries made to known malicious domains.