Persistence Through Service Workers—Part 1: Introduction and Target Application Setup

During a recent discussion about achieving persistence on a web server, someone suggested that I explore using browser service workers. As I began reading about what service workers do, the possibilities for Red Team applications seemed intriguing. But first, I had to find out…what exactly is a service worker?
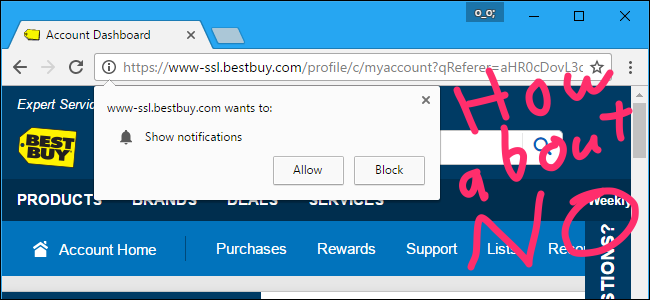
In their efforts to make web applications more 'app like' (i.e., progressive web apps), the intertube 'powers that be' have created the concept of browser service workers. These are scripts that your browser runs in a web page's background that are separate from the page itself. These scripts are essentially installed in your browser and support features like those wonderful push notifications we all 'love' blocking incessantly on websites.
These service workers can also support features, such as background sync, when the web page is closed in the browser. Essentially, they’re designed to allow offline experiences for web applications by caching resources and allowing a web page to work offline.
How is the service worker able to do this? By acting as a **PROXY** between the user and the web application server…a proxy that happens to be installed in the user’s browser. I did a double take when I read this. This is a terrible idea from a security perspective and an attacker’s dream! I started to read the restrictions and limitations on service workers and realized that this is not my XSS payload nirvana.
So, what are the limitations, and what do they mean for our sweet hacks?
Service Workers Can’t Access the DOM Directly
Bummer! This isn’t your typical JavaScript XSS. However, the JavaScript service worker can communicate with the web page in the user’s browser. So, if you also have JavaScript in the web page itself, you can access the DOM in the page by communicating back and forth between your service worker and the JavaScript in the web page.
Browser Support
Support is hit or miss—Chrome, Firefox, and Opera have support.
They Must be Installed From the Web Application Server
This is the big one. You can’t create an XSS payload to contain and install a service worker. You do need JavaScript to install and trigger the service worker, but the service worker code itself must be loaded from the web server.
This means that we must get file write permission on the webserver in order to deploy service workers.
Browsers are Picky
Due to the powerful position service workers hold, and the fact the service worker code loads from the webserver, the target webserver must use HTTPS with a proper certificate to ensure it’s not modified in transit.
Service Worker Scope
The location on the webserver where the service worker code is hosted matters tremendously, as it sets the scope of the service worker. If you have file write access on the webserver and put your service worker code in the web application root directory, you’re in great shape. The scope of your service worker, by default is its location, and anything below (you can manually restrict it to subdirectories). The service worker will have access to all requests/responses in its scope. If a request/response is to/from a path above the service worker scope, it won’t be able to access it.
If your only means of getting the service worker code onto the webserver is through a file upload, the scope of that service worker could be significantly reduced depending on where the uploaded file is served from in the web application directory structure.
Ok, so those are quite a few limitations, and we can see that this technique isn’t going to be a daily tool. But what can you do once you finally get it working? Well, you can indeed manipulate the DOM on the fly. As a matter of fact, since you’re in a proxy position, you can intercept all in-scope requests and modify all in-scope responses. Pretty potent position you have...
You can also make requests to the application from the user’s browser and 'borrow' their session cookies. How about proxying your use of the web application through the user’s service worker and using their session? It's a nifty way to access the application as a user, especially if we can’t directly reach the application, perhaps because it’s an internal web application. Before demonstrating that, though, we need to get some items set up.
Setup
For the purposes of demonstration, we’ll focus on deploying the awesome Shadow Workers project from @libnex and @claudiocontin.
https://shadow-workers.github.io/
Let's walk through setting up a demonstration web application to target suitable Shadow Workers. Part 2 of this blog post will cover the Shadow Worker C2 setup and using it for exploitation.
We’ll be using Namecheap for domain registration and Digital Ocean for hosting our target application and Shadow Worker C2/Proxy.
Domain Registration
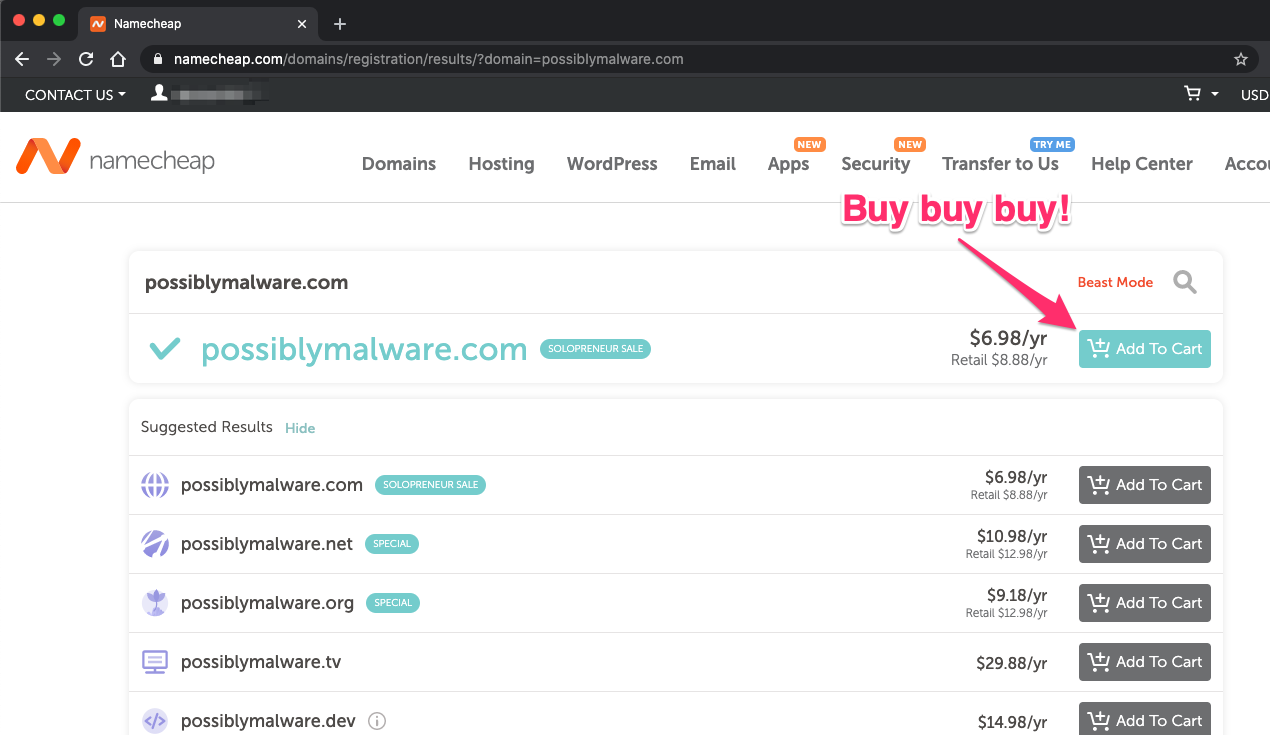
Before we begin setting up our servers in Digital Ocean, we need a domain. Log into your Namecheap account (or your preferred domain registrar) and register a domain. For our purposes, we’ll be registering possiblymalware.com. You can pick any domain you’d like (.lol and .xyz TLDs are quite cheap). If you already have a domain, you can use that instead of registering a new one.
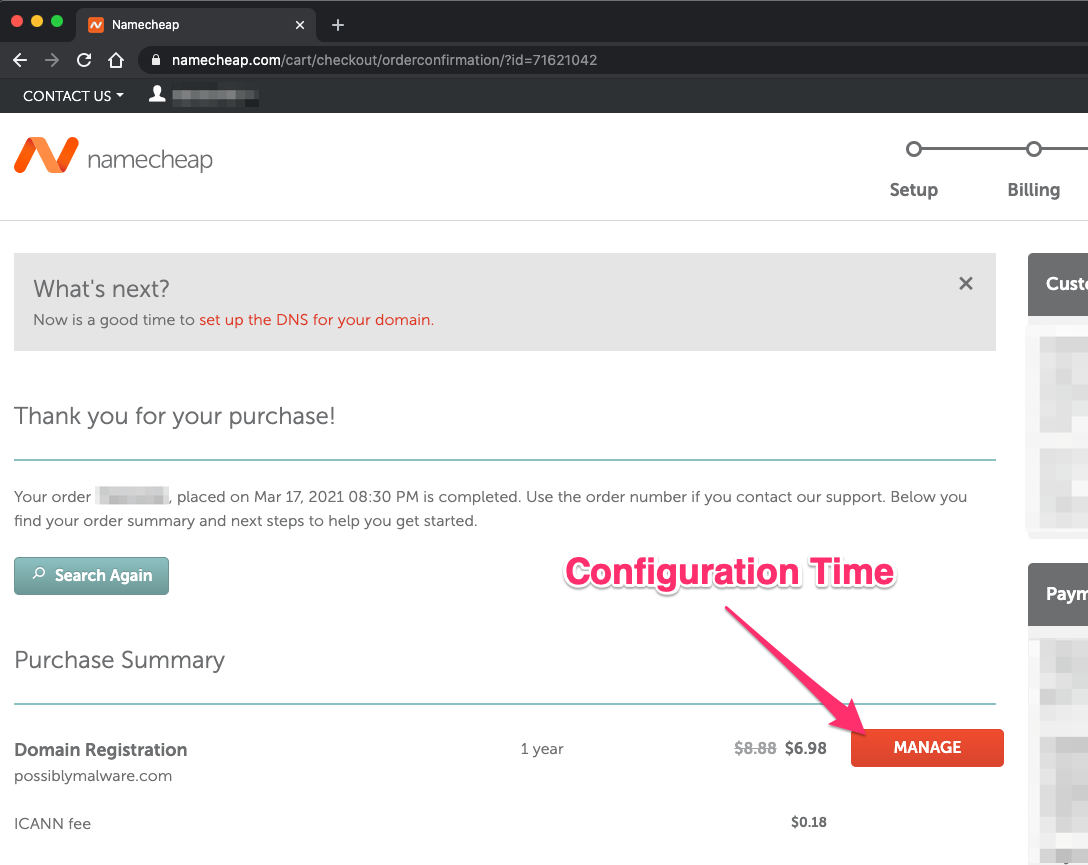
For our purposes, we don’t need any of the offered bells and whistles. Once you’ve finished checking out, you have the option to manage your domain. We’re going to configure our domain to be managed by Digital Ocean for demonstration purposes.
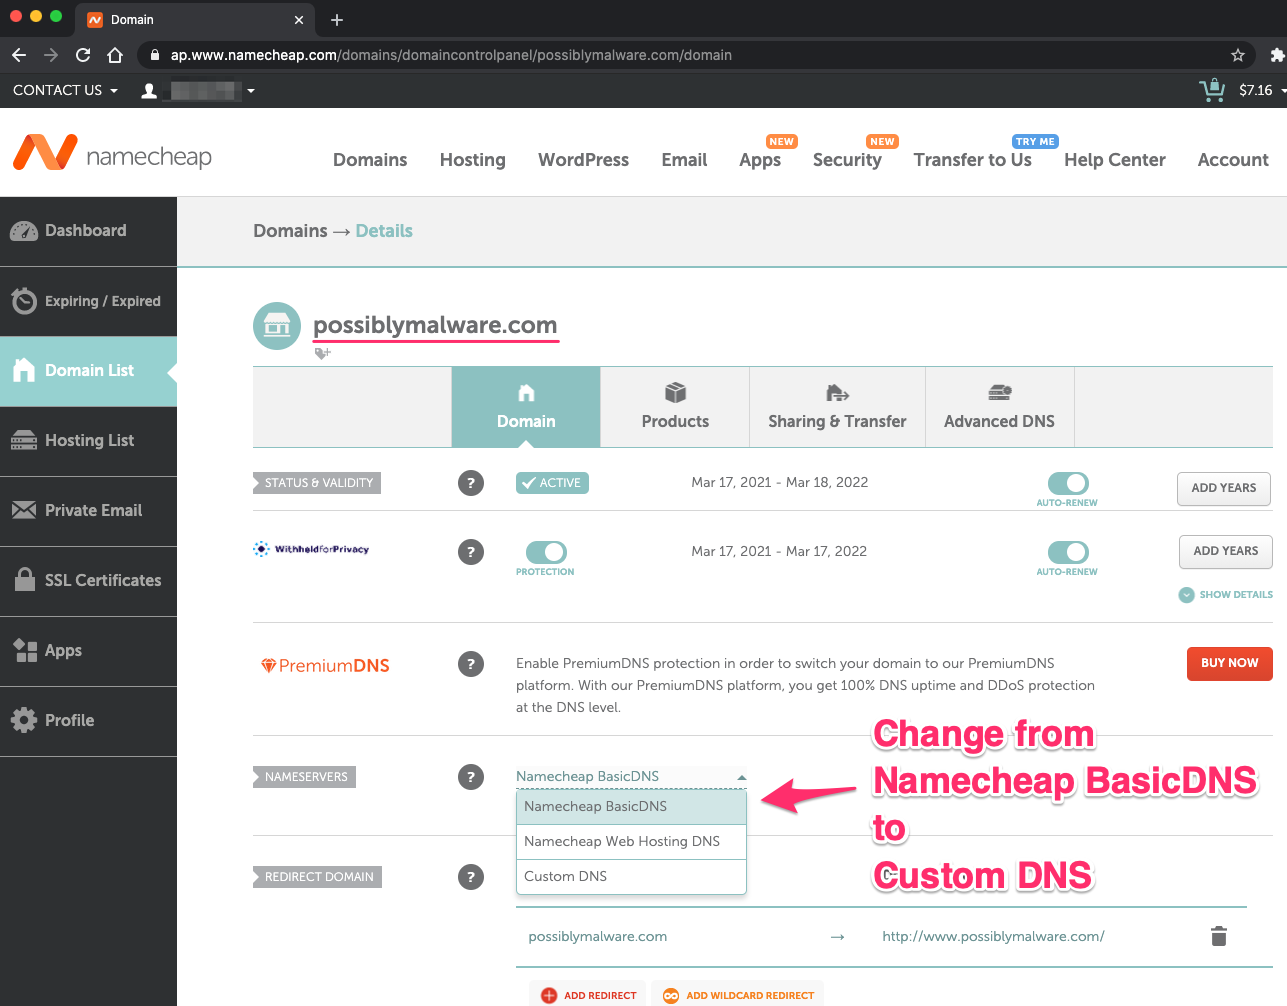
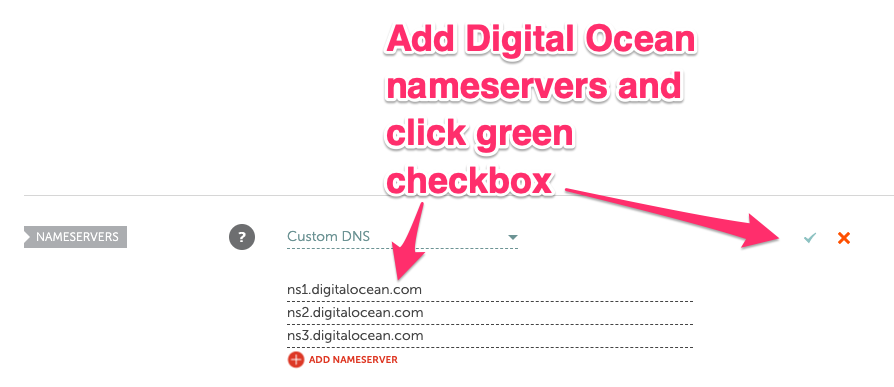
We need to modify the DNS servers for our new domain. On the main Domain tab in Namecheap, we want to change from Namecheap BasicDNS to Custom DNS.
Add the Digital Ocean nameservers.
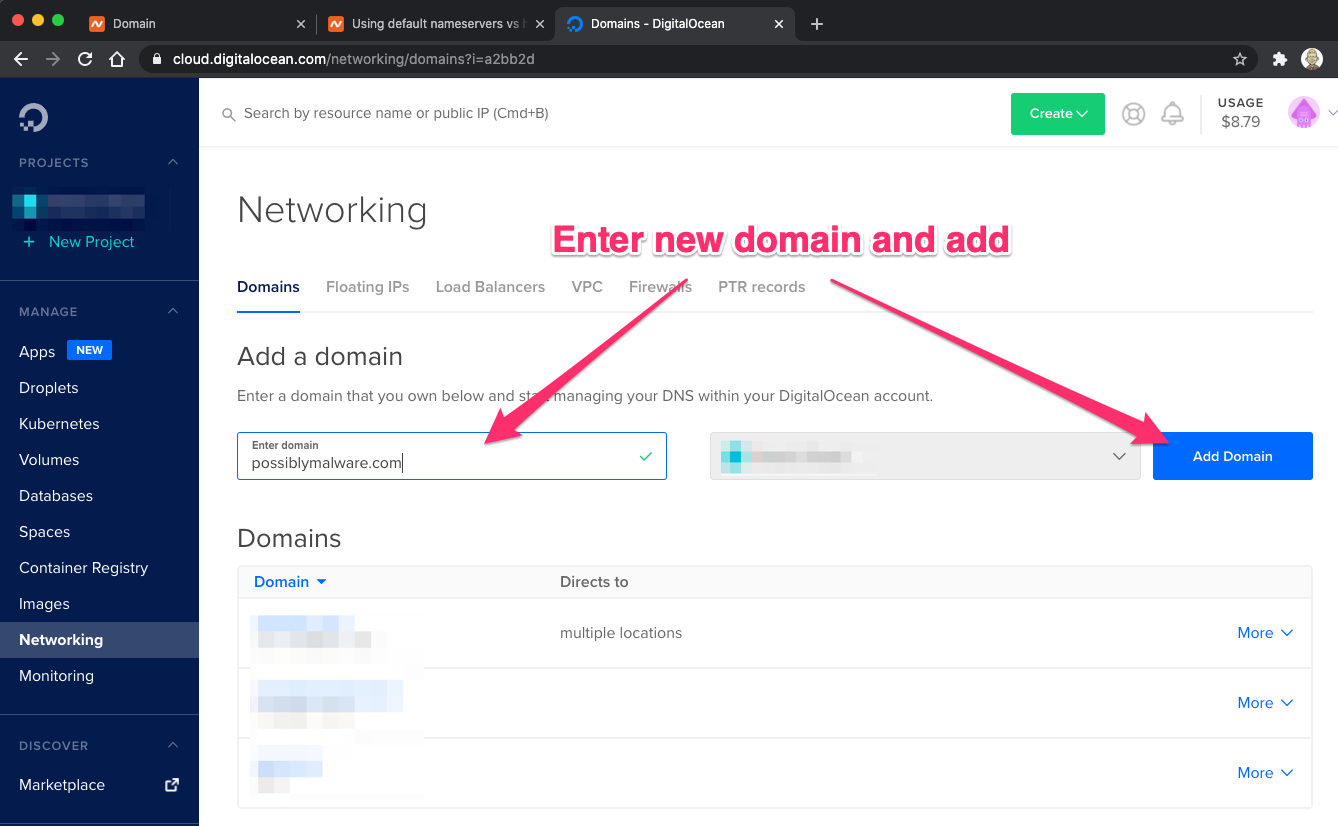
We’re done with Namecheap now and have set up our Digital Ocean account to manage our new possiblymalware.com domain. We logged into our Digital Ocean account and went to our Networking page. Then we added our new domain and clicked the Add Domain button.
Now that we have that set up, let’s move onto building our target web application server.
Target Web Application
We need an application to target for our testing purposes. This web server will need a proper TLS certificate for browsers to 'trust' a service worker installed by it. Any web application will work. For demonstration, we’ll be walking through setting up a simple WordPress server.
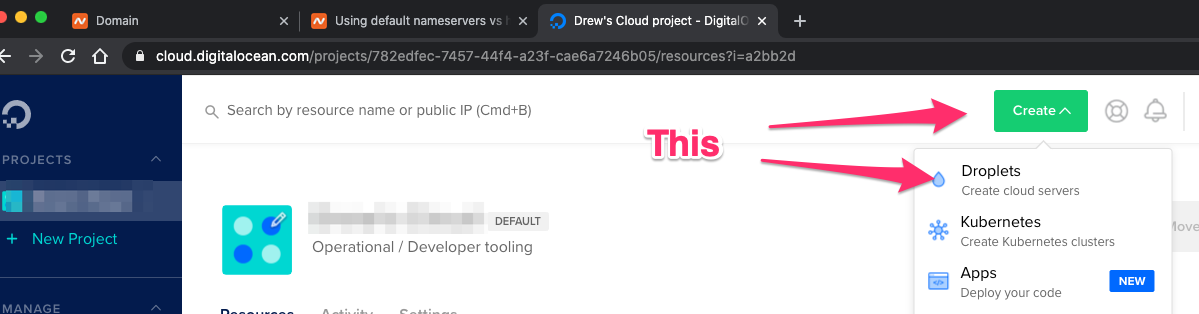
We’ll create a 'droplet,' which is what Digital Ocean calls a Virtual Private Server (VPS). This is equivalent to an EC2 instance in AWS.
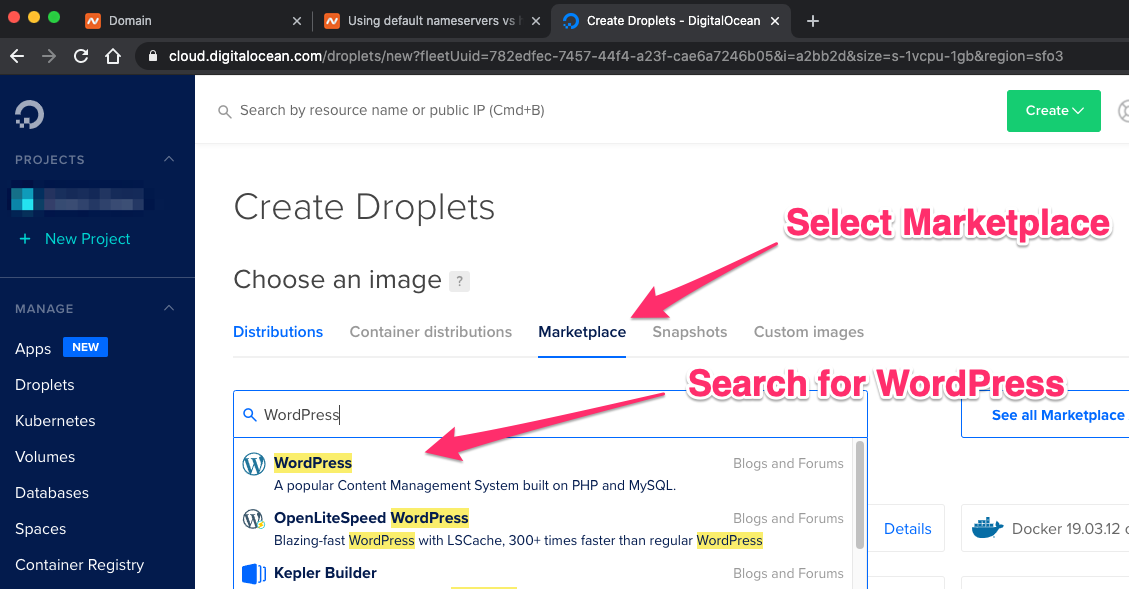
To make things easy, we'll use a preconfigured WordPress setup from the Digital Ocean marketplace. This makes getting a basic WordPress site up and running a quick process.
We’re going to be economical and choose the lowest level server, which is $5 a month for 25GB disk space, 1 CPU, and 1GB of memory. That’s plenty for our testing purposes.

Now you need to pick the datacenter in which to deploy your server. This is completely dependent on your preferences. I tend to pick something close to home.
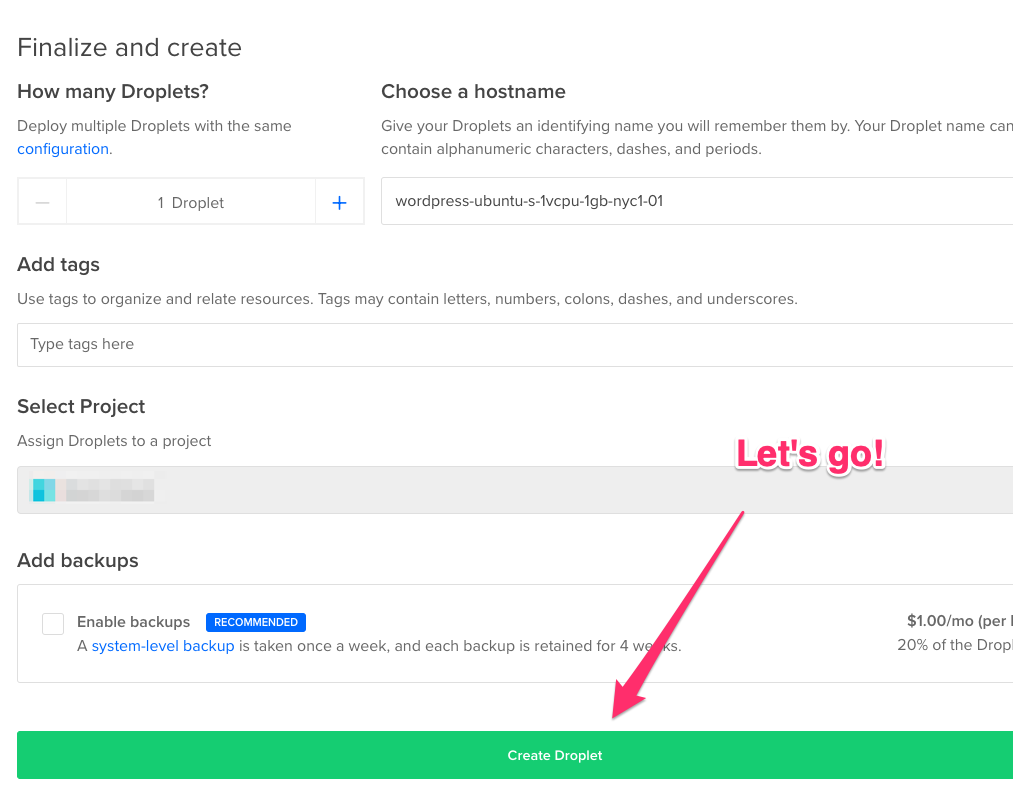
You’ll need to set up your authentication to the server. This should be through SSH keys, which is the default. If you haven’t already added your keys, you can add one (1) directly in 'create droplet workflow.' You need to add your SSH public key, not your private key; your id_rsa.pub file contents, not your id_rsa file contents.
You can select the number of servers you want (one (1) in our example), and you can choose a hostname or leave the default. You’re now ready to create the droplet.
Digital Ocean will start building your server. This might take a minute or so. You’ll see the progress bar work its way across the screen. When it’s done, we’ll be ready to start configuring the WordPress server.
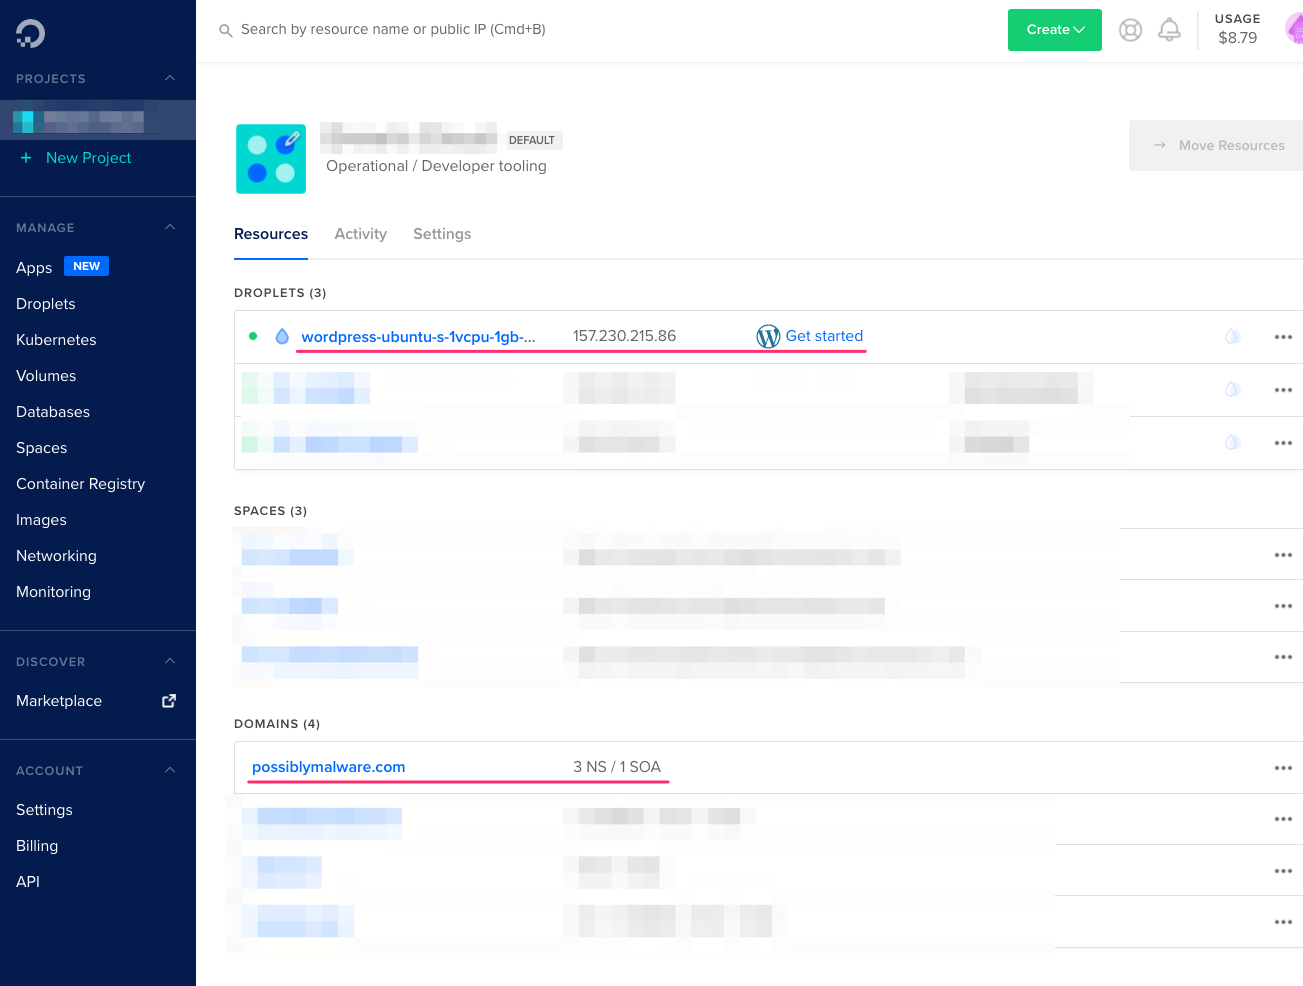
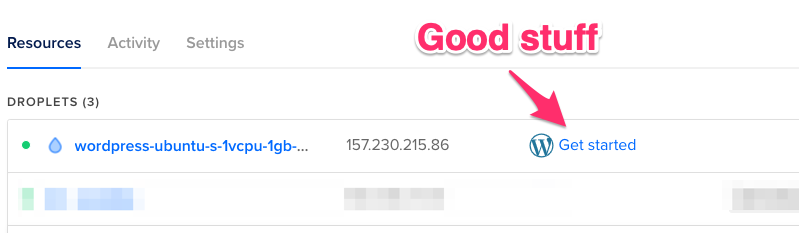
You’ll notice a 'Get started' link by your server droplet. These are instructions specific to the marketplace image you used to build your server. This is very helpful information, and we’re going to follow it at this point. Feel free to check this document for additional guidance.
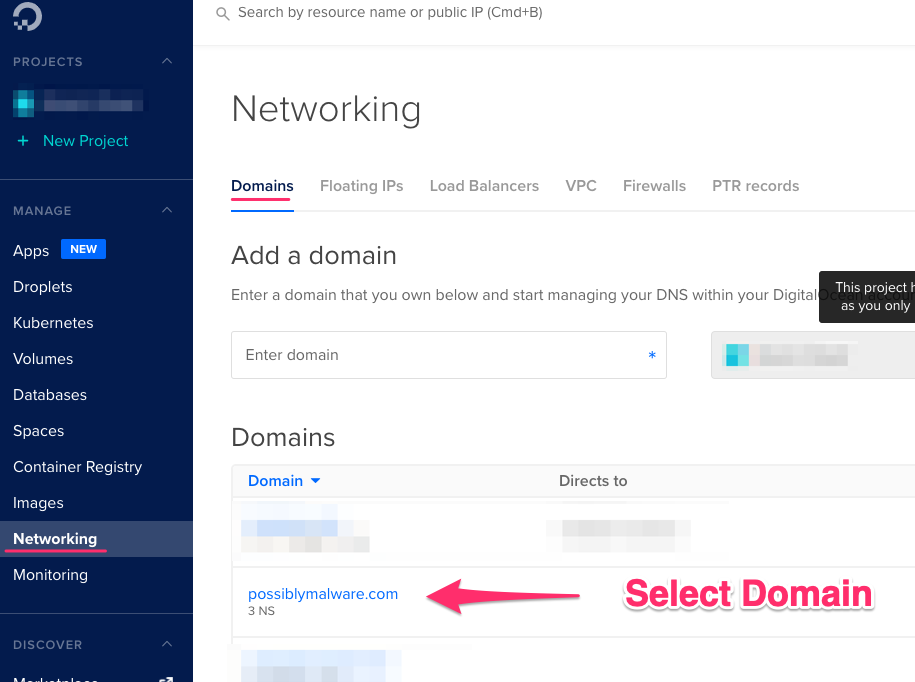
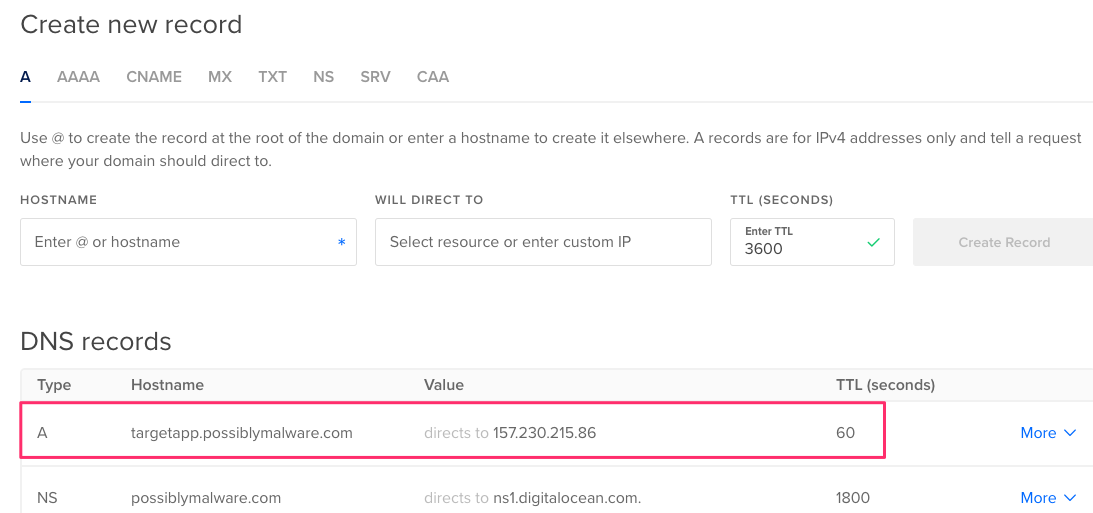
We can set up our domain to point at our new web application server. Go to Networking >Domains and select your newly registered domain.
We have two (2) servers we’ll register under this domain—the web application server we’re setting up now and our malicious C2/Proxy server later. We’ll make them subdomains, so we’ll use targetapp.possiblymalware.com for our new server. Enter targetapp as the hostname, set it to direct to our new droplet, and change the TTL to something much lower than the default 3,600. I like using 60 seconds for short-life testing systems, otherwise you could wind up waiting for DNS entries to propagate for a while.
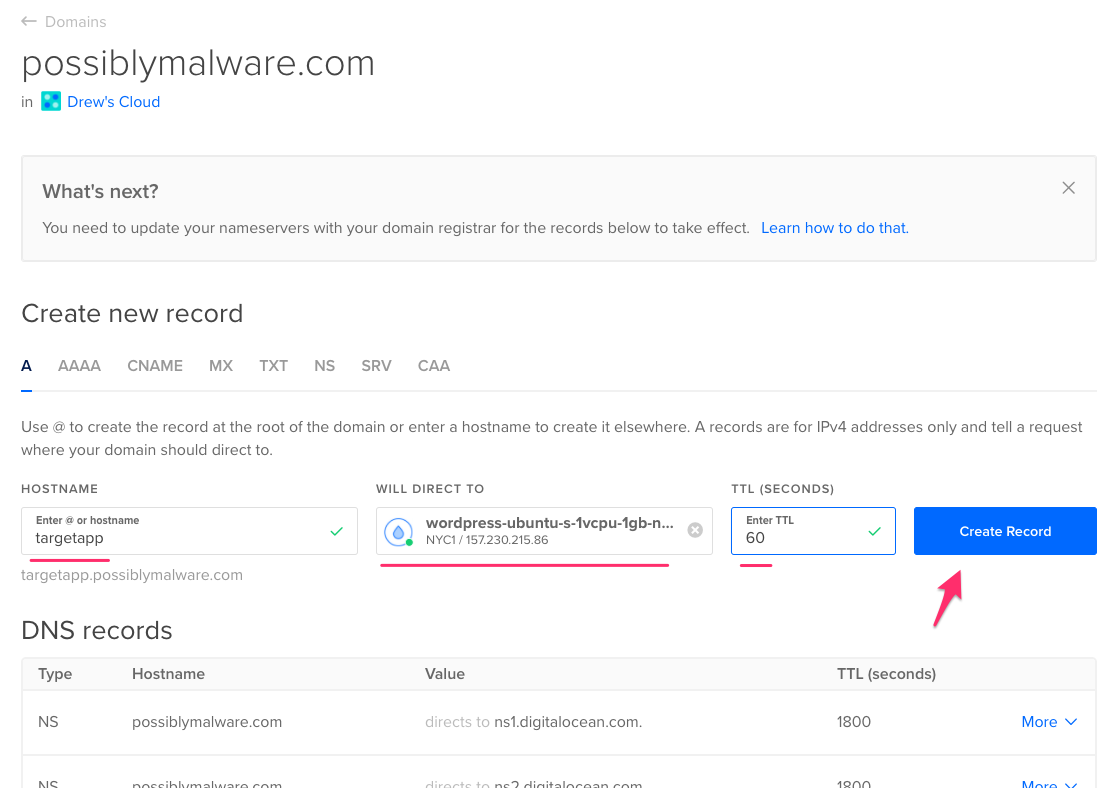
We now have our DNS record added.
Now we need to log into our new server and finish configuring it. From the system that has the SSH key, which you added to your server when creating it, SSH into the server as root:
The first time you SSH into the server you’ll need to accept its fingerprint. Once logged in, you’ll be dropped right into the setup script. First, we’ll add our domain.
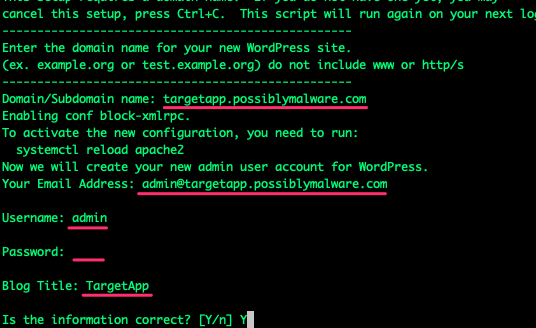
Since this is only a demonstration site, it doesn’t matter what you enter as the administrative email address. Set the username as admin. Set a password you’ll remember. If you’re going to leave this site open to the public, choose a complex password. I recommend using the firewall to restrict which IP addresses can access the site. Set a Blog Title as well.
Then you’ll be asked if you want to use LetsEncrypt to configure your SSL and HTTPS for you. Answer yes to both and allow LetsEncrypt to do the hard work for you. Enter a valid email address if you want notifications for certificate renewals, etc. You’ll then need to accept the terms of service.
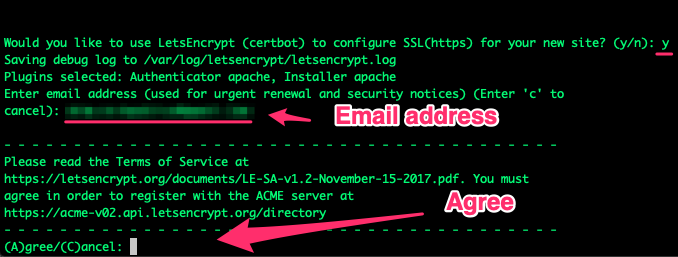
You need to determine if you want to allow LetsEncrypt to share your email address with the Electronic Frontier Foundation. Your choice here.
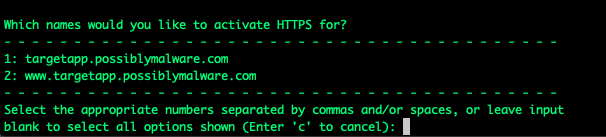
Then choose which hostnames you’d like to activate HTTPS for. Select number one (1) since we only configured DNS for that hostname.
We should also choose to redirect nonsecure HTTP traffic to HTTPS by selecting number two (2) at the next question.
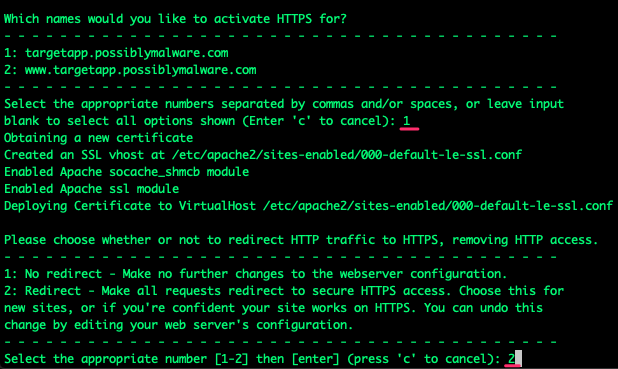
Once you hit enter, LetsEncrypt does several things. At the end of the process, you’ll have a properly configured HTTPS (port 443) WordPress application with a valid certificate.
Now would be a really good time to restrict who can access the site by IP address. However, we’re not going to spend time hardening our target application in this demonstration.
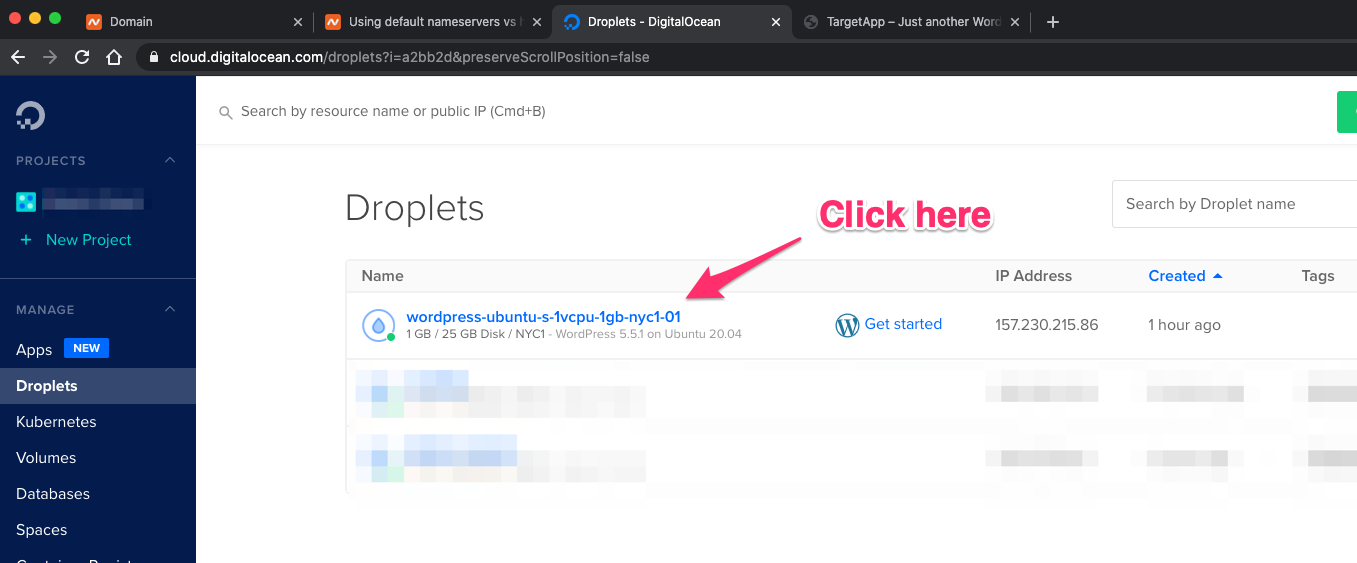
In your Digital Ocean account, go to your list of droplets and select the droplet running your WordPress application.
Select the Networking tab:
Choose to edit the firewall for this droplet.
Select 'Create Firewall' to create a firewall.
Choose a new rule, select HTTPS, and remove the All IPv4 and All IPv6 entries. Add your IP address. This way only you can access the insecure web application. You can use https://ipinfo.io to see your current IP address. Don’t bother changing the SSH settings, they're already well secured with SSH key-based authentication.
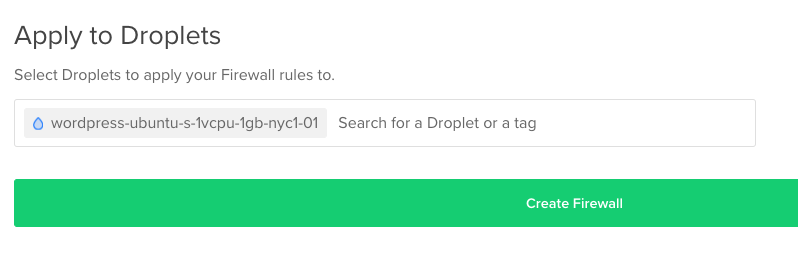
Scroll down to the bottom and select the droplet you want to apply the new firewall to and create the firewall.
You’ll need to modify this later, but it’s a nice way to lock things down in the meantime. You should still be able to access the application (e.g., https://targetapp.possiblymalw...) after applying the firewall.
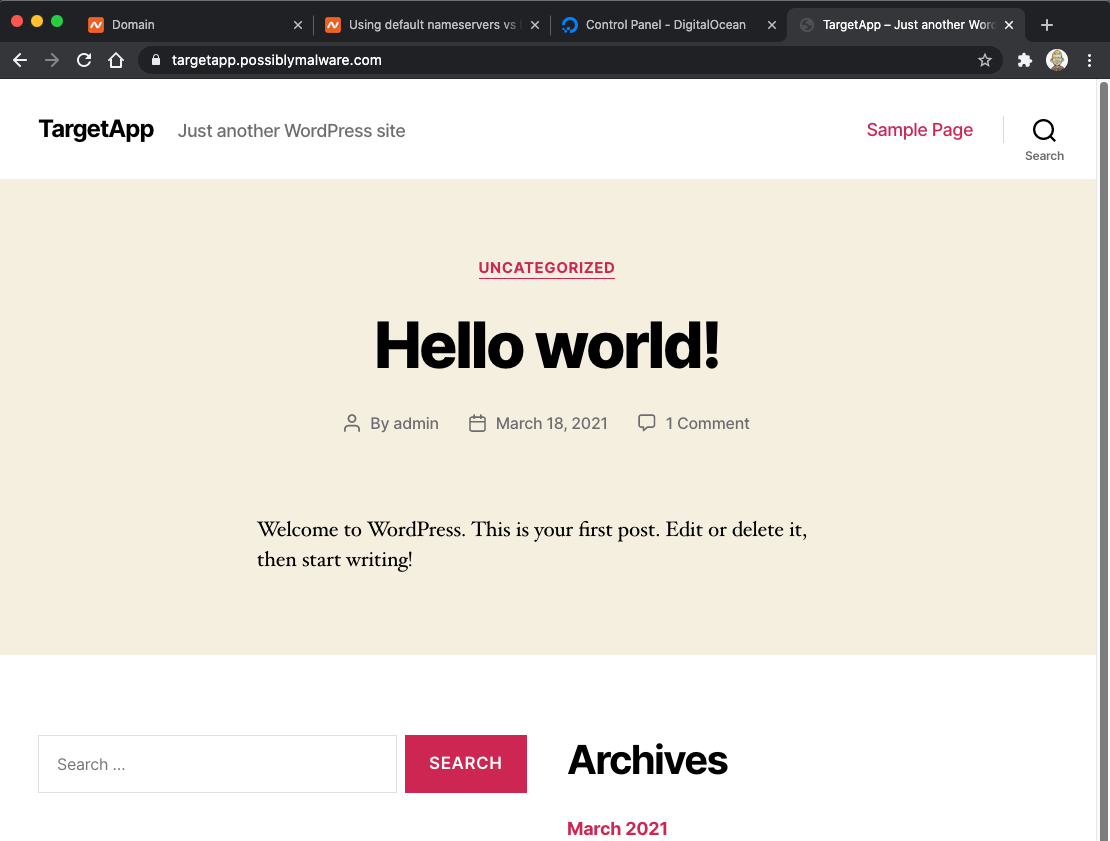
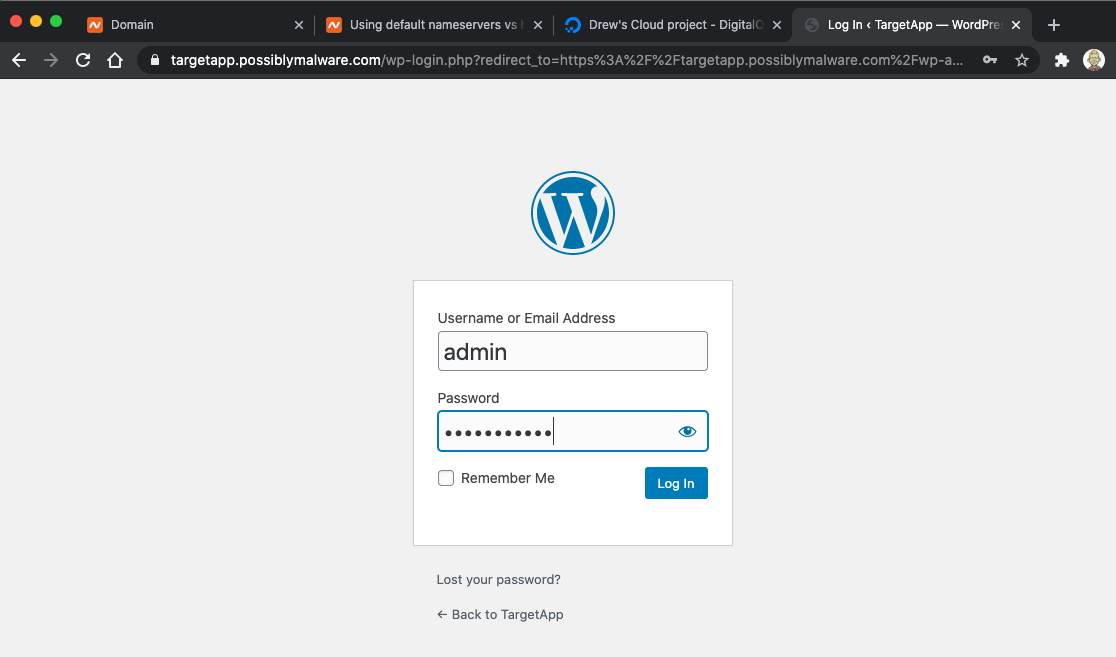
We’re in good shape with our target application. If you want to log in as your admin and start reconfiguring your WordPress site for fun, you can access the admin login by visiting https://YOURDOMAIN/wp-admin. This will redirect you to the admin login. Use the admin credentials you configured earlier.
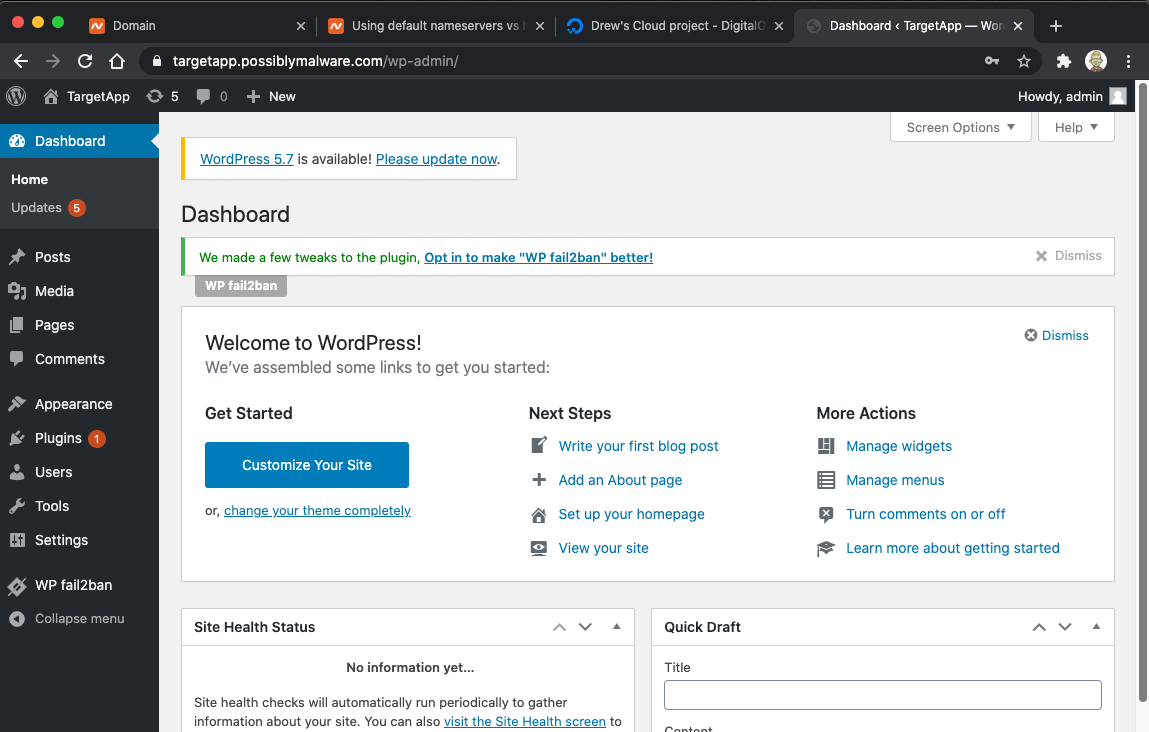
You now have a properly configured WordPress server that is suitable as a target for Shadow Workers exploitation.
In Part 2 of this blog post, we’ll cover setting up the Shadow Workers C2 server and exploitation.
References:
https://shadow-workers.github.io/
https://github.com/shadow-workers/shadow-workers